


(Complete guide to fix DLL errors on Windows 10 and Windows 11) The complete guide to fixing DLL errors on Windows 10 and Windows 11: When installing new software or running a new application on a device running Windows 10 or Windows 11, you may encounter a "Missing DLL" or "DLL not found" message. Missing DLL issues are very common among users, and every Windows user may face DLL-related problems on their computers. In this article, I will explain all possible methods to resolve DLL-related issues.
So, I recommend you follow this complete guide to fix DLL errors on Windows 10 and Windows 11 if you really want to know how to resolve missing DLL issues.
Before diving into the complete guide to fixing DLL errors on Windows 10 and Windows 11, you should know a little about DLL files to avoid making mistakes while restoring them.
What is a DLL file?
The technical name for this file is Dynamic Link Library, which is a small component found in any application that provides specific functionalities.
A DLL file is a pre-compiled component that contains functions, variables, and resources (icons, images, files, etc.). For example, if your application provides you with various features but unfortunately any DLL file gets corrupted, the program will stop providing the functionality associated with the corrupted DLL file.
Why is the DLL file important for your computer?
DLL files allow for code reuse, efficient memory usage, reduced disk space, and enable you to perform multiple operations simultaneously, making them essential components for Windows-based Windows, so it is very important to have this file on your device.
Is the DLL file safe or is it a virus?
Generally, when you install legitimate applications on your computer, the DLL files stored by those applications are safe.
However, when downloading a DLL file from a third-party website, there is a possibility that you might download a virus disguised as a DLL file.
A DLL file contains executable code, so running malicious code within a DLL file poses a significant risk, which is why it is recommended not to download DLLs from third-party websites.
What is a missing DLL?
As mentioned earlier, a DLL is a file associated with most applications running on Windows 8, 10, and 11.
If your application is looking for a specific DLL file and cannot find it, the application will start displaying a "DLL not found" or "Missing DLL" message. If the specified DLL file has been deleted or corrupted by another application such as viruses/malware, you may also receive the same error.
The complete guide to fixing DLL errors on Windows 10 and Windows 11.
Method 1: Fix DLL issues using Advanced System Repair Tool
If you are not tech-savvy and want to easily fix DLL issues along with other system problems, you can simply download an advanced system repair tool to optimize and fix issues on your computer. It takes care of your computer and performs necessary optimizations such as updating system drivers, software, Windows updates, fixing missing file errors, enhancing security, and repairing registry issues.
Windows consists of a large number of dll files, exe files, sys files, various types of services, databases, and so on, so it is not possible to constantly monitor all files. A great PC optimization tool silently repairs damages, fixes errors, updates windows and drivers, and removes various types of errors.
The Outbyte PC Repair Tool performs all the above tasks easily and provides you with a smooth and error-free Windows environment to work so you can focus solely on your work.
3 steps to fix this error
Step 1. Download the Outbyte Repair Tool [File size: 16.4 MB]
Step 2. Scan your Windows computer
Step 3. Click the "Repair" button to fix the error
Method 2: Download, install, and register the DLL file
If you want to fix DLL issues yourself, you can download the DLL file and install it on your computer, then register it properly.
However, it is highly recommended not to download a DLL file from any third-party or malicious site as you may end up downloading a virus disguised as a DLL file. This is worse than simply having a missing DLL file.
The best way to download this file is to ask a friend to give you the same file from the specified site. If you cannot find this file, follow the steps below to download, install, and register your DLL file.
Step 1: Go to the following site and search for your DLL file to download.
https://www.dll-files.com/
Step 2: Extract the file to the following location.
For 32-bit:
C:\Windows\System32
For 64-bit:
C:\Windows\SysWOW64
Registering the DLL file
Step 3: Go to the location where you saved the downloaded file and press Shift + right-click on the empty area. Select "Open PowerShell window here."
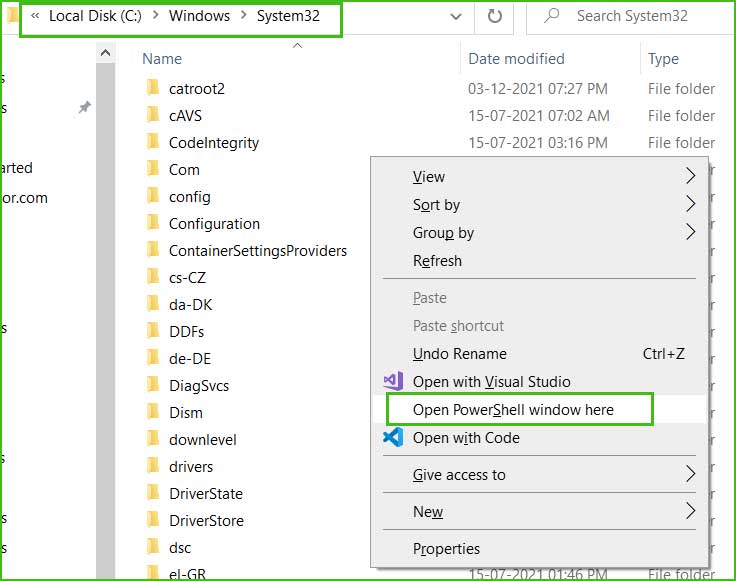
com.powershell
Step 4: Execute the following commands to register the DLL file.
regsvr32 xxx.dll
Register_dll
Step 5: Restart your computer to apply the effect.
Method 3: Repair Microsoft Visual C++ Redistributable?
Repairing the Microsoft Visual C++ Redistributable is essential if you are getting a DLL not found error and other errors such as AcroRd32.exe missing, Bluestack application crashing, or mxdwdrv.dll not found, etc.
Method 4: Install the latest Windows updates
Old Windows updates are also a major cause of missing file errors. When you update your Windows operating system, it installs the necessary files required to run modern applications and games. Therefore, if you have outdated Windows updates, quickly update them to fix DLL-related issues.
Step 1: Click on the Start menu > Settings > Update & Security.
Step 2: Click on Check for updates, then install all pending updates.
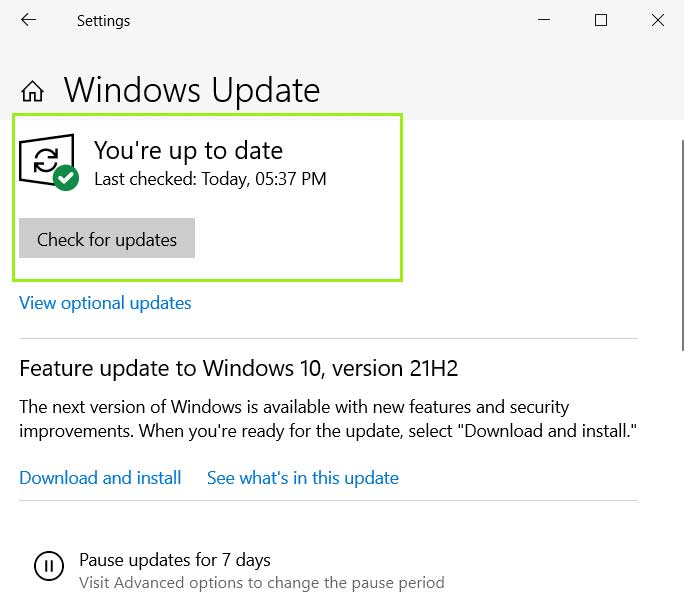
update_security_2
Method 5: Update third-party drivers
After completing Windows updates, it is essential to install updates for all third-party drivers on your system. Third-party drivers are those installed with games or other third-party applications and devices. You should check for outdated drivers and update them.
Step 1: Go to "Device Manager" and see if there are any exclamation marks on the drivers. To go to "Device Manager," right-click on the Start menu and click on "Device Manager."
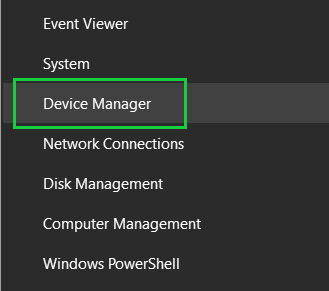
open_device_manager
Step 2: Right-click on the outdated driver and select "Update Driver."
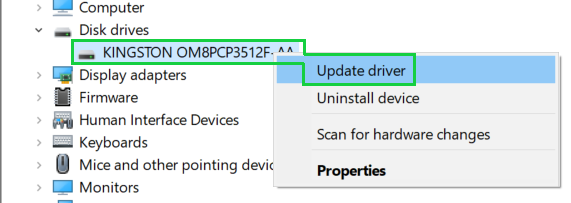
update_disk_driver
Step 3: Click on "Search automatically for drivers," and Windows will find updated drivers for your devices. If it cannot install the latest driver for your devices, proceed to the next step.
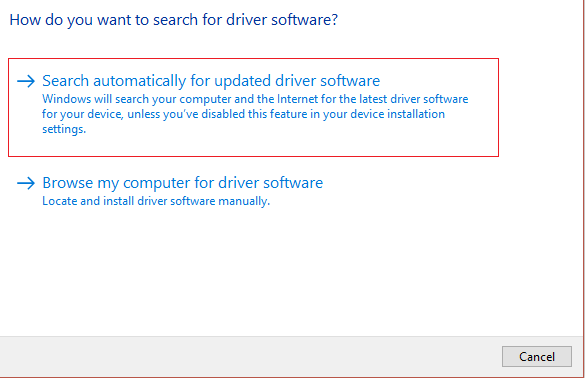
search_automatically_for_updated_driver
Step 4: Go to the official site of your devices and manually download the driver. If you do not know the official site, just search on Google, and you will find the appropriate site for your driver.
Method 6: Remove viruses/malware
When was the last time you scanned your computer for viruses/malware? Viruses can enter your computer at any time without notifying you, and your computer may be affected by some malware.
Therefore, it is essential to perform a full system scan to remove all this malware from your computer using a reliable antivirus program. Once the scan is complete, start scanning the boot sector using Windows Defender or your antivirus program.
Method 7: Restore or repair the registry file
Windows uses the registry file to store configuration values for all installed devices and drivers. Nothing can run or attach to your computer without being in the registry file. This file is extremely important, and if it gets corrupted, your system may


