

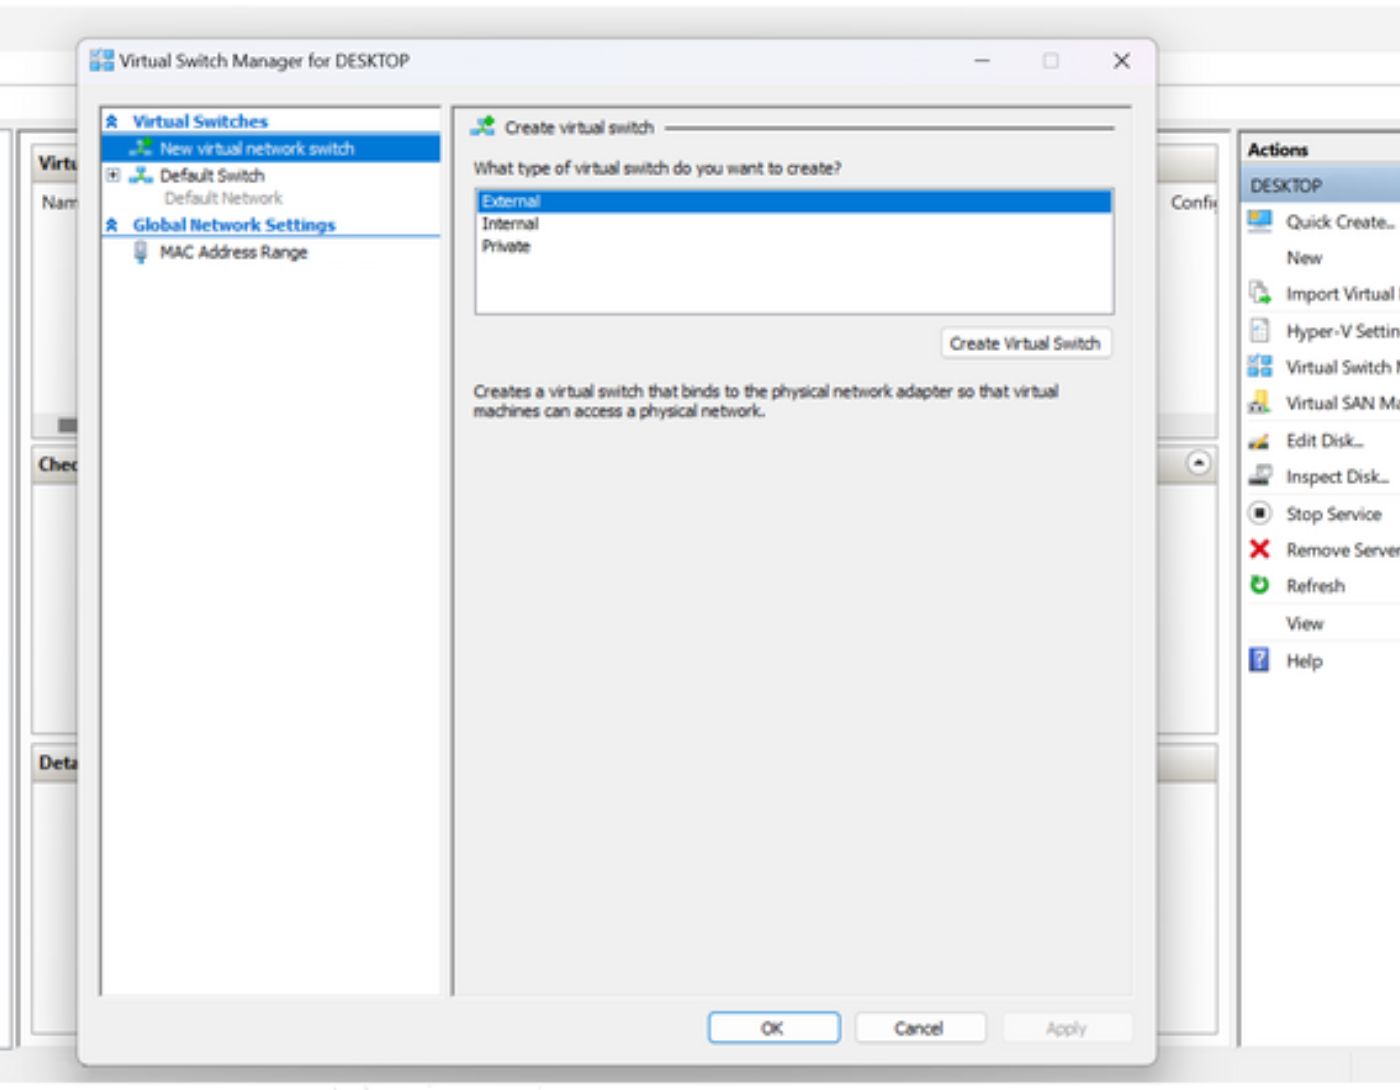
How to Enable Hyper-V on Windows 11: Are you someone who works with different operating system versions, not just Windows? If so, a virtual machine platform is an essential feature for you. Hyper-V is a native hypervisor that enables this feature on Windows, allowing you to create virtual machines to efficiently install and run guest operating systems.
It's also important to note that Hyper-V is only available on Windows 11 Enterprise and Pro Education editions, unfortunately, this feature is not available on Windows 11 Home edition.
So, if you're running Windows 11 Home Edition, you'll need to use the best third-party virtual machine tools. If you prefer not to try third-party virtual machine tools, our guide will help you install and enable Hyper-V on Windows 11 Home Edition. But before proceeding, here's a quick overview of Hyper-V.
What is Hyper-V?
Hyper-V, developed by Microsoft, is a native hardware-based hypervisor. Hypervisor software allows you to run multiple operating systems on a single machine. More specifically, Hyper-V in Windows 11 is a hypervisor that enables you to create and manage virtual machines on your system.
Hyper-V runs each virtual machine in its own isolated environment, allowing you to run multiple virtual machines on the same device simultaneously without hassle.
How to Check if Your System is Compatible with Hyper-V?
Before attempting to enable hardware virtualization on your Windows 11 system, you need to ensure your computer is compatible. Here are the system requirements for Hyper-V on Windows 11:
Windows 11 Enterprise or Pro (64-bit).
Second Level Address Translation (SLAT). (This is a hardware virtualization technology available in many processor types, including Intel and Advanced Micro Devices (AMD) processors.)
4 GB of RAM
Supports hardware virtualization at the BIOS
Follow the steps below to check if your device is compatible:
Step 1: Open the Run dialog by pressing the Win Logo + R keys simultaneously.
Step 2: Then type msinfo32 in the Run box and press Enter.
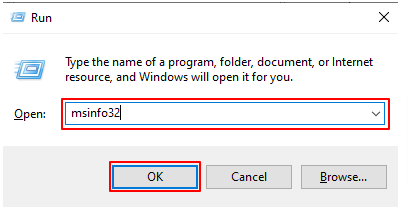
Enter msinfo32 in the Run box
Step 3: In the System Information window, scroll down to the System Summary section and look for Hyper-V requirements. If it says "Yes," it means your system is fully compatible.
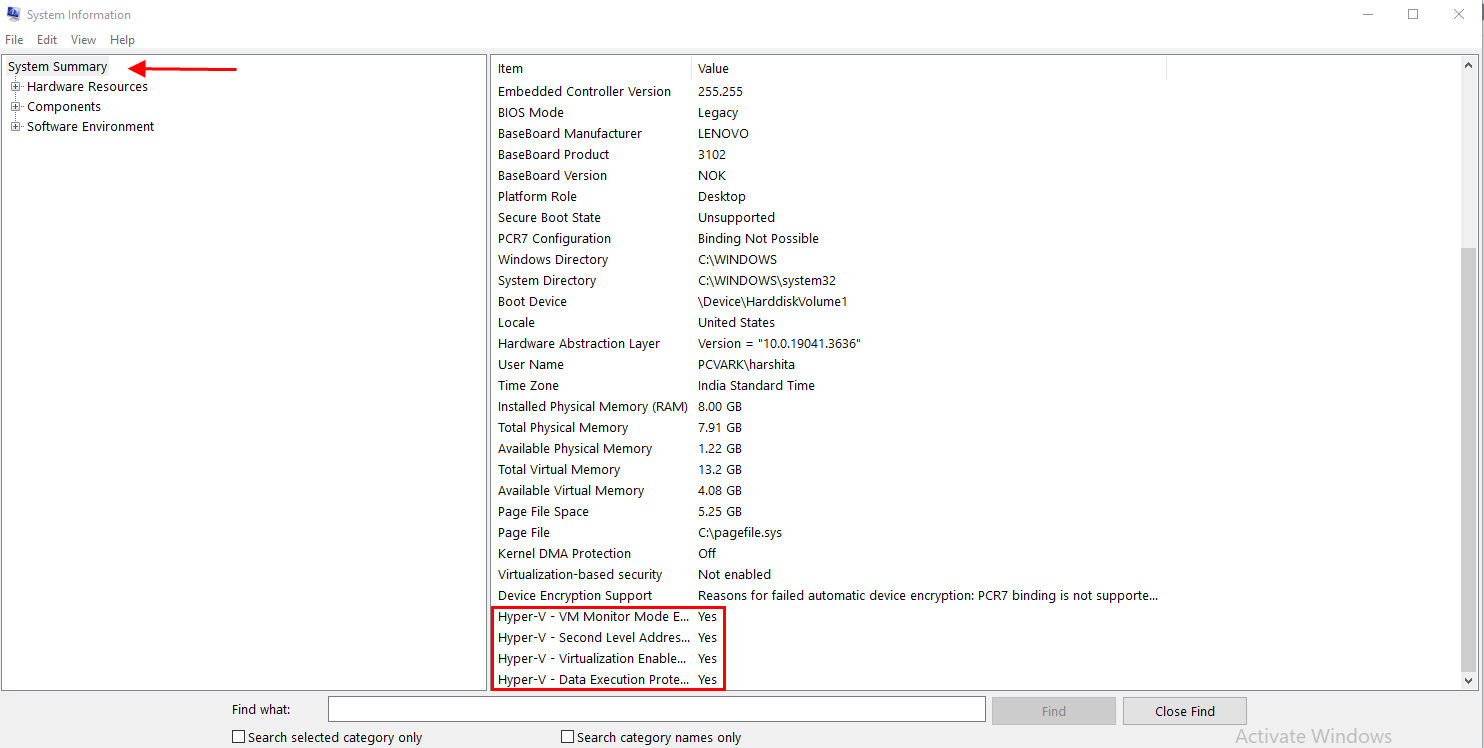
Hyper-V Requirements. (1)
How to Enable Hyper-V on Windows 11
Once you've confirmed your device is compatible, follow the steps below to enable Hyper-V on Windows 11.
Step 1: On your keyboard, press the Win Logo + R keys simultaneously to open the Run dialog.
Step 2: In the text field of the Run box, type appwiz.cpl and press Enter on your keyboard.
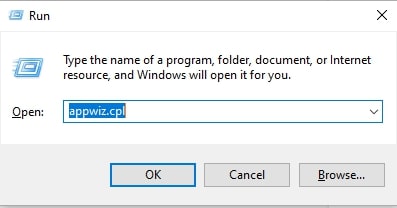
Appwiz.cpl
Step 3: In the right pane, select Turn Windows features on or off.
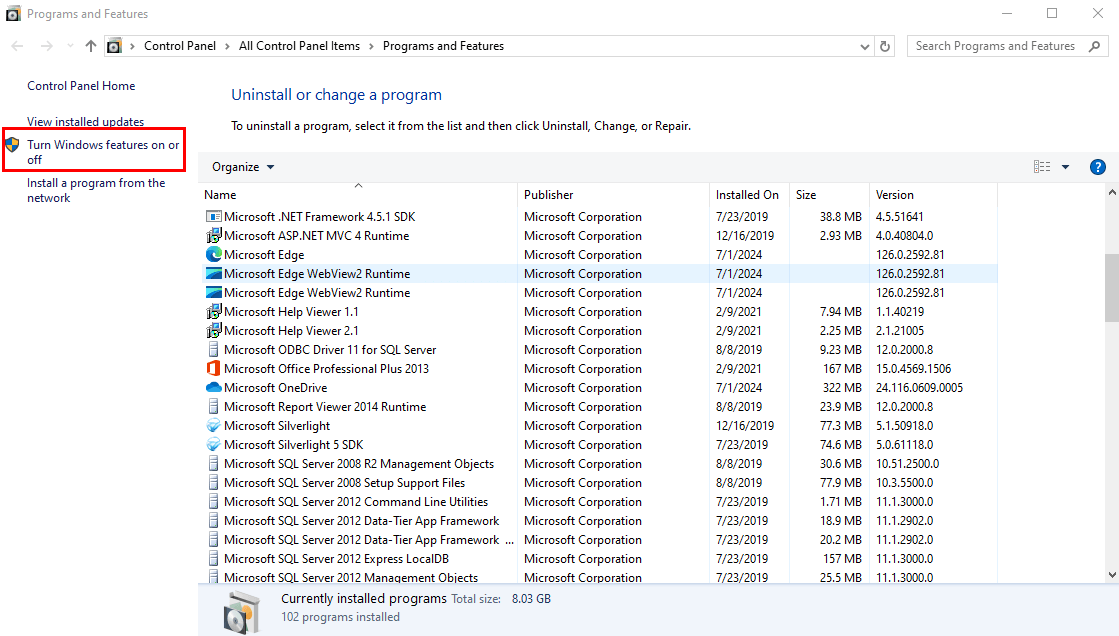
Turn Windows features on or off.
Step 4: In the Windows Features window, look for Hyper-V and check the box next to it.
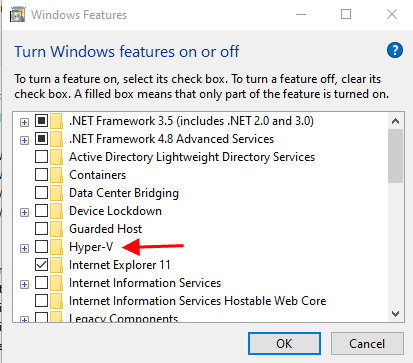
Look for Hyper-V
Step 5: Click OK and wait for the installation process to complete.
Step 6: Once the installation is successful, restart your system.
How to Install Hyper-V on Windows 11 Home?
As mentioned, Hyper-V is only available on Windows 11 Pro or Enterprise, not on Windows 11 Home. However, there is a technique to install Hyper-V on Windows 11 Home and enable it to run multiple virtual machines. To enable Hyper-V on Windows 11 Home, you need to install the necessary files by creating and running a batch script. Here’s how to download, install, and enable Hyper-V on Windows 11 Home:
Step 1: To start, open Notepad.
Step 2: Copy the following script and paste it into Notepad.
pushd “%~dp0”
dir /b %SystemRoot%\servicing\Packages\*Hyper-V*.mum >hyper-v.txt
for /f %%i in (‘findstr /i . hyper-v.txt 2^>nul’) do dism /online /norestart /add-package:”%SystemRoot%\servicing\Packages\%%i”
del hyper-v.txt
Dism /online /enable-feature /featurename:Microsoft-Hyper-V -All /LimitAccess /ALL
pause
Step 3: Next, go to File and select Save As.
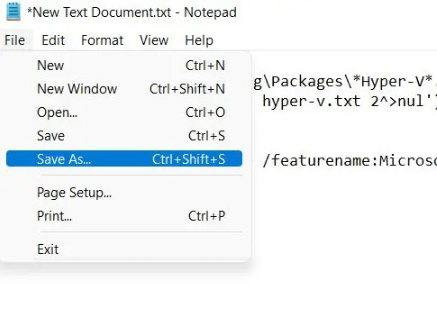
Select Save As
Step 4: Then, choose All Files (*.*) from the Save as type dropdown. After that, name your file and add the .bat extension to save it as a batch file.
Step 5: Click the Save option to proceed.
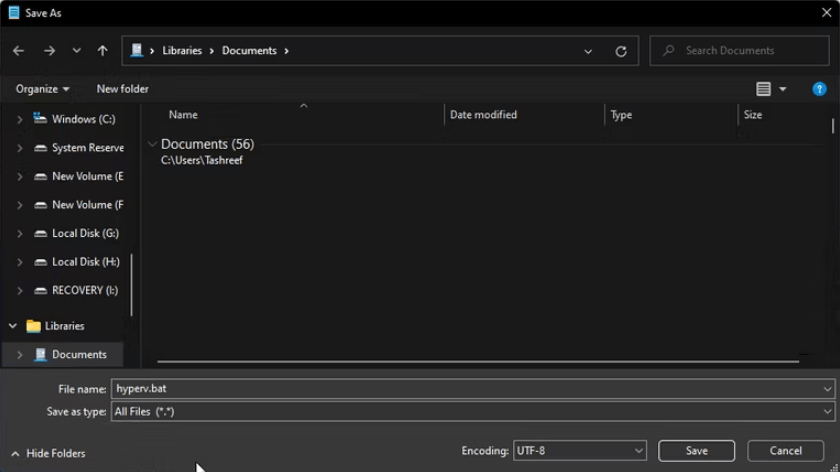
Click Save
Step 6: To enable Hyper-V on Windows 11 Home, you need to right-click on the batch file you just saved and select the Run as administrator option to continue.
Step 7: Now, a PowerShell/Command Prompt window will appear on your screen, and the installation process for Hyper-V on Windows 11 Home will begin. Note that you need to rely on an active and stable internet connection to run this feature.
Step 8: Once the installation process is complete, simply restart your computer. After that, press the Windows + R keys together on your keyboard to open the Run dialog.
Step 9: Type optionalfeatures.exe in the Run box and press Enter on your keyboard.
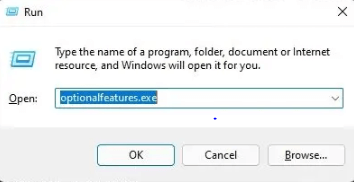
optionalfeatures
Step 10: In the next prompt, scroll down until you see Hyper-V, Windows Hypervisor Platform, and Virtual Machine Platform, then check the box next to these options. To save the changes, click the OK option.
Now, it will install all the necessary packages and prompt you to restart your computer once the installation process is complete.
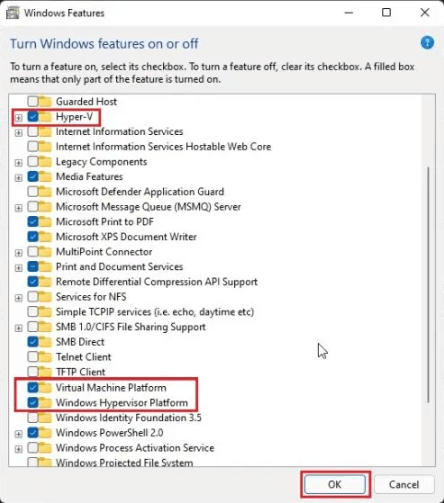
Restart your computer once the installation process is complete
Step 11: Now, Hyper-V will be installed and enabled on your Windows 11 Home system. Press the Win Logo key and search for Hyper-V; you should now see Hyper-V in the search results.
One point to remember: if you can't find Hyper-V in the search results, open the Run dialog, type virtmgmt.msc, and then press Enter on your keyboard. This will immediately bring up Hyper-V Manager on your Windows 11 Home screen.
Conclusion
That’s all about how to easily enable Hyper-V on Windows 11. As mentioned above, Hyper-V is only available for Windows 11 Enterprise or Pro, and Windows 11 Home lacks the built-in hypervisor feature. Therefore, we also provided you with a detailed step-by-step guide on enabling Hyper-V on Windows 11 Home.
That’s it! We hope you found this article helpful and informative. If you have any questions or additional information, feel free to share it in the comments section.


