


(7 ways to fix the 0xC1900101 error when updating Windows 10/11) 7 Ways to Fix the 0xC1900101 Error When Updating Windows 10/11: Are you encountering the error code 0xC1900101 when trying to upgrade to Windows 11? Windows 11 is the latest version of the Windows operating system, packed with features and offering many important new functionalities for users. Updating your system is a common consideration these days, but sometimes you may face this error message: you won't be able to upgrade your device running Windows 7/8/10 to Windows 11.
In this article, I will share some effective and tested methods to resolve this issue.
You may receive the following error message when attempting to upgrade from Windows 10 to Windows 11.
We couldn't install Windows 11
Your PC has been reverted to its previous state before starting the installation of Windows 11.
0xC1900101-0x30018
The installation failed during the boot phase due to an error during the SYSPREP process. You may encounter this error with one of the following error code combinations:
0xC1900101 – 0x2000c
0xC1900101 – 0x20017
0xC1900101 – 0x30018
0xC1900101 - 0x3000D
0xC1900101 – 0x4000D
0xC1900101 – 0x40017
7 Ways to Fix the 0xC1900101 Error When Updating Windows 10/11
There are several methods to resolve this error:
Method 1: Repair Using Advanced System Repair Tool
This error often occurs due to faulty or incompatible drivers, missing system files, outdated Windows updates, etc. Additionally, there are dozens of subtle underlying causes that can be difficult to identify manually, which is why we recommend repairing and optimizing your Windows PC using an advanced system repair tool.
Windows consists of a large number of dll files, exe files, sys files, various types of services, databases, etc., so it's not feasible to constantly monitor all files. The excellent PC Optimizer tool repairs damage, fixes errors, updates Windows and drivers, and silently removes various types of errors.
The Outbyte PC Repair Tool performs all the above tasks effortlessly and provides you with a smooth and error-free Windows environment to work in so you can focus solely on your tasks.
3 Steps to Fix This Error
Step 1. Download the Outbyte Repair Tool [File Size: 16.4 MB]
Step 2. Scan your Windows PC
Step 3. Click the "Repair" button to fix the error
Method 2: Disconnect External Devices
When upgrading from Windows 7/8/10 to Windows 11, you should disconnect all external devices such as external hard drives, USB flash drives, printers, webcams, etc., because when the update begins, the computer tries to find compatible drivers for all devices connected to your system, which may cause issues with the installation of Windows 11. After installing Windows 11, you can simply reconnect all your external devices one by one.
Method 3: Fully Update Windows 10 Before Upgrading to Windows 11.
If your Windows 10 operating system is outdated, it is recommended to update it to the latest version, as old or corrupted drivers can cause problems when installing Windows 11. When you update your PC, all installed drivers and firmware are updated.
Step 1: Go to Start, Settings, Update & Security, and check for updates.
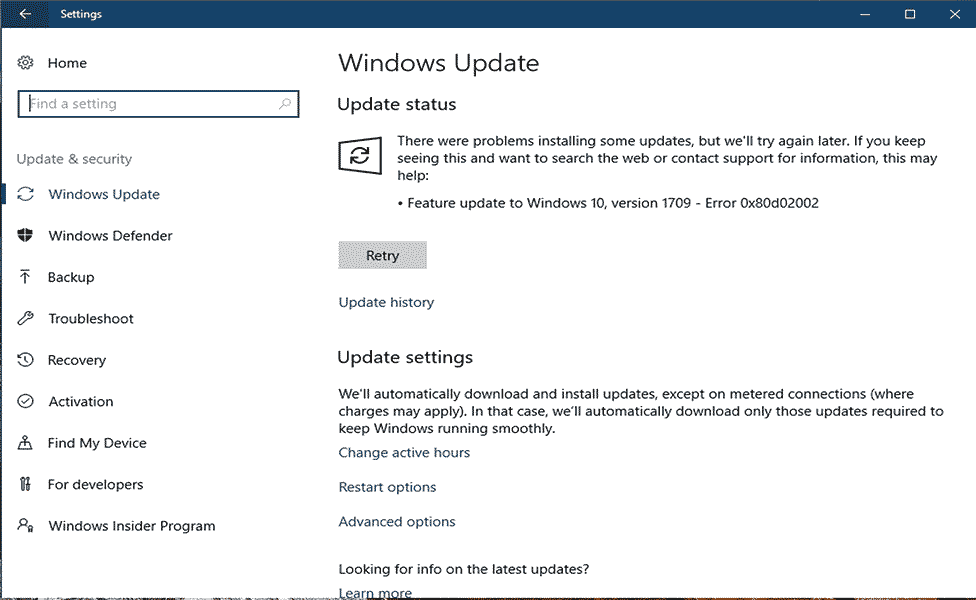
Step 2: Download and install any new updates found for your PC.
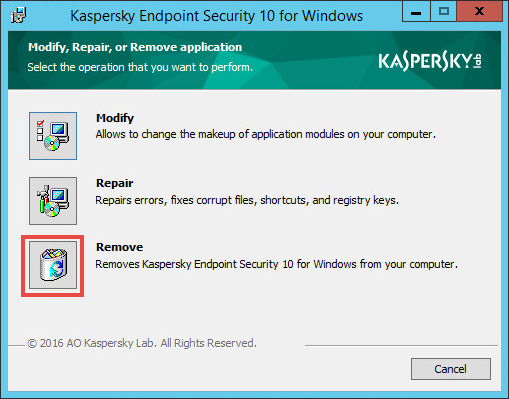
Method 4: Remove Third-Party Antivirus Software.
Today, antivirus software has become more powerful than in previous days, creating strong boundaries around your operating system and protecting your PC from harmful attacks. This means it blocks unnecessary and unused connections to your computer.
When downloading and installing Windows 11, Windows Update assistants download large files and attempt to install them, making changes to every corner of your PC, including sensitive and critical folders. Security software may perceive this as a threat, thus halting the installation of Windows 11 and causing the upgrade error 0xC1900101.
It is advisable to remove the security software from your PC if you encounter the above error. After successfully installing Windows 11, you can simply reinstall the third-party antivirus software.
Method 5: Remove Additional RAM, Extra Graphics Cards, Extra Network Cards, and Extra PCI Cards.
As mentioned in Method 2, you can also remove any additional components installed on your PC if you are facing issues installing Windows 11. These components may include external RAM, sound cards, network cards, additional graphics cards, etc.
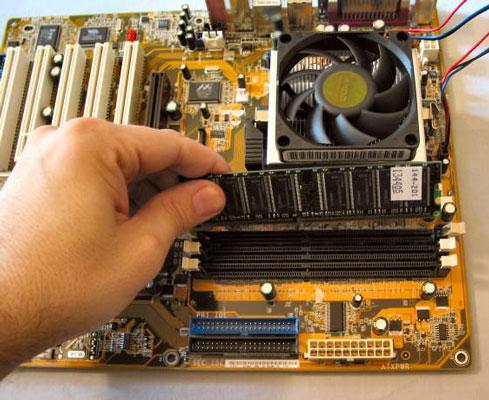
Remove RAM
Method 6: Scan and Repair Windows Files Using the System File Checker Tool.
You should run the System File Checker tool to check the integrity of your Windows system. If there are any corrupted or missing system files, this tool will repair them all.
Step 1: Open Command Prompt as Administrator.
Step 2: Type the following commands and press Enter.
SFC /SCANNOW
Step 3: Wait for the process to complete. Method 7: Boot Windows in Clean Boot Mode.
Clean Boot Mode runs the Windows operating system with minimal hardware, software, and drivers, loading only the necessary drivers; it automatically excludes all faulty drivers and software, allowing you to start your Windows in Clean Boot Mode.
Conclusion
In this article, I have explained the best 7 methods to fix the 0xC1900101 error when updating Windows 10/11. Just follow the instructions and eliminate this error.


