

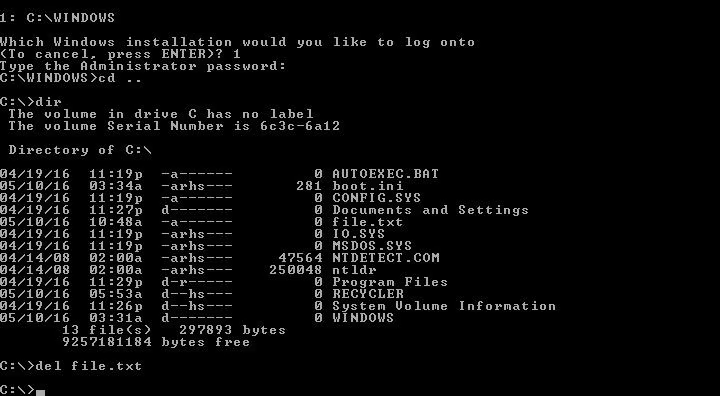
How to Fix NTLDR Missing Error on Windows 11/10: The NTLDR file is a crucial component of the boot loader. If this file is missing or corrupted, you won't be able to start your computer, and you'll constantly receive the following error message.
Error Message:
NTLDR is missing. Press any key to restart.
NTLDR is missing. Press Ctrl Alt Del to restart.
NTLDR stands for NT Loader. It is part of the boot sector that initiates the boot process. This file is initialized during boot and is responsible for loading all essential services, files, and boot sequences required for Windows to start normally.
Encountering an NTLDR missing error at startup can be frustrating, but there's no need to panic. In this article, I've listed the best solutions to fix this error.
How to Fix NTLDR Missing Error on Windows 10 and 11
Here’s a list of some of the best solutions that can fix the NTLDR missing error on computers running Windows 11, Windows 10, and Windows 8/7/XP.
How to Fix NTLDR Missing Error on Windows 11/10
Fix Using PC Repair Tool
Windows consists of a large number of dll files, exe files, sys files, various types of services, databases, and so on, so it's not feasible to constantly monitor all files. A great PC optimization tool can repair damage, fix errors, update Windows and drivers, and silently remove various types of errors.
The Outbyte PC Repair Tool performs all the above tasks effortlessly and provides you with a smooth, error-free Windows environment to work in so you can focus solely on your tasks.
3 Steps to Fix This Error
Step 1. Download the Outbyte PC Repair Tool [File Size: 16.4 MB]
Step 2. Scan your Windows computer.
Step 3. Click the "Repair" button to fix the error.
Method 1: Repair the Corrupted or Missing NTLDR File..
The NT Loader file can become corrupted due to malware infection or a disk error. Your first step in fixing this error should be to repair the corrupted or missing NTLDR file. You can do this as follows:
The most suitable way to fix this error code is to repair/restore the Boot Configuration Data.
The Boot Configuration Data is similar to a database that stores information about boot-related settings. If the Boot Configuration Data (BCD) is corrupted, damaged, or inaccessible, Windows won't be able to read the boot settings and will display the message Bootmgr is missing.
There is a way to rebuild or restore the Boot Configuration Data. Just follow the steps below to restore the BCD.
Step 1: Boot your computer using Windows installation media. The Windows installation wizard will open. Click Next.
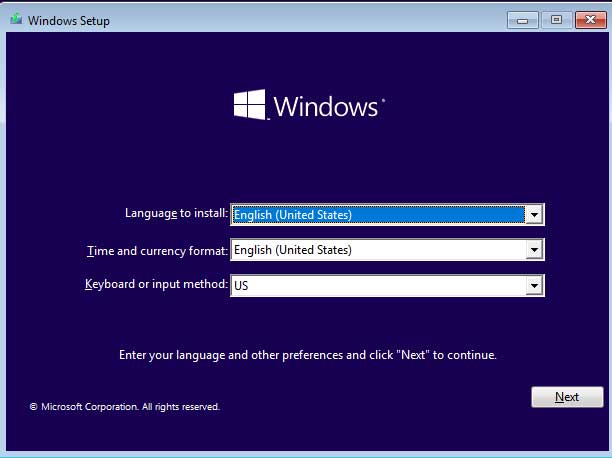
Installing Windows Operating System
Step 2: Select Repair your computer.
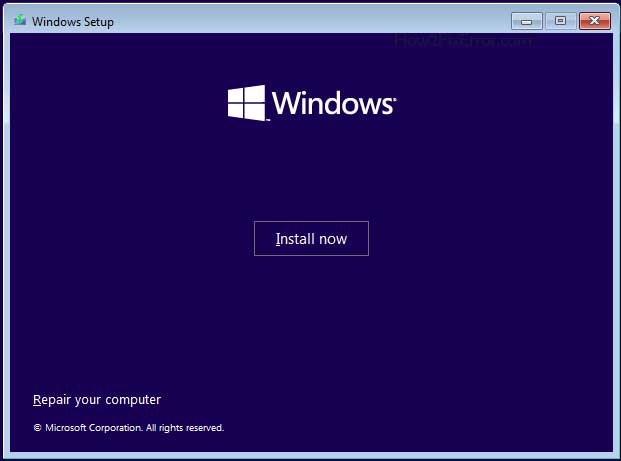
Repair your Windows 10 and 11 computer option
Step 3: The Advanced Startup Options or Windows Recovery Environment will open. Click Troubleshoot.
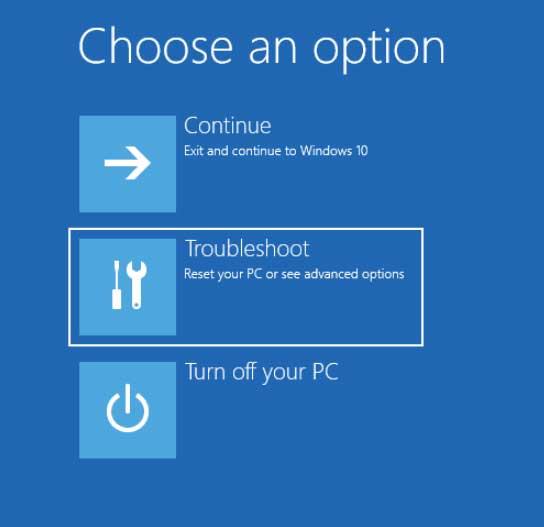
Troubleshoot in the Advanced Startup Options menu for Windows 10 and 11
Step 4: Select Command Prompt.
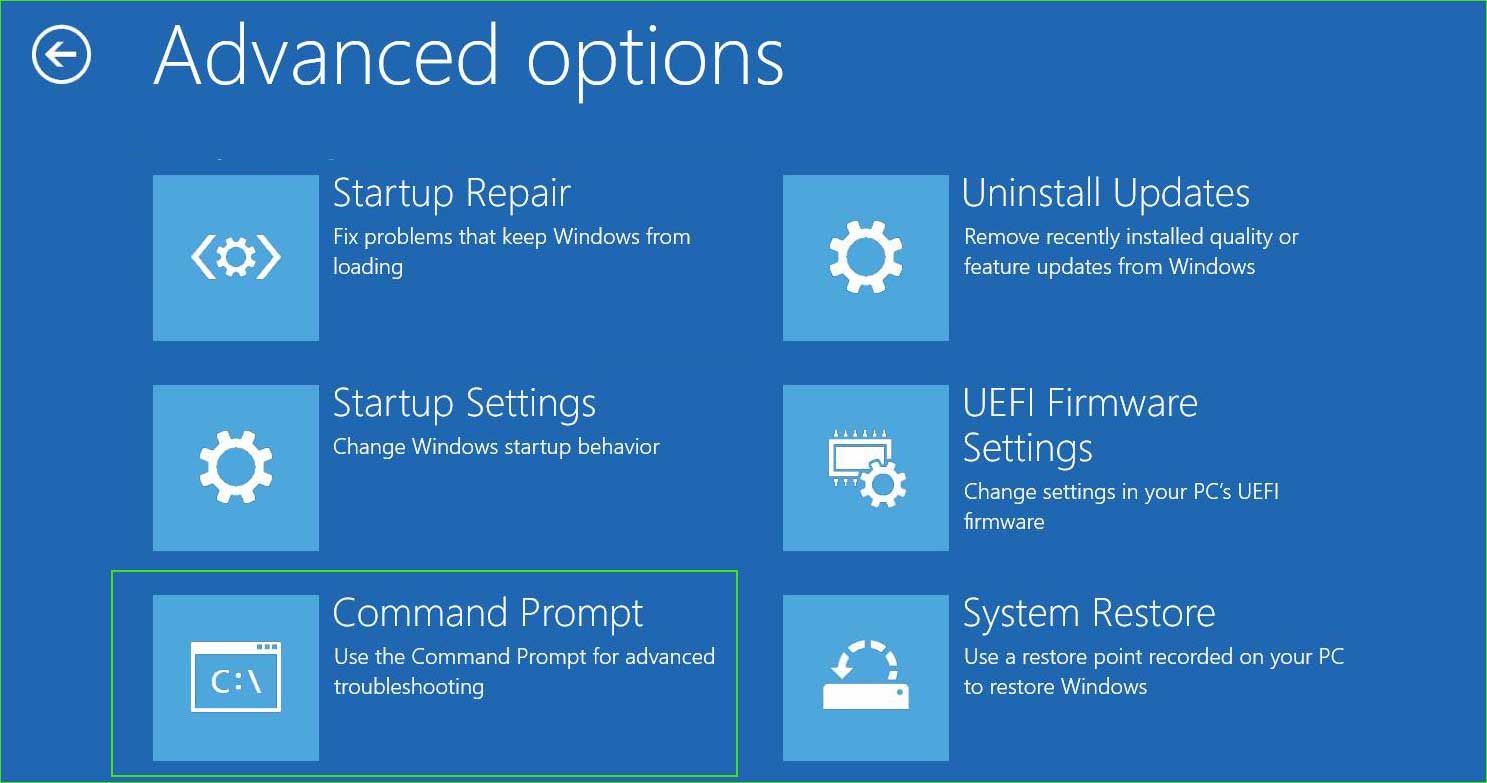
open_command_prompt in Advanced Startup Options
Step 5: Type the following commands and press Enter to execute them.
bootrec /FixMbr
bootrec /FixBoot
bootrec /ScanOs
bootrec /rebuildbcd
Step 6: Now restart your computer, and you won't see the NTLDR missing boot error message.
Method 2: Incorrect BIOS Configuration
If your primary boot device is set to a non-bootable device like a USB flash drive, CD/DVD drive, or network drive, you may encounter the "NTLDR is missing" error. To resolve this issue, you can check and change the boot order in BIOS using the following steps:
Step 1: Open BIOS settings. To access BIOS settings, restart your computer and continuously press the F2/F8/Del/Esc key when you see the manufacturer's logo during startup. Keep in mind that different manufacturers may have different methods to access BIOS settings. It is recommended to refer to the manufacturer's guidelines to determine the specific key or key combination to enter BIOS.
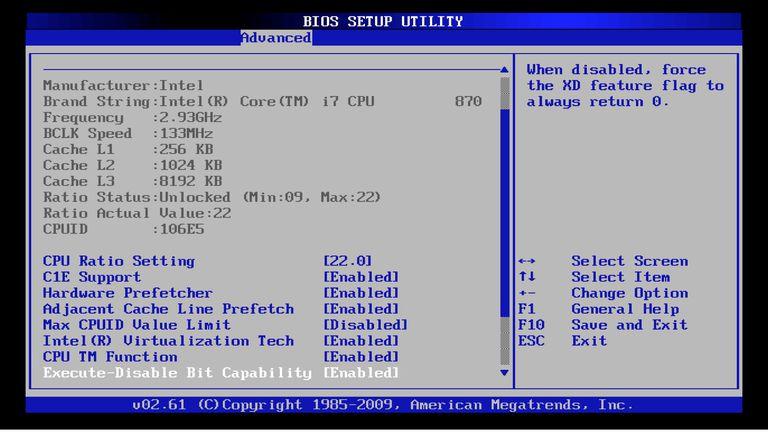
1_bios_settings
Step 2: Locate the Boot Option settings. The menu style in BIOS may vary depending on the manufacturer, so look for the Boot Option menu and adjust the boot order to prioritize your primary hard drive where Windows is installed. Make sure to set the primary hard drive as the first boot device.
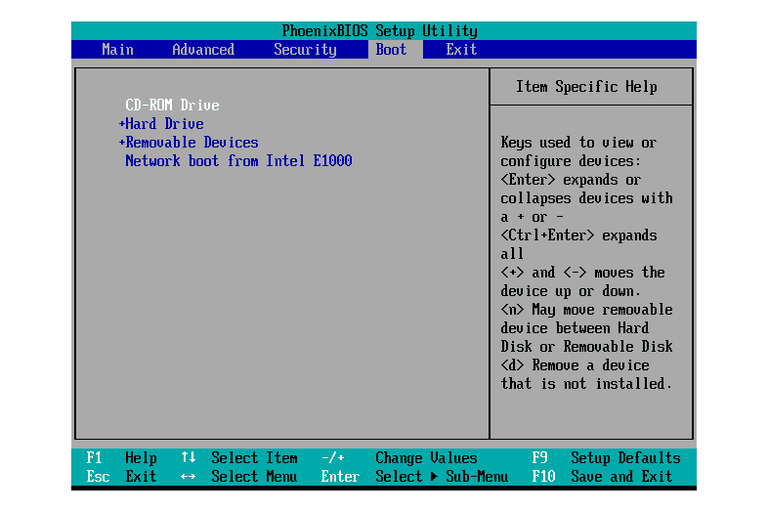
2_bios_boot_option
Method 3: Hard Drive Disk Malfunction
A faulty hard drive (HDD/SSD) is the most common cause of any Boot Loader issue. This could be due to a loose cable between the hard drive and motherboard, a bad sector on the hard disks, incorrect partition settings, or a malfunctioning hard drive.
Step 1: Reseat the loose cable between the hard drive and motherboard.
Step 2: If the hard drive is defective or not functioning properly, replace it with a new drive and install Windows on it.
Method 4: Run SFC.exe, chkdsk, and Dism Commands.
SFC (System File Checker), DISM (Deployment Imaging Service and Management), and CHKDSK (Check Disk) are all built-in Windows utilities that can help fix file system issues. Each tool serves a specific purpose in diagnosing and repairing file system problems.
Step 1: Open Advanced Startup Options.
Step 2: Go to Troubleshoot → Advanced options → Command Prompt.
Step 3: Now run the following commands one by one.
1. System File Checker Tool
sfc /scannow
2. Run the Dism Command
Dism /Online /Cleanup-Image /CheckHealth
Dism /Online /Cleanup-Image /ScanHealth
Dism /Online /Cleanup-Image /RestoreHealth
3. Run the Disk Check Utility.
chkdsk C: / f / x / r
Method 5: Perform Startup Repair.
This is a type of startup issue, so you can fix it by performing a startup repair. Startup Repair is an advanced and trusted mechanism that removes startup errors and allows you to log into your Windows account. You can perform a startup repair as follows:
Step 1: Boot your computer using Windows installation media. The Windows installation wizard will open. Click Next.
Installing Windows Operating System
Step 2: Select Repair your computer.
Repair your Windows 10 and 11 computer option
Step 3: The Advanced Options or Windows Recovery Environment will open.
Step 4: Go to Troubleshoot.
Troubleshoot in the Advanced Startup Options menu for Windows 10 and 11
Step 5: Choose Advanced options.
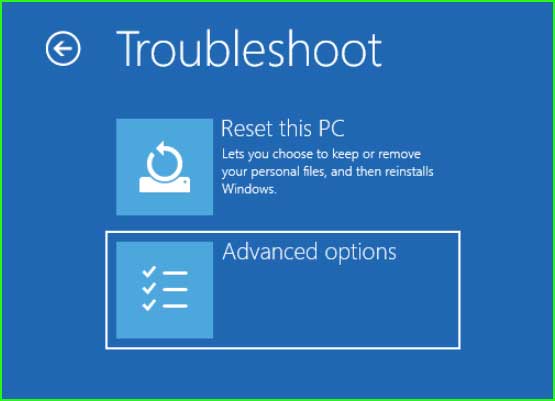
Advanced options for Windows 10 and 11
Step 6: Select Startup Repair.
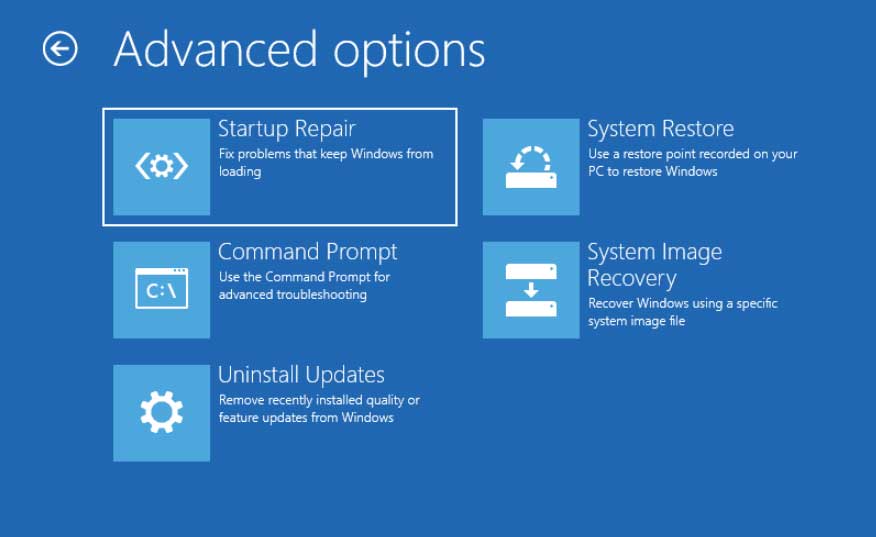
Startup Repair Windows 10 and 11
Step 7: Select the operating system.
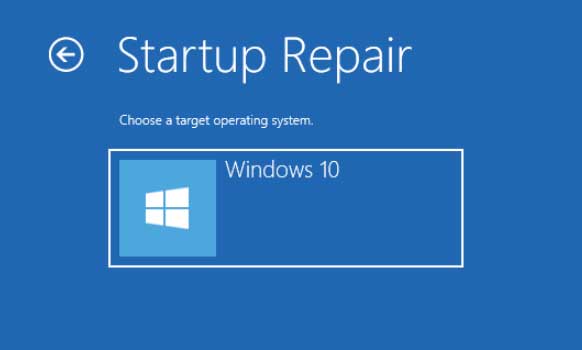
Startup Repair - Select Operating System
Step 8


