


How to fix the WHEA uncorrectable error in Windows 11/10 step by step: The WHEA uncorrectable error is a blue screen of death (BSOD) that occurs during system startup, displaying the message "Your PC ran into a problem."
If you encounter this error, you won't be able to successfully boot into Windows 11/10.
- Find the download link at the end of the article by clicking on View download links.
However, there are available repair methods that can help you regain access to your computer.
Now, let's explore how to fix the WHEA uncorrectable error in Windows 11/10.
Error message:
Your PC ran into a problem.
WHEA Uncorrectable Error 0x00000124
Why does the WHEA uncorrectable error occur?
The WHEA uncorrectable error is typically associated with hardware malfunctions and can occur due to CPU overheating, RAM/SSD failures, or other component issues. Some of the most common causes include:
Overclocked CPU – If you have overclocked your CPU, you may encounter the above error.
Incorrect BIOS configuration – Incorrectly changing BIOS settings can also lead to the same error.
Hardware failure – Some parts of your computer may have failed, causing the blue screen error.
Corrupted Windows – The Windows operating system can become corrupted for various reasons, such as missing important system files, damaged MBR/GPT, or corrupted registry files, etc.
How to fix the WHEA uncorrectable error on Windows 11/10
Here are some helpful methods outlined below that will assist you in recovering from the WHEA uncorrectable error.
Important note:
Before attempting any significant repairs on your Windows operating system, it's crucial to back up your data and store it safely. EaseUS Data Recovery Wizard can help recover data from a malfunctioning computer.
Solution 1: CPU Overheating
Have you checked your CPU temperature? An overheated CPU can lead to system restarts and cause the WHEA uncorrectable error.
Overheating can result from various factors, including CPU overclocking and malware or viruses.
If you have overclocked your CPU, consider installing a more powerful cooling system.
A cooling fan may not be sufficient for an overclocked CPU; you should opt for a larger and more efficient heat dissipation solution.
Solution 2: Reset BIOS
If your computer is experiencing overheating issues, you may find it difficult to access the BIOS settings as your CPU can heat up quickly and cause the computer to restart within seconds. However, if you can access the BIOS settings, it is recommended to reset them to their default configurations.
Reset BIOS/UEFI to default settings
Step 1: Open the BIOS/UEFI settings.

Step 2: Go to the "Exit" tab and select Load Setup Defaults.
Press F10 to save and exit.
If you cannot access the BIOS due to repeated system restarts, try force resetting the BIOS.
Reset CMOS data
Step 1: Turn off your computer and unplug the power cord.
Step 2: Locate the coin-sized battery on the motherboard.

Remove it and wait for a minute, then reinsert it.
This will clear all CMOS data and reset the BIOS settings to default.
Step 3: Plug in the power cord and turn on your computer.
Solution 3: Update BIOS
Visit the motherboard manufacturer's website and check for BIOS/UEFI updates.
Sometimes, updating the BIOS/UEFI can resolve hardware compatibility issues.
Update BIOS
Step 1: Click on the Start menu and search for MSInfo, then open the application.
Step 2: In MSInfo, you will find details about the BIOS manufacturer and version number.

Step 3: Look for the latest BIOS version on the manufacturer's official website and download it.
Step 4: Double-click the downloaded file to install it.
Solution 4: Check for Loose Cables and Replace Faulty SSD/RAM
Another essential step in resolving the WHEA uncorrectable error is to check for loose cables inside your computer.
Loose cables can be the root cause of the problem. It's a good practice to reseat all cables, and if you find any damaged cables, replace them with new ones.
Additionally, it's crucial to check your SSD and RAM for potential errors.
If you identify any issues with these components, consider replacing them.
Solution 5: Roll Back Windows Updates
While keeping your Windows system updated is crucial, it's worth noting that installing Windows updates can sometimes lead to various issues, including blue screen errors like the one mentioned above.
If you suspect that the error occurred after a recent Windows update, you can try resolving it by uninstalling the problematic update.
Uninstalling Updates - Step by Step
Step 1: Open the Advanced Startup Options or Windows Recovery Environment.

Click on Troubleshoot.
Then proceed to troubleshoot through the advanced startup menu for Windows 10 and 11.
Step 2: Go to Troubleshoot ➜ Advanced options ➜ Uninstall updates.
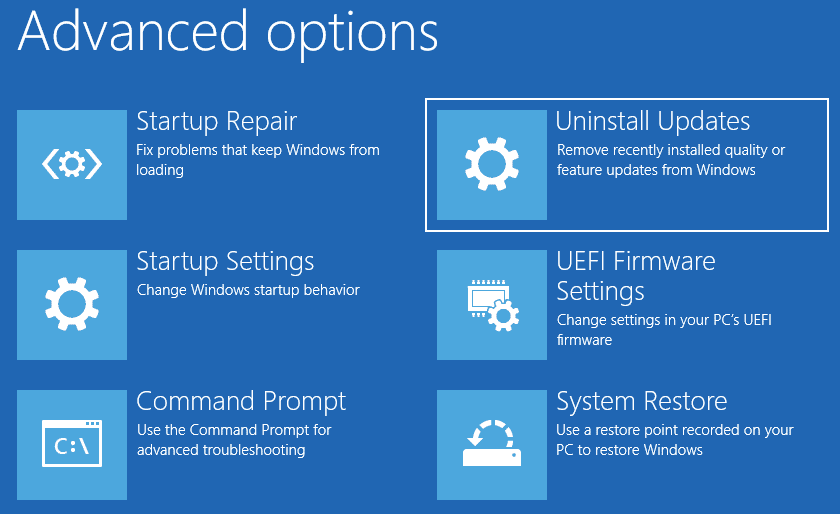
Windows Advanced Options
Step 3: Select Uninstall the last quality update.
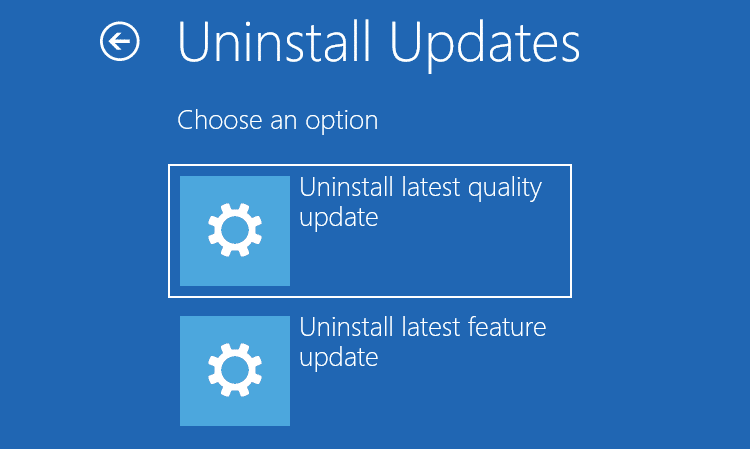
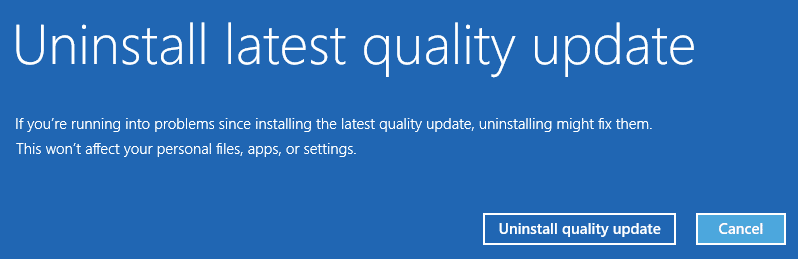
Step 4: Click the Uninstall quality update button to remove the updates.
Solution 6: Run Windows Repair Commands
The SFC, DISM, CHKDSK, and Bootrec commands are typically considered essential Windows repair tools. These commands are used to scan and repair corrupted system files, fix Windows image issues, correct disk errors, and restore boot records.
Repair Windows using commands
Step 1: Open the Windows Recovery Environment or Advanced Startup Options.
Click on Troubleshoot.
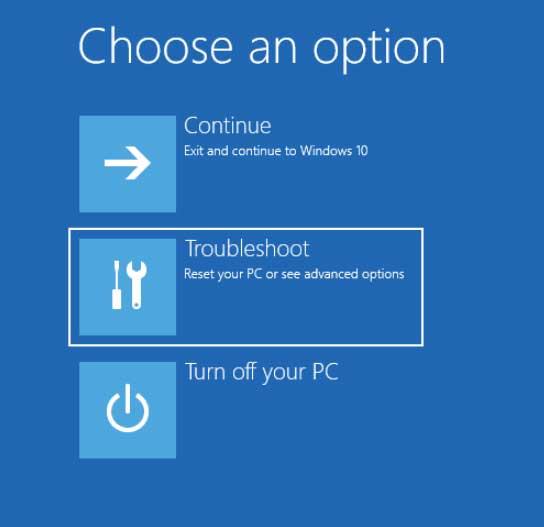
You can troubleshoot from the advanced startup menu for Windows 10 and 11.
Step 2: Select Command Prompt.
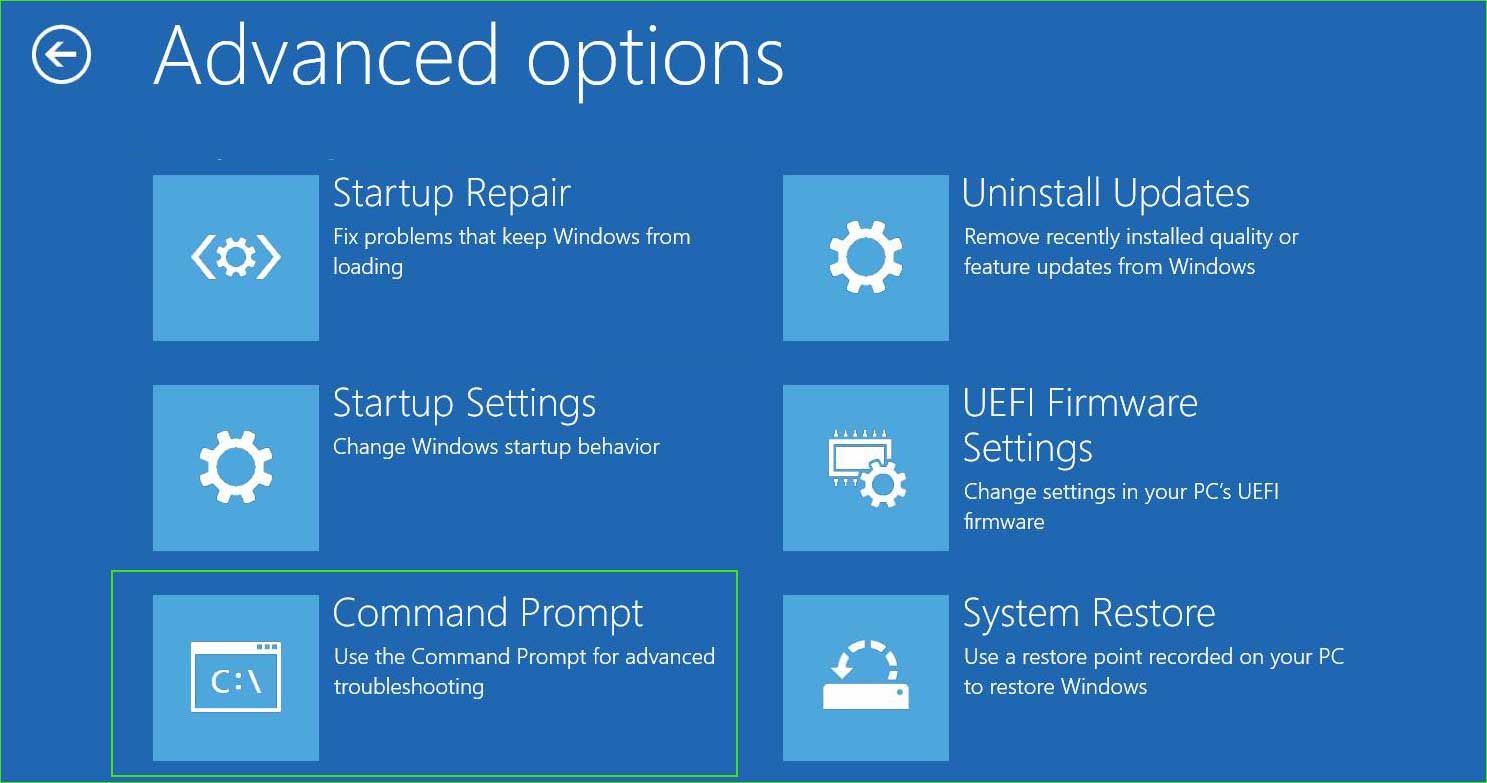
open_command_prompt in the advanced startup options
Step 3: Run the following commands.
SFC Command
SFC stands for System File Checker, which is used to scan and repair corrupted Windows files.
The System File Checker helps maintain the integrity of essential system files that Windows relies on to function correctly.
sfc /scannow
CHKDSK Command
CHKDSK is short for "Check Disk" and is used to check and repair HDD/SSD errors such as integrity violations, file system failures, and bad sectors on the disk, etc.
chkdsk C: /f /r
DISM Command
The DISM command, which stands for "Deployment Imaging Service and Management Tool," is a command-line utility in Windows used to service and manage Windows operating system images. It is a powerful tool primarily used for system repair, updates, and maintenance tasks.
To check the health of the Windows image:
DISM /Online /Cleanup-Image /ScanHealth
To attempt to repair any existing issues in the image:
DISM /Online /Cleanup-Image /RestoreHealth
Bootrec Command
The Bootrec command is a powerful command-line tool in Windows used to fix boot-related issues and troubleshoot them.
This command is especially useful when dealing with boot problems that prevent your computer from starting.
bootrec /scanos
bootrec /fixmbr
bootrec /fixboot
bootrec /rebuildbcd
Solution 7: Perform Startup Repair
You can also opt for a startup repair process. To do this, you will need a bootable Windows installation drive, which you can use to boot your computer and start the startup repair.
Startup Repair - Step by Step
Step 1: Use Windows installation media to boot your device.
The Windows installation wizard will open. Click Next.
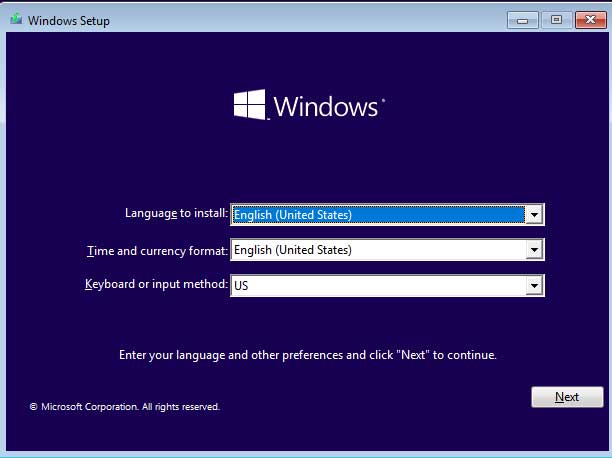
Installing Windows Operating System
Step 2: You need to select Repair your computer.
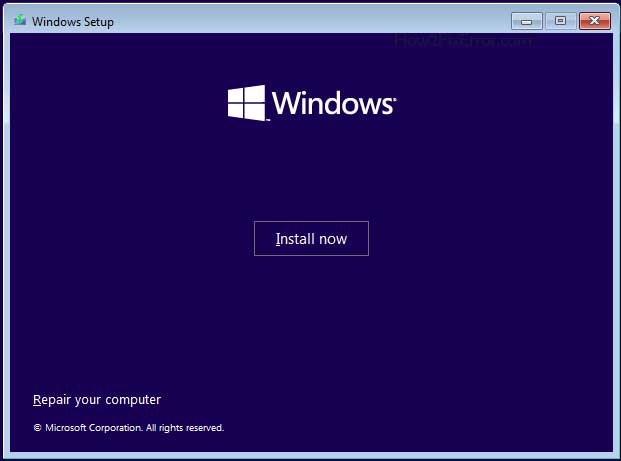
Step 3: After that, the Advanced Startup Options or Windows Recovery Environment will appear on your screen.
Click on Troubleshoot.
Step 4: The Advanced Startup menu will open.
Go to Troubleshoot ➜ Advanced options ➜ Startup Repair.
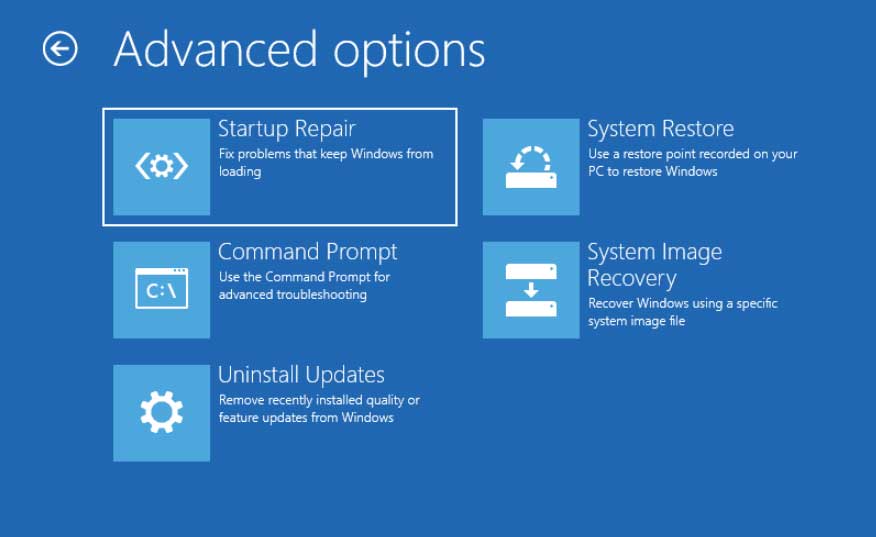
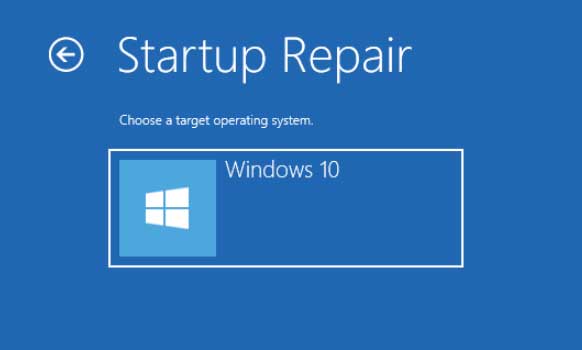
Step 5: Select the operating system.
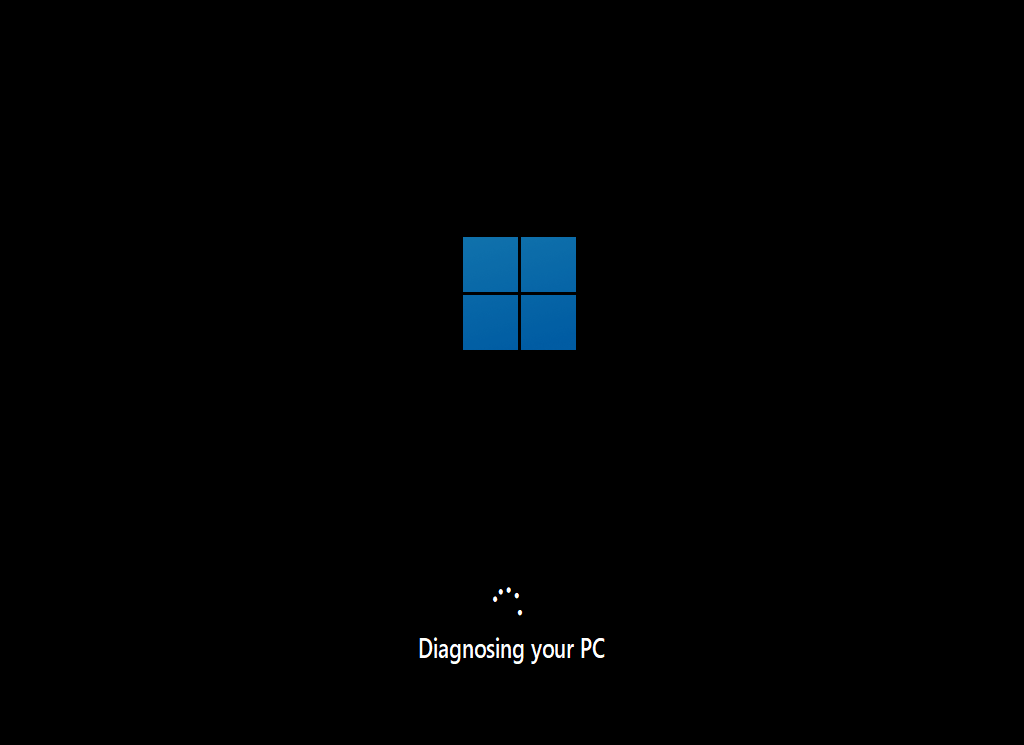
Step 6: You need to wait for it to diagnose and repair your device.
Conclusion
In this article, we discussed how to fix the WHEA uncorrectable error in Windows 11/10.
How to prevent the WHEA uncorrectable error 0x00000124?
Encountering a blue screen error can be a frustrating experience and often requires significant time and effort to resolve.
To prevent such issues, it's advisable to maintain your computer by keeping it clutter-free, updated, and optimized. One way to achieve this is by installing a reliable performance optimization tool. These tools can automate optimization tasks, enhance security, and repair system damages, making your computing experience smoother and safer.


