

Transfer Photos from Mac to iPhone Without iTunes
Transfer Videos from iPhone to Mac
Transfer Files from iPhone to Computer Using iTunes
How to Transfer Videos from Computer to iPhone via iTunes
Transfer Photos from iPhone to Computer Using Cable
Transfer Photos from iPhone to Computer 2018
Easiest Way to Transfer Photos from iPhone to Mac
How to Transfer Videos from Computer to iPhone via iTunes 2018

Wondering how to transfer files from your iPhone to your Mac? We at Tech World are here to help you out and share this knowledge with you. Apple devices are renowned for their top-notch quality, and the seamless interaction between these devices is particularly impressive. From iOS to macOS, these operating systems work together to enhance user experience.
As a result, transferring files between an iPhone and a Mac is quick, convenient, and secure, and you're about to discover just how easy it is.
4 Ways to Transfer Files from iPhone to Mac
Below are four methods to transfer files from various types of iPhones to your MacBook.
Methods for Transferring from iPhone to Mac
-
- AirDrop
- iCloud Drive
- iTunes
- Third Party App
Let's dive right in.
1. AirDrop
Launched in 2011 with iOS 7, Apple's AirDrop might be the most convenient way to transfer files from iPhone to Mac. By combining Wi-Fi and Bluetooth, users can quickly send files to their computers. Ensure Wi-Fi and Bluetooth are enabled on both your Mac and iPhone to use AirDrop. You must also be logged into the same iCloud account to use this feature.
On your Mac, press Command + Spacebar to access Spotlight and type 'Airdrop'. A Finder window will open showing your current connection and AirDrop settings. Click on the 'Allow me to be discovered by' option at the bottom of the page and select 'Contacts Only'. This ensures your Mac is visible only to your contacts, not everyone on the network.

You need to enable AirDrop on your iPhone. Tap the 'Settings' app and go to 'General > AirDrop'. Tap 'Contacts Only' to enable file transfer to contacts.
Now select the file you want to send on your iPhone. Suppose you want to send a video to your Mac. Open the Photos app and select the video. Tap the share icon in the bottom left, which appears as a box with an upward arrow. A list of sharing options will appear, with AirDrop at the top.

Click on the MacBook user's name on your iPhone and accept the request on your computer. If you're sending to your own Apple ID, the file will transfer automatically without needing acceptance.

How long does it take? Transfer time varies from a few seconds to several minutes, depending on the file size.
2. iCloud Drive
Unlike other cloud services, iCloud stores files from specific apps in their designated folders. For example, a document in the Pages app on your iPhone is also available through iCloud. Of course, you must be logged into the same Apple ID on both devices. Here's how to transfer files from iPhone to Mac using iCloud.
Select the file you intend to send on your iPhone and click the share option. Then, select 'Save to File' for a range of options. Besides saving to iCloud, these options include saving to other cloud services as well as on your iPhone.
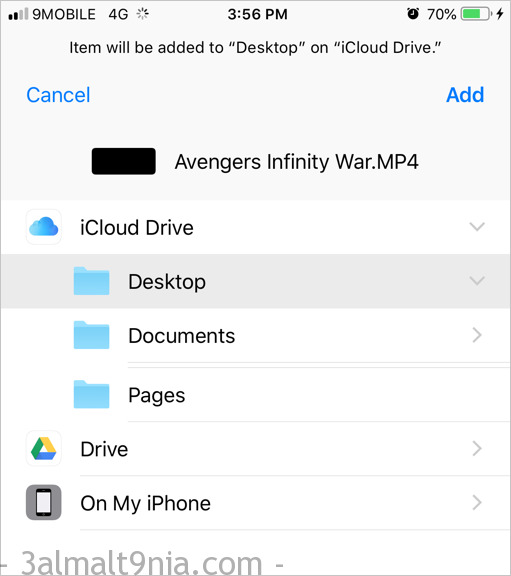
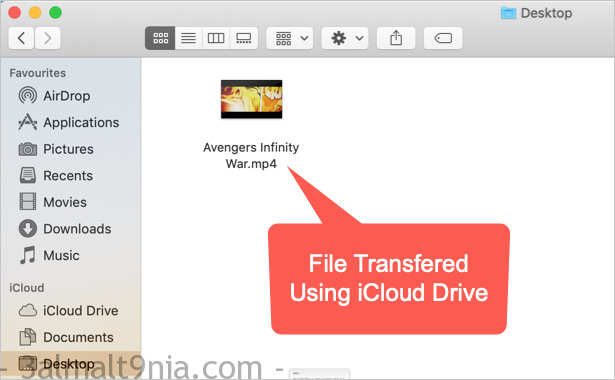
Choose the iCloud Drive option, select the appropriate folder, and click 'add'. Congratulations, you've successfully moved your file to the cloud.
To open the file on your Mac, click Finder in the dock and select the iCloud folder. Finally, open the folder where you saved the file.
3. iTunes
Our list wouldn't be complete without mentioning the good old iTunes file sharing. Whether you're sending a document, music, or video files, iTunes is the oldest method for sharing files between iPhone and Mac. Wondering how it works?
Connect your iPhone to your Mac via USB and launch the iTunes app. Then, click on your iPhone and select 'File Sharing' from the sidebar. You'll see a list of apps installed on your iPhone that support file sharing. Choose your preferred app that includes the file you want to transfer to your Mac, and click save.
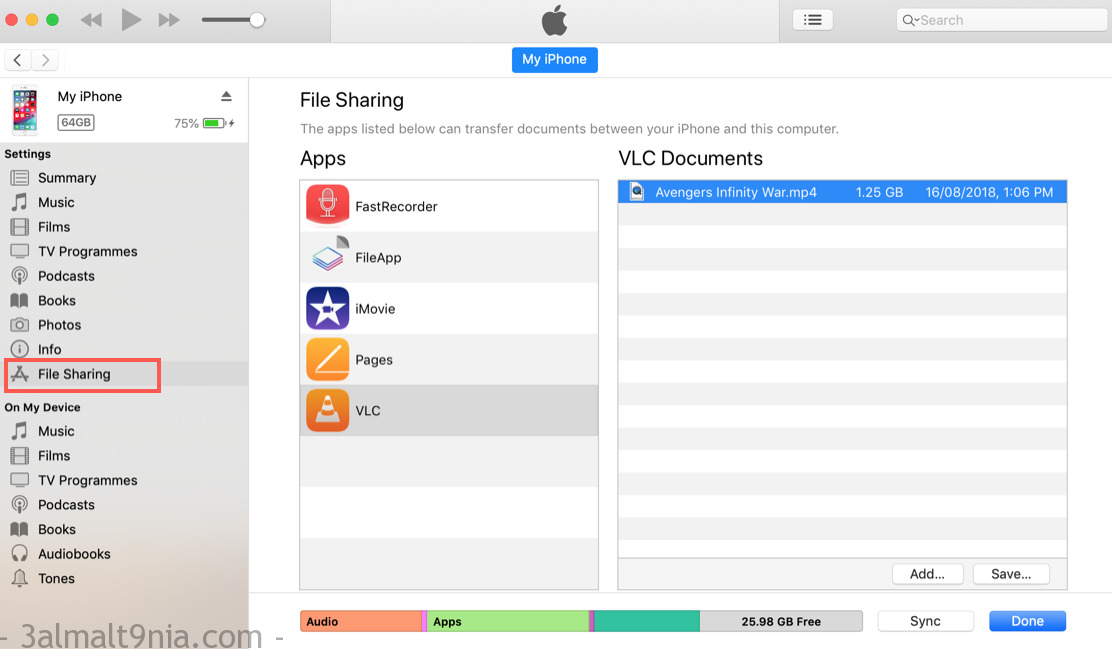
However, iTunes file sharing will only work with supported apps, not all apps.
4. Third Party Apps
There are plenty of file transfer apps available on the iOS App Store. You may need to choose the app based on the type of file you want to transfer. Most apps support transferring media files from the Photos app to your Mac and PC. For instance, "Send Anywhere – File Transfer" is a popular iOS app that allows you to send files freely using various methods.
Create a security key to send and receive files.

