


(How to Fix Fixboot Access Denied) How to Resolve Fixboot Access Denied: The "Fixboot Access Denied" error occurs when attempting to repair the boot loader or MBR (Master Boot Record) or other boot-related issues using the command prompt or Windows Recovery Environment. When executing the command "bootrec /fixboot," users encounter the "Access Denied to Fixboot" error.
In this article, we will explore the nature of this error and discuss ways to resolve it.
What is the Fixboot Command?
The "fixboot" command is a command-line utility available in Windows operating systems, including Windows 11. It is used to repair or rebuild the boot sector of the system boot partition. The boot sector contains essential information required to start the operating system.
When the boot sector becomes corrupted or damaged for various reasons, such as improper shutdowns, hardware issues, or malware infections, it can lead to boot problems and prevent the system from starting correctly. In such cases, the "fixboot" command is executed.
Why Does the Fixboot Access Denied Error Occur?
Here are some potential reasons behind the Fixboot Access Denied error on Windows 11 and Windows 10.
Not Running as Administrator - If you are not running the Fixboot command with administrative privileges, you may encounter the "Access Denied" error.
Corrupted Boot Files - The boot files may be severely corrupted, preventing the Fixboot command from repairing them.
Antivirus Software Blocking the Command - Your security software may be blocking the execution of the FIXBOOT command.
Corrupted or Missing System Files - There may be important Windows files that are either missing or corrupted, leading to the "Fixboot Access Denied" error.
How to Fix the "Access Denied to Fixboot" Error on Windows 11 and 10?
Important Note:
Before attempting any significant repairs on your Windows operating system, it is crucial to back up your data and store it safely.
EaseUS Data Recovery Wizard can help recover data from a malfunctioning computer.
Whether you are facing the dreaded blue screen of death, startup failures, or boot issues, this tool allows you to boot your computer and recover your valuable data effortlessly. So, make sure to use EaseUS Data Recovery Wizard to protect your files before proceeding with any repairs!
Note: The free version allows you to recover up to 2GB of data.
This error message can be frustrating, but there's no need to panic, as there are several steps you can take to address this issue and restore your system's boot functionality. In this article, we will explore potential causes and provide solutions to overcome the "Fixboot Access Denied" error on Windows 11.
Solution 1: Repair Startup Issues Using EaseUS Partition Master
Step 1: Download EaseUS Partition Master
Solution 2: Run Command Prompt as Administrator.
To ensure you have the necessary administrative privileges, follow these steps:
1. Press the Windows key and search for "Command Prompt."
2. Right-click on "Command Prompt" and select "Run as Administrator."
3. Click "Yes" to grant administrative permission.
4. Now run the Fixboot command.
Solution 3: Disable Secure Boot Option from BIOS.
If you are consistently receiving the error while booting your computer, the best solution is to turn off Secure Boot in the BIOS settings. Read the steps below thoroughly before applying any changes.
Step 1: To open the BIOS settings, restart your computer and keep pressing the F2/F8/Del/Esc key when you see the manufacturer's logo during startup. Different manufacturers may have different methods for opening the BIOS settings. You should check the manufacturer's instructions for accessing the BIOS.
Step 2: Look for the Secure Boot option. It is usually found under the Boot tab.
Step 3: Disable Secure Boot or change the Secure Boot option from Windows UEFI Mode to another operating system.
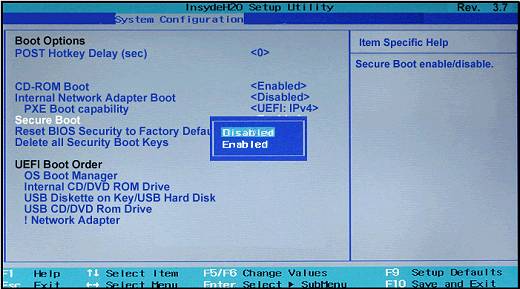
Disable Secure Boot Violation in BIOS
Step 4: Save and exit the BIOS.
Now, the BIOS will not check the operating system before loading, and you will not encounter another error related to Secure Boot violation.
Solution 4: Temporarily Disable Security Software (Antivirus and Windows Defender)
Antivirus or security programs may interfere with the execution of the fixboot command. Temporarily disable this software to determine if it is causing the Access Denied error. Refer to the program's documentation or contact the vendor for instructions on temporarily disabling it.
Disabling Security Software - Step by Step
1: Disable Antivirus Programs:
Sometimes, conflicts with third-party software, such as antivirus programs or firewalls, can interfere with the Windows Update process. Security software may block or disable the installation of updates, leading to the error code.
Step 1: Right-click on the security program in the notification area.
Step 2: Select "Pause Protection."
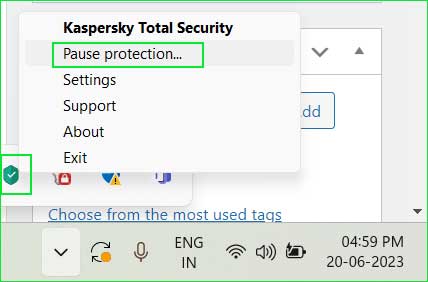
Pause_Protection
2: Disable Windows Defender:
You can follow the steps to temporarily disable Windows Defender.
Step 1: Click on the Start menu and search for Windows Security and open it.
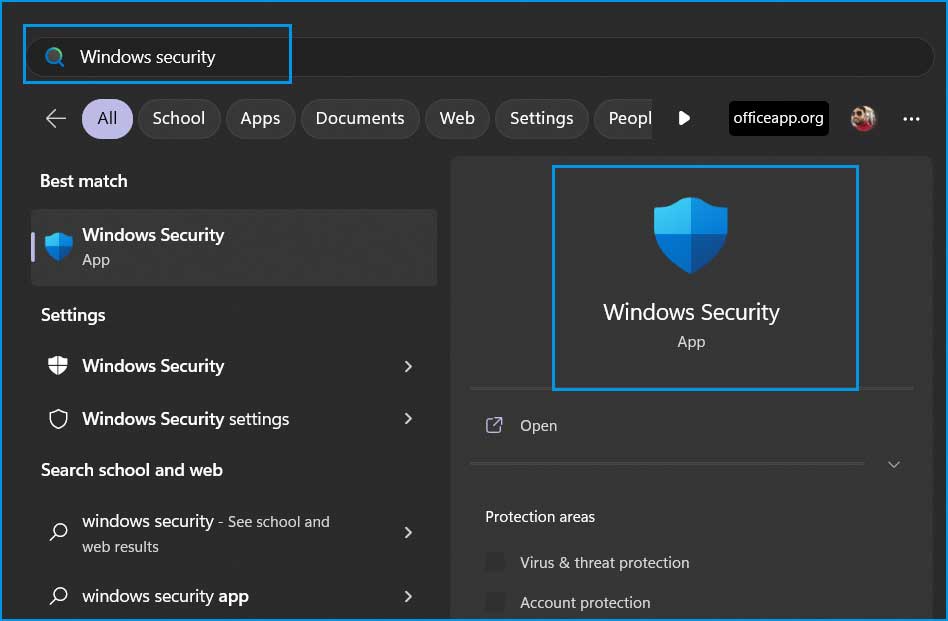
1_open_windows_security
Step 2: Click on Virus & Threat Protection in the left sidebar.
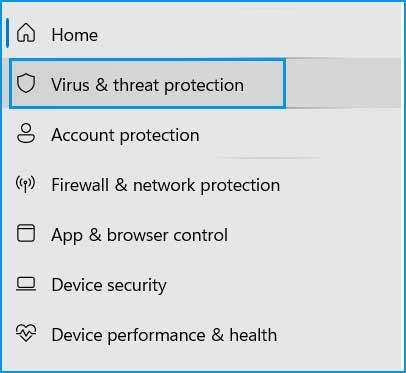
2_open_virus_threat_protection
Step 3: Scroll down to find Virus & Threat Protection Settings and click on Manage Settings.

3_virus_threat_protection_setting
Step 4: Turn off Real-time Protection.
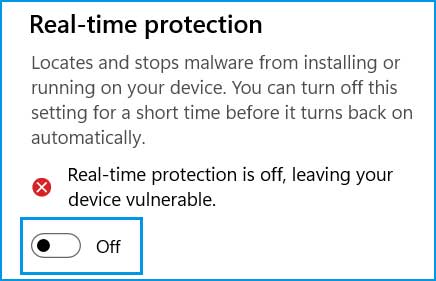
4_turn_off_real_time_protection
Step 5: Scroll down to find Tamper Protection and turn it off.
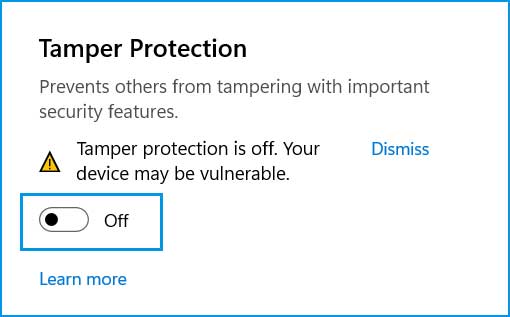
5_turn_off_real_tamper_protection
Note: You should manually turn these services back on; otherwise, your device will be vulnerable.
Solution 5: Repair Startup
You can proceed to Repair Startup if you cannot fix the boot error using the Fixboot command. Startup Repair fixes all components responsible for running your computer. You can perform Startup Repair as follows:
Step 1: You need a Windows installation disc/USB drive. If you don't have one, create a bootable drive for Windows.
Step 2: Boot from the Windows 11/Windows 10 installation media.
Step 3: Choose your language and keyboard layout, then click Next.
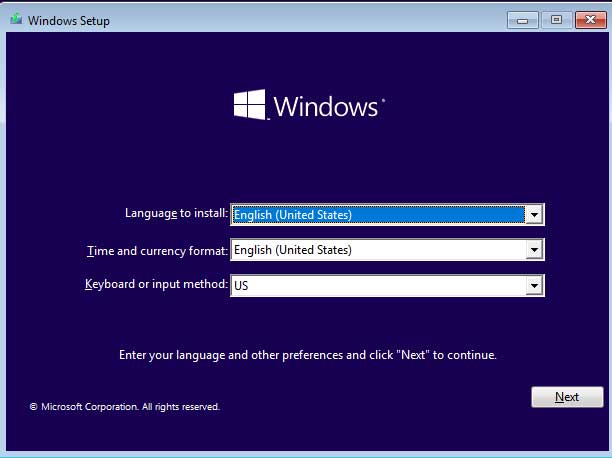
Installing Windows Operating System
Step 4: In the next window, select Repair your computer.
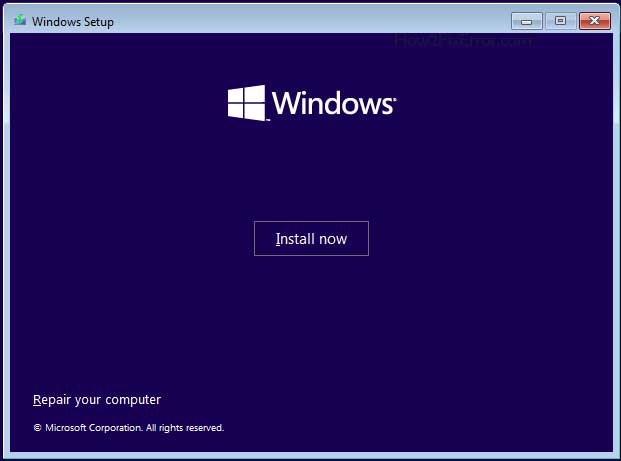
Repair Your Computer Option for Windows 10 and 11
Step 5: The advanced options or Windows Recovery Environment will open.
Step 6: Go to Troubleshoot.
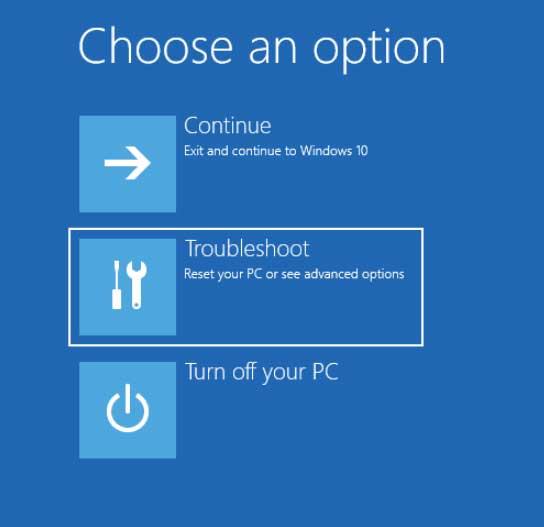
Troubleshoot in the Advanced Startup Menu for Windows 10 and 11
Step 7: Select Advanced Options.
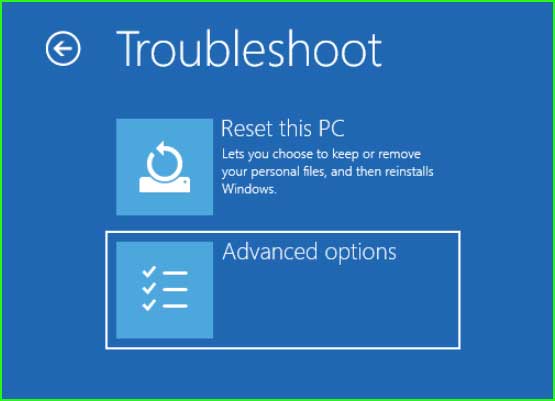
Advanced Options for Windows 10 and 11
Step 8: Select Startup Repair.
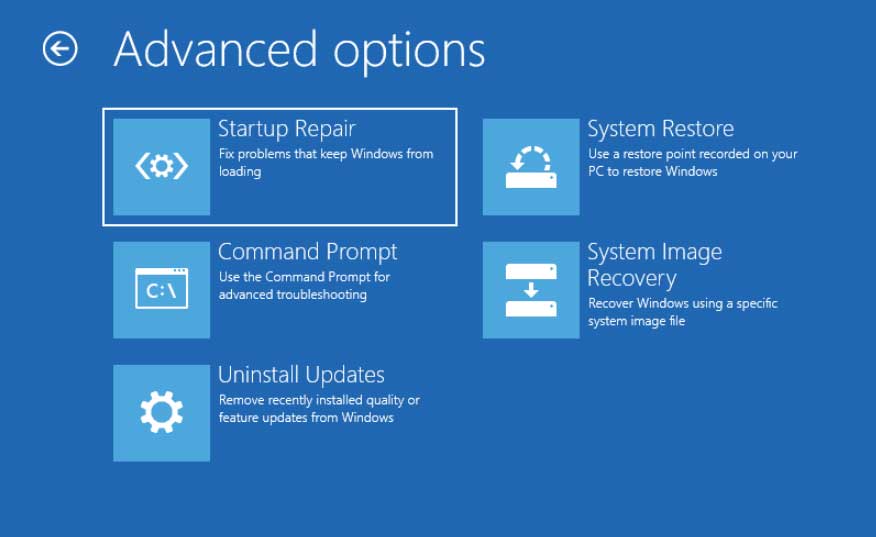
Startup Repair for Windows 10 and 11
Step 9: Select the operating system.
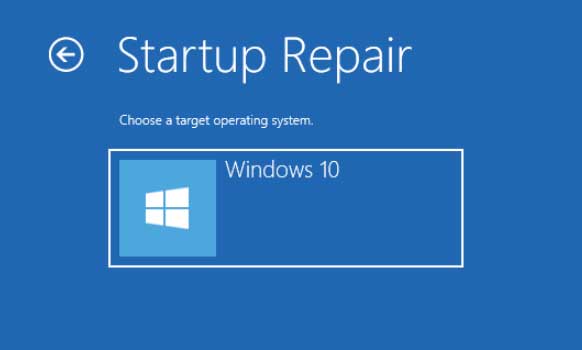
Startup Repair - Select Operating System
Step 10: Your computer will begin diagnosing. Please wait until the process is complete.
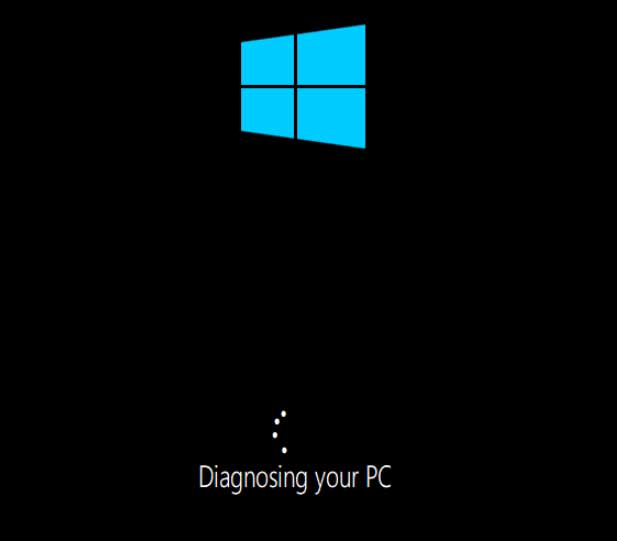
Diagnosing Windows 10 and 11
Solution 6: System Restore
It is a good idea to restore your computer if you are experiencing issues during startup. It reverts all changes to a previously known good configuration point and allows you to successfully boot your computer.
Here’s how to restore your computer.
Step 1: Open the Advanced Startup Menu. To open the Advanced Startup Menu, apply the following steps.
Turn off your computer and then turn it back on.</


