

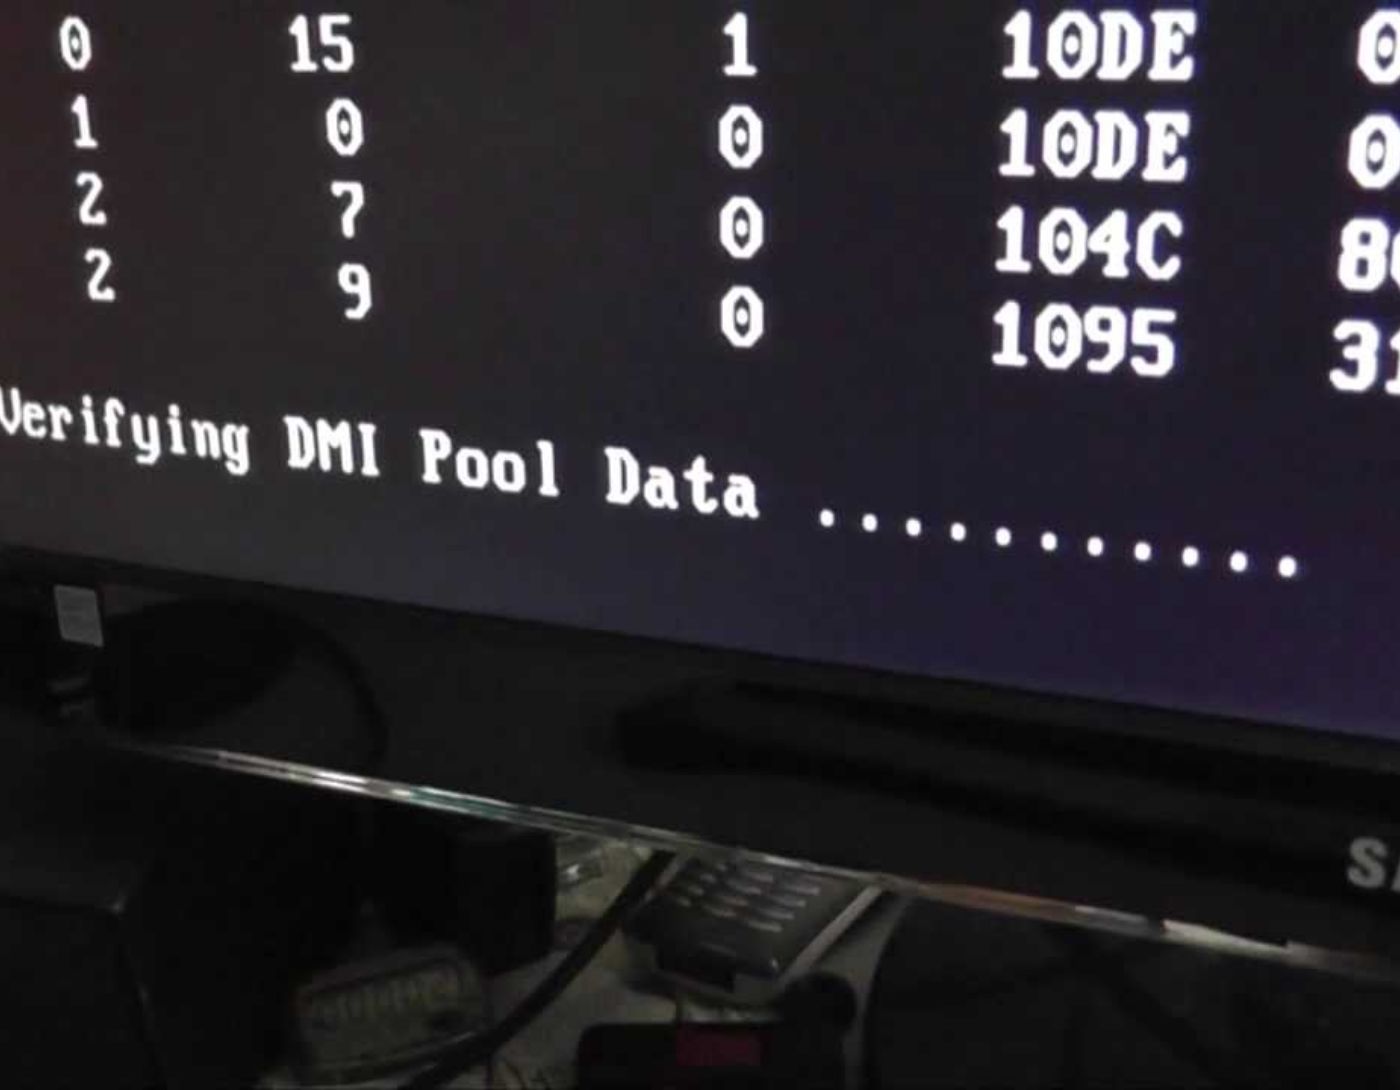
(Fix DMI pool data verification error) Fixing the DMI Pool Data Verification Error: The "DMI Pool Data Verification" error is like a dormant cell within your computer, remaining inactive until it unexpectedly reveals its presence at the most inconvenient times. No matter how hard you try, you may find yourself stuck when starting Windows with a black or blue screen, accompanied by the frustrating message "Verifying DMI Pool Data." The process seems endless, leaving you in a state of anxiety.
Important Note:
Before attempting any major repairs on your Windows operating system, it's crucial to recover your data and store it safely. EaseUS Data Recovery Wizard comes to the rescue for data recovery from a malfunctioning computer.
Whether you're facing the scary blue screen of death, startup failure, or boot issues, this tool allows you to get your computer running and recover your valuable data effortlessly. So, make sure to use EaseUS Data Recovery Wizard to protect your files before proceeding with any repairs!
Note: The free version allows you to recover up to 2GB of data.
In the past, the "DMI Pool Data Verification" error was very common in Windows XP and Windows 7.
However, with the release of more advanced versions like Windows 11, 10, 8, and Windows Server 2019, this error has gradually faded away.
Unfortunately, recent statistics reveal that the "DMI Pool Data Verification" error has resurfaced and is now affecting many computers running Windows 10/11.
What is DMI Pool Data?
DMI stands for Desktop Management Interface, and DMI Pool Data refers to a section of memory that stores important hardware information about your computer's configuration.
When you power on your computer, the BIOS connects to various hardware components like the motherboard, RAM, hard drive (HDD/SSD), CPU, etc., and stores important information in the DMI Pool Data. Later, the Windows operating system uses this data to recognize and configure the different hardware components present in your computer.
So, the question is, what exactly is the "DMI Pool Data Verification" error?
When your Windows operating system starts the boot process, the BIOS performs a check on the DMI Pool section to verify important hardware information. If the BIOS encounters any difficulty accessing the DMI Pool Data for any reason, it repeatedly attempts to do so, resulting in the persistent message "Verifying DMI Pool Data."
Several factors can contribute to this issue, such as disk errors, hard drive (HDD/SSD) failures, or when core hardware components like the CPU, motherboard, and RAM are changed, etc.
These changes can disrupt the proper functioning of the DMI Pool, causing the verification process to halt and leading to the error message during startup.
How to Fix the "DMI Pool Data Verification" Error on Windows 11/10/8/7 and Windows Server?
If your computer crashes during boot and displays the DMI Pool Data error, there's no need to panic. Fortunately, you can resolve this issue by following some troubleshooting steps. Here are some fixes that will help you overcome this problem and successfully boot your computer.
Solution 1: Restart Your Computer.
Restarting electronic devices is often considered a go-to troubleshooting method, and interestingly, it’s a mysterious fix that seems to work like magic for various issues. Although a simple restart may not always be obvious, it can work wonders in resolving problems.
So, give it a try and perform several restarts to see if it does the trick!
Solution 2: Tweak BIOS Settings
The "DMI Pool Data Verification" error occurs when the BIOS fails to verify essential hardware information during the boot process, which could be due to misconfigured or outdated BIOS.
To address this issue, try resetting the BIOS to its default settings, and if possible, update the BIOS version to the latest available. These simple steps might be the key to resolving the issue and getting the system running smoothly again.
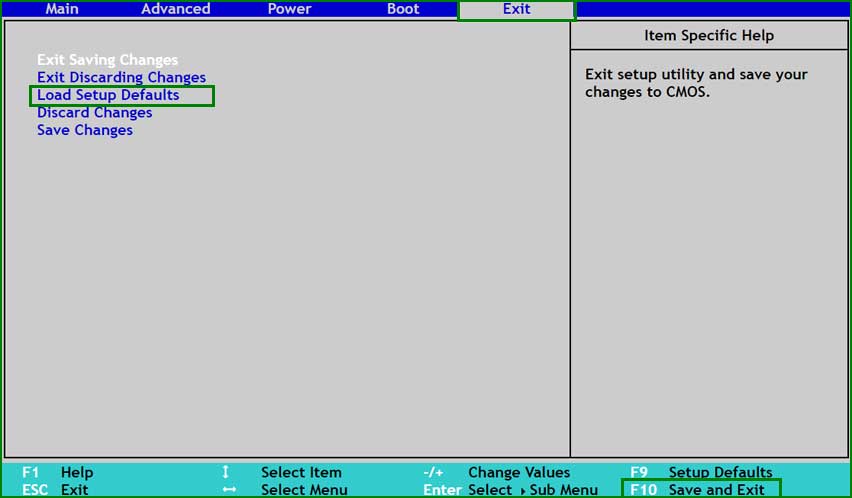
Resetting BIOS/UEFI to Default
Step 1: Open BIOS/UEFI settings.
Step 2: Go to the "Exit" tab → Select Load Setup Defaults. Press F10 to save and exit.
Updating BIOS
Updating the BIOS is a critical process that carries the risk of permanently crashing your PC, so it should be approached with extreme caution, and every detail should be checked thoroughly.
Before proceeding, ensure you have the correct manufacturer details and the BIOS version number you intend to install. Double-checking this information is crucial to avoid potential issues.
Identify the BIOS manufacturer and version [most importantly].
"When starting the BIOS update process, identifying the installed BIOS information is crucial for ensuring a smooth installation. Clearly identifying the current BIOS version is essential before proceeding with any updates, as installing the wrong version can lead to serious problems for your computer.
Updating BIOS
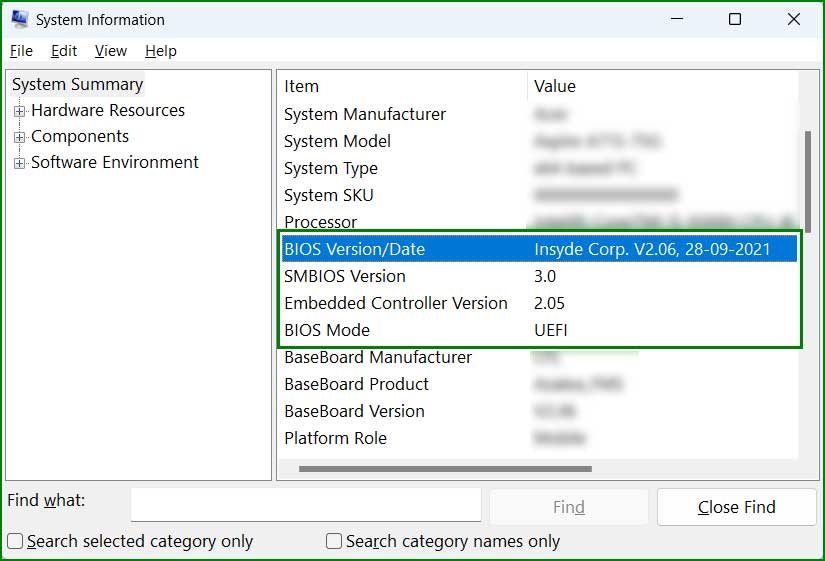
Step 1: Click on the Start menu and search for MSInfo, then open the application.
Step 2: Under MSInfo, you will find details about the BIOS manufacturer and version number.
Step 3: Look for the latest BIOS version on the manufacturer's official website and download it.
Step 4: Double-click the downloaded file to install it.
Solution 3: Clear CMOS
CMOS is a small battery-operated chip located on the computer's motherboard that stores BIOS configuration information. Sometimes, clearing the CMOS data is necessary to resolve hardware issues, boot problems, startup issues, etc. You can easily clear the CMOS data as follows.
Resetting CMOS Data
Step 1: Turn off your computer and unplug the power cord.
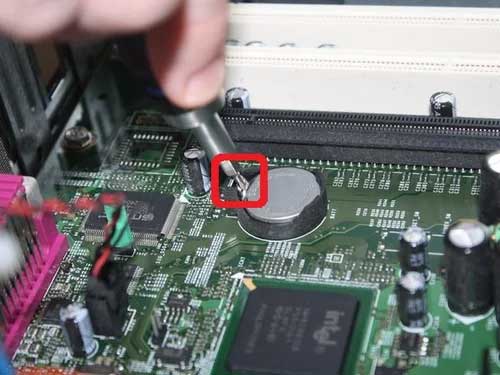
Step 2: Locate the coin-sized battery on the motherboard. Remove it and wait for a minute, then reinsert it. This will clear all CMOS data and reset the BIOS settings to default.
Step 3: Plug the power cord back in and turn on your computer.
Solution 4: Disconnect Peripheral Devices and External Components.
In some cases, the BIOS may struggle to verify important hardware information during startup due to invalid data sent to the DMI Pool by external devices or components. This can cause Windows to hang during startup. To resolve this issue, the simple and effective solution is to disconnect all peripheral devices and external components, then perform a restart. This step allows the BIOS to accurately recreate the hardware verification process and often leads to resolving the issue, enabling a successful boot.
Solution 5: Reset Windows
Resetting Windows involves undoing all changes made to your computer and returning it to its original state when it was first installed. This process proves beneficial when Windows encounters critical issues that cannot be easily resolved through regular troubleshooting methods.
However, it’s essential to understand that resetting Windows carries the risk of data loss. Therefore, before proceeding with the reset, it is advisable to recover all your important files from the malfunctioning computer using a reliable data recovery tool like EaseUS Data Recovery. This precaution ensures the protection of your valuable data before starting the reset process.
Solution 6: Repair Windows Using EaseUS Partition Master
If none of the previously mentioned methods resolve the "DMI Pool Data Verification" error and you still cannot boot your computer, it may be necessary to repair your Windows installation.
Step 1: Create a bootable USB drive for Windows: Create a bootable USB drive using the free EaseUS Partition Manager tool. This will enable you to install or repair your Windows operating system.
Download EaseUS Partition Manager
Create a bootable WinPE drive using EaseUS Partition Master
Step 1: Insert an


