


(Fix error 0x0000009C) Fixing error 0x0000009C: The Machine Check Exception (MCE) error, with the code 0x0000009C, is a common issue often linked to hardware problems in your computer. If you encounter this MCE error code, it's crucial to conduct a thorough check of your hardware components, including the CPU, RAM, SSD/HDD, and motherboard for potential issues. However, it's important to note that there are additional factors that can lead to this error.
In recent versions of Windows, such as Windows 11 and 10, this error is referred to as WHEA_UNCORRECTABLE_ERROR.
How to fix error 0x0000009C on Windows 11 and 10
Below, you'll find a set of solutions that can effectively resolve the Machine Check Exception (MCE) error (0x0000009C) and help you regain access to your Windows operating system as well as your valuable data. Follow these steps carefully to take control of your system again.
Important Note:
Before attempting any significant repairs on your Windows system, it's essential to recover your data and store it safely. EaseUS Data Recovery Wizard can help you recover data from a malfunctioning computer.
Whether you're facing the dreaded blue screen of death, startup failures, or boot issues, this tool allows you to boot your computer and recover your precious data effortlessly. So, make sure to use EaseUS Data Recovery Wizard to protect your files before proceeding with any repairs!
Note: The free version allows you to recover up to 2 GB of data.
Solution 1: Disconnect all peripherals and external or additional components.
Before proceeding, it is advisable to disconnect all external peripherals and additional hardware components and perform a simple system reboot. Often, issues can arise from external devices such as webcams, external SSDs, USB drives, printers, scanners, or Bluetooth devices.
Solution 2: Check and replace hardware.
As mentioned earlier, blue screen errors typically stem from hardware failures, so resolving this issue often involves replacing faulty hardware components like RAM, SSD, CPU, or motherboard. You can identify problematic hardware accurately using your operating system through the following methods:
Use Performance Monitor
Step 1: Click on the Start menu and search for "Performance Monitor" and open it. Alternatively, you can open it via the Run dialog. Type "perfmon" in the Run window and press "OK" to open it.
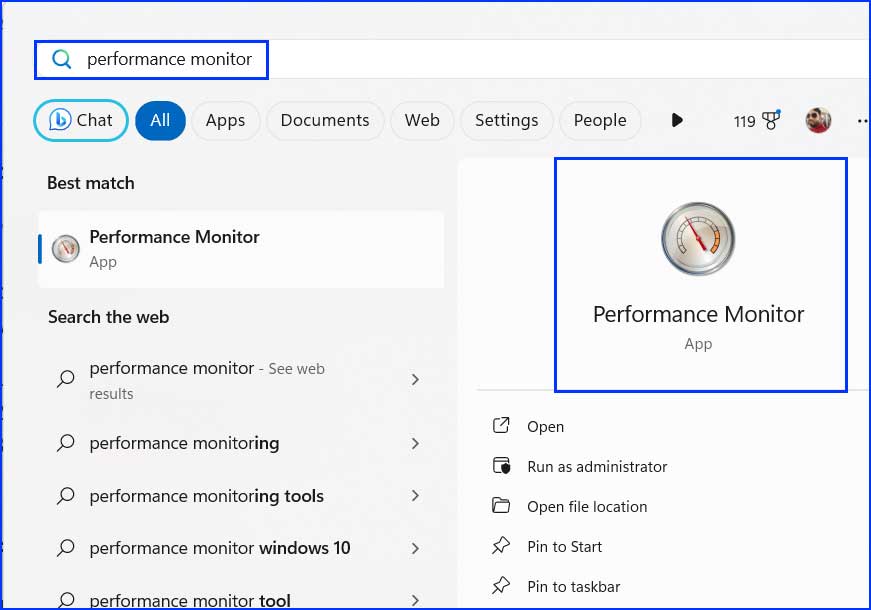
Step 2: In "Performance Monitor," you can analyze hardware performance by reviewing the displayed reports. Just click on the "Resource Monitor" link to access and open "Resource Monitor."
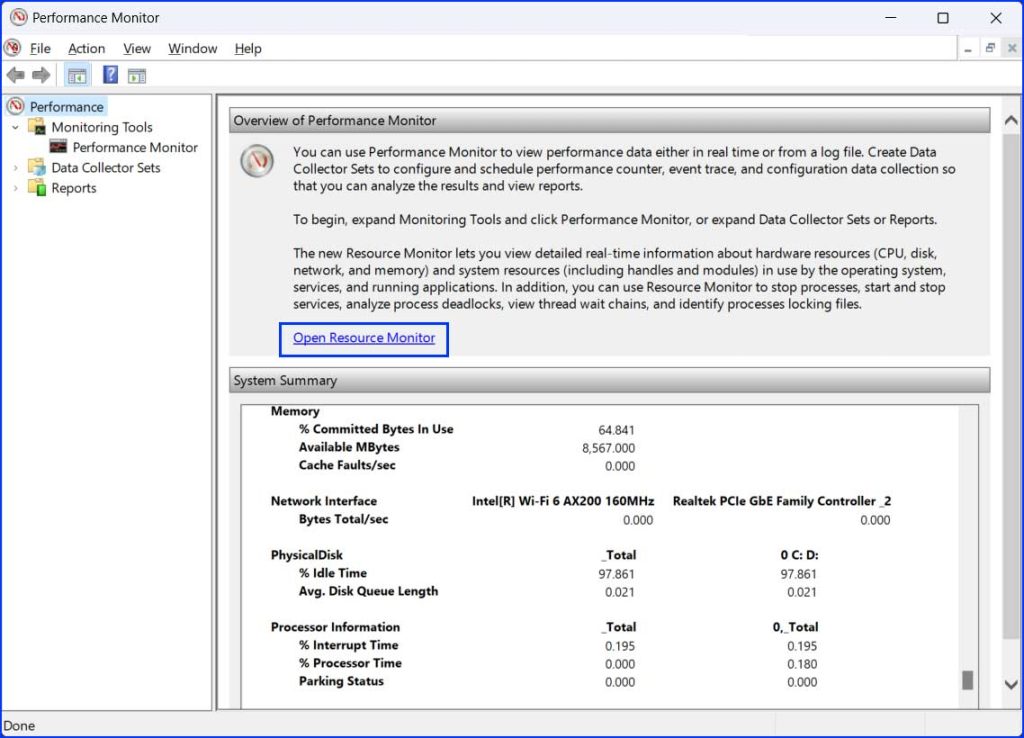
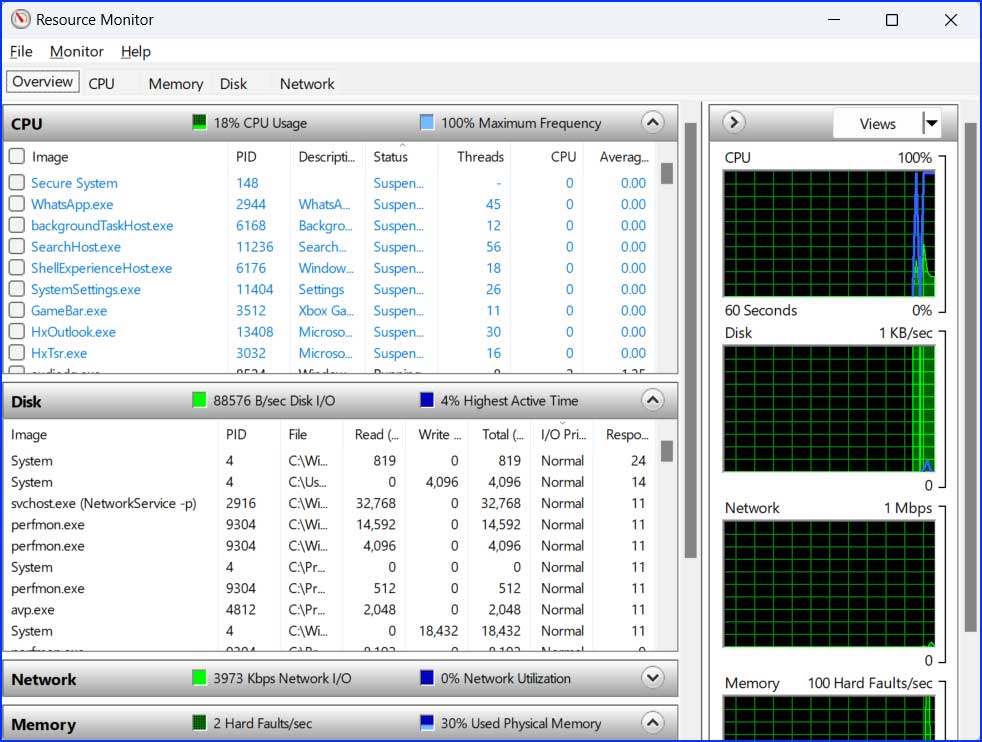
Step 3: In "Resource Monitor," you can diagnose the graphical representation of the actual resource usage of your system. This allows you to identify what is currently using your system's resources.
Run the Memory Diagnostic Tool
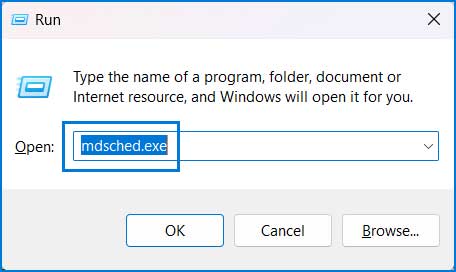
Step 1: Open the Run dialog by pressing the Windows key + R. Type mdsched.exe and press Enter.
Step 2: Click on "Restart now and check for problems (recommended)."
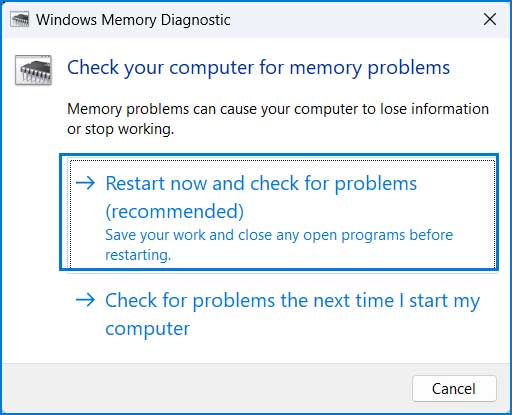
Step 3: The memory testing process will begin upon restart.
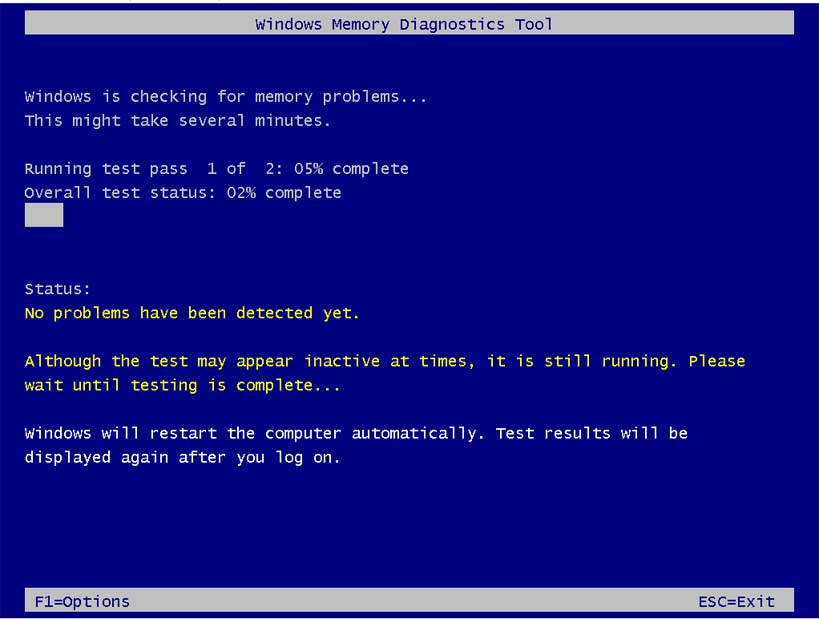
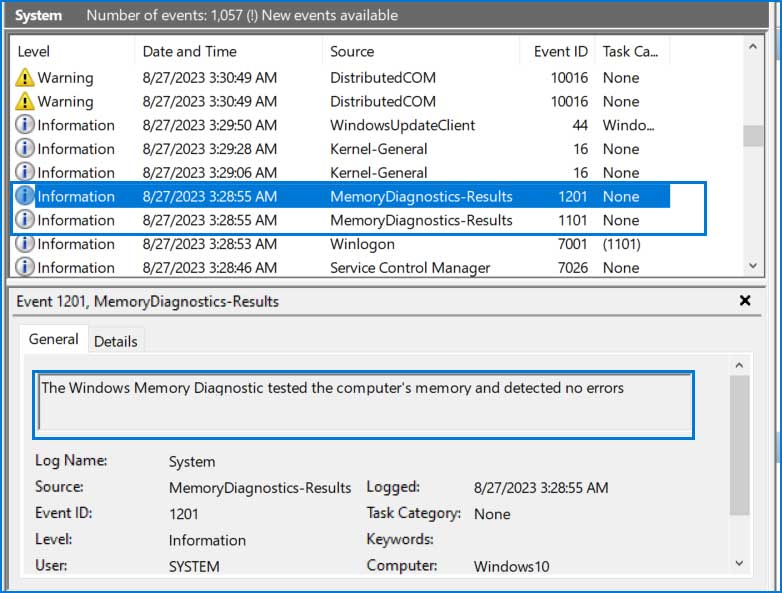
Step 4: The test results will be displayed after logging into your computer. If the results are not shown, you can view them in the Event Viewer application.
1. Click on the Start menu. Search for Event Viewer and open it.

2. Expand Windows Logs → System.
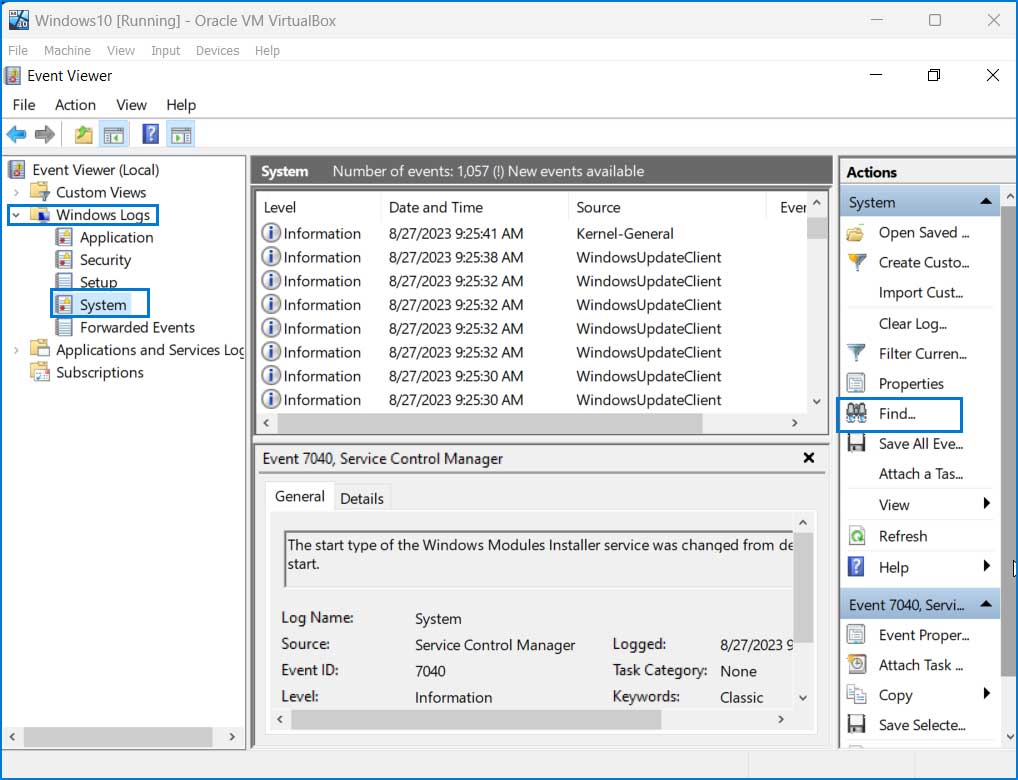
3. Click the "Find" button and search for Memory Diagnostic.
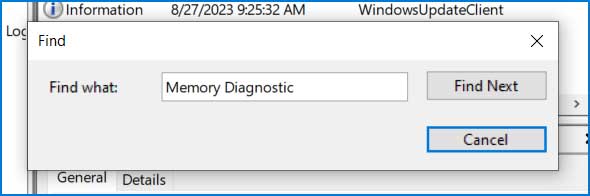
4. You will see the results of the memory diagnostic.
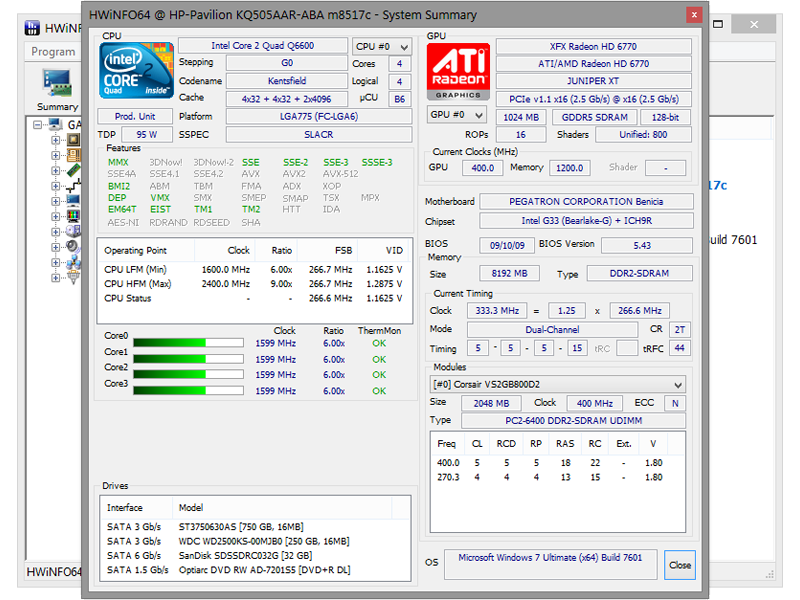
Use HWiNFO Tool (Free).
HWiNFO is a free hardware diagnostic tool that provides you with a detailed report on the hardware installed on your computer. Look for this tool online and download it from the official website.
Solution 3: Uninstall recently installed drivers and programs in Safe Mode.
Try booting your computer in Safe Mode. Safe Mode prevents the loading of drivers and third-party software, effectively bypassing potential software conflicts and driver failures.
Boot your computer in Safe Mode
Step 1: Boot your computer using Windows installation media. The Windows installation wizard will open. Click Next.
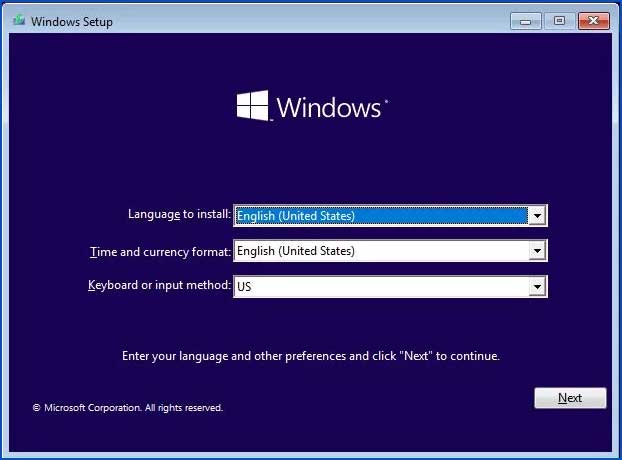
Windows Installation
Step 2: Select Repair your computer.
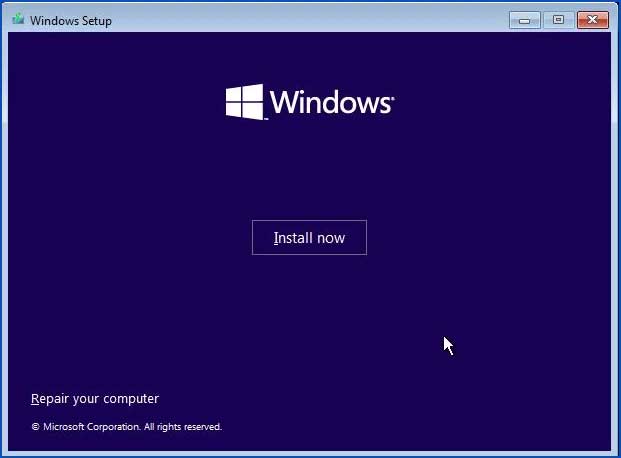
Windows Installation - Step 2
Step 3: The Advanced Startup Options or Windows Recovery Environment will open. Go to Troubleshoot.
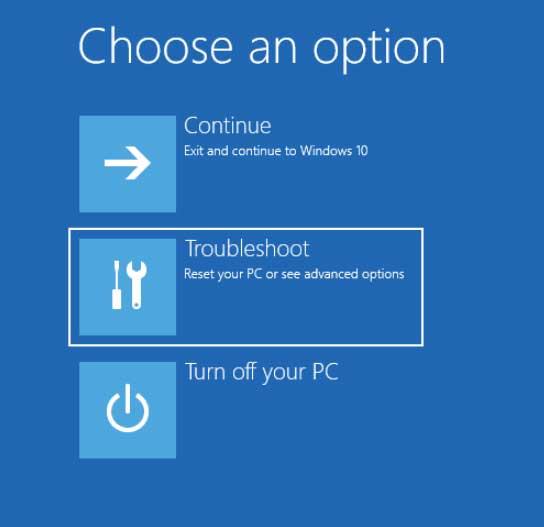
Troubleshoot in the Advanced Startup Options menu for Windows 10 and 11
Step 4: Select Advanced options.
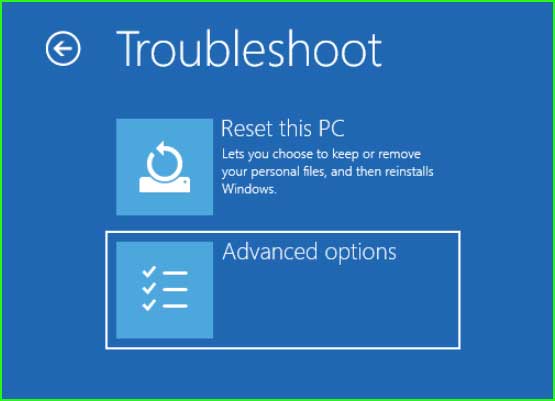
Advanced options for Windows 10 and 11
Step 5: Select Startup Settings.
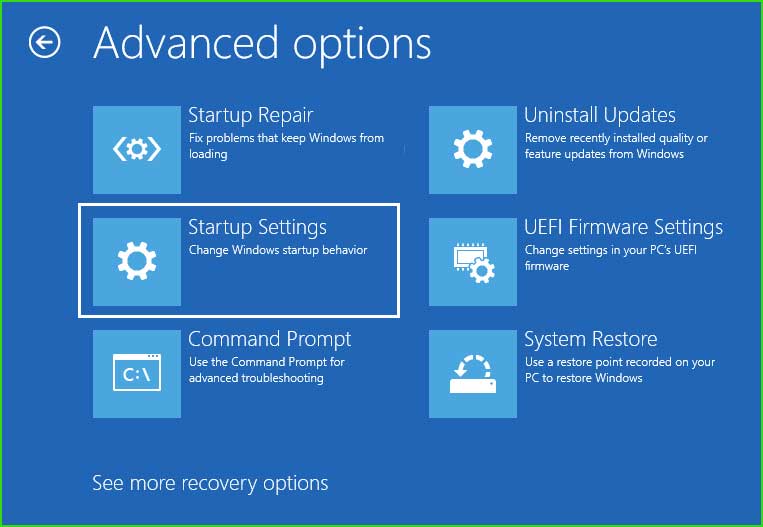
21_Startup Settings
Step 6: Click the Restart button to enable Safe Mode.
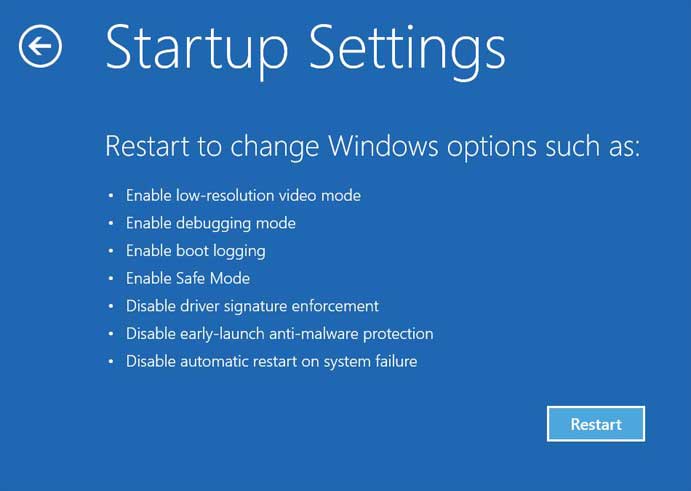
Step 7: Once your computer is running in Safe Mode, uninstall any recently added games, drivers, and programs.
Solution 4: Roll back incomplete Windows updates.
A sudden power outage during the installation of Windows updates can lead to the Machine Check Exception error - 0x0000009C. Additionally, newly installed updates may cause the same issue. It's wise to address this problem by uninstalling recently installed updates and checking if the error is resolved.
Solution 5: Run the system repair command.
The Windows operating system includes built-in commands that are effective in addressing system failures. These commands, SFC, CHKDSK, and DISM, can be run to repair corrupted system files, address disk errors, and resolve issues related to Windows image corruption.
Run the SFC, CHKDSK, DISM commands
Step 1: Boot your computer using Windows installation media. The Windows installation wizard will open. Click Next.
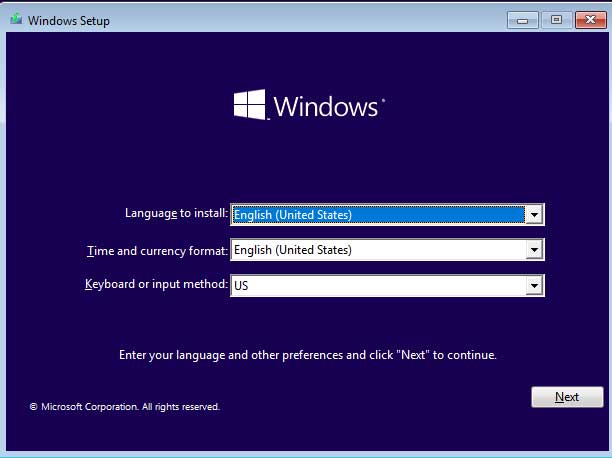
Windows Operating System Installation
Step 2: Select Repair your computer.
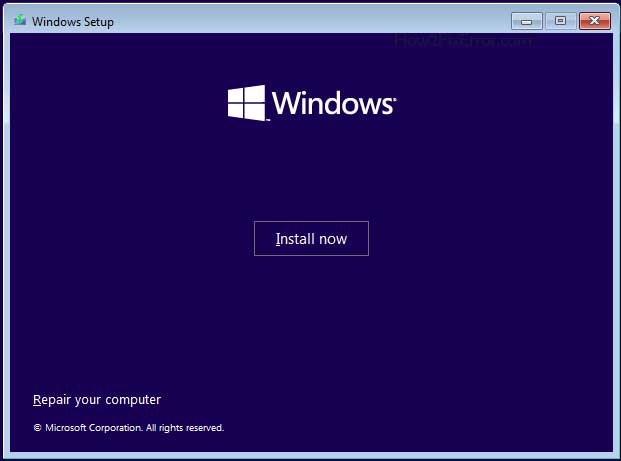
Repair your computer option Windows 10 and 11
Step 3: The Advanced Startup Options or Windows Recovery Environment will open. Click Troubleshoot.
Troubleshoot in the Advanced Startup Options menu for Windows 10 and 11
Step 4: Select Command Prompt.
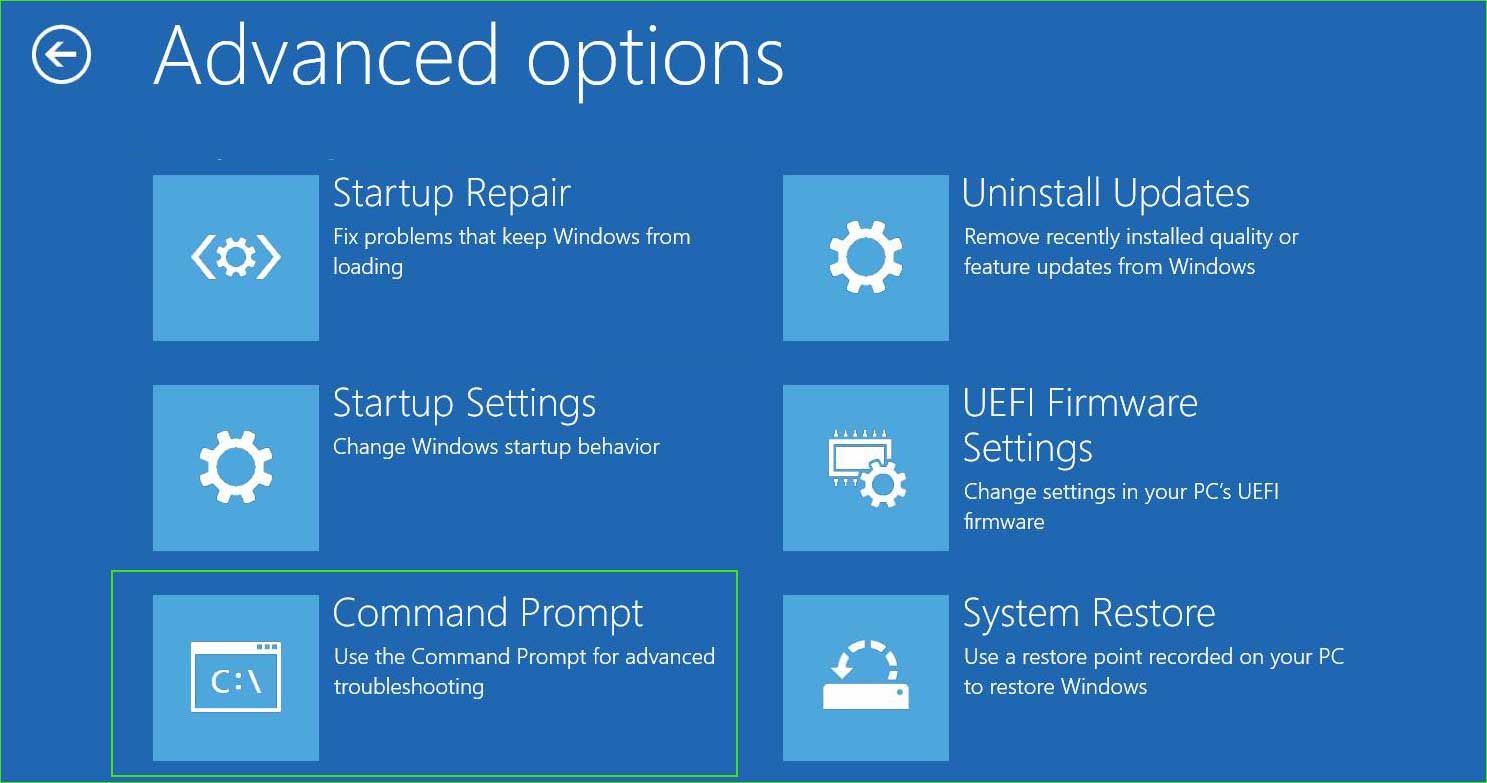
open_command_prompt in the Advanced Startup Options
Step 5: Now run the following commands one by one.
System File Checker tool
sfc /scannow
Second. Run the Dism command
Dism /Online /Cleanup-Image /CheckHealth
Dism /Online /Cleanup-Image /ScanHealth
Dism /Online /Cleanup-Image /RestoreHealth
Third. Run the disk check utility.
chkdsk C: /f /x /r
Solution 6: Use System Restore to restore your system.
The System Restore feature allows you to revert your system to a previously known stable configuration, effectively resolving recent issues. It's important to note that this feature requires a previously created system restore point. Fortunately, Windows automatically creates restore points before making changes such as driver installations, software installations, or Windows updates.
System Restore - Step by Step
Step 1: Open the Advanced Startup Options or Windows Recovery Environment. Go to Troubleshoot ➜ Advanced options ➜ System Restore.
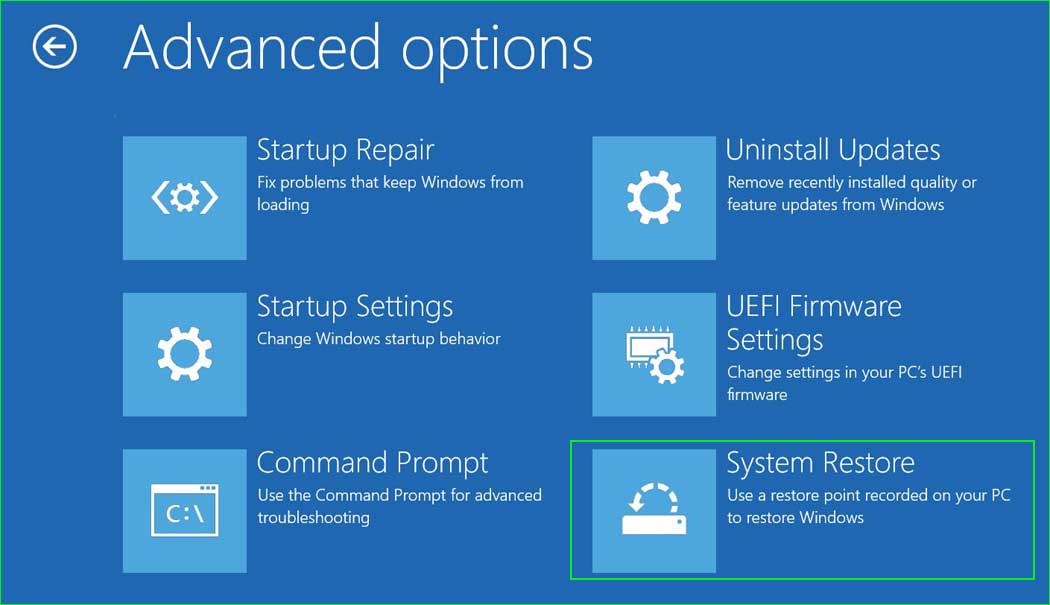
system_restore
Step 2: Click Next and select a date.
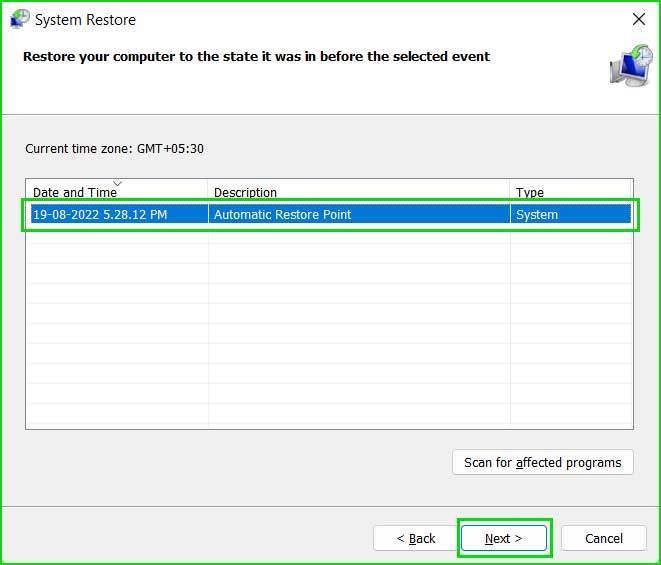
Select System Restore from the list
Step 3: Click "Finish" to start the restoration process.
Solution 7: Perform a Startup Repair.
Another effective option for addressing Windows startup issues and resolving the Machine Check Exception error - 0x0000009C is to use the "Startup Repair" feature. To use this feature, it's essential to create a USB drive for Windows installation.
Startup Repair - Step by Step


