

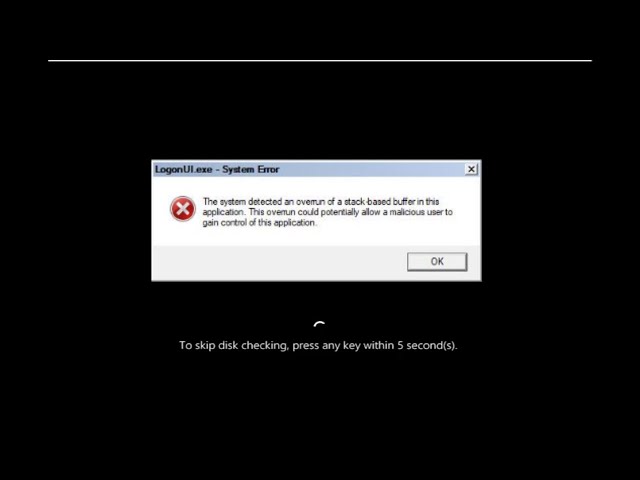
Troubleshooting LogonUI.exe and how to fix it: LogonUI.exe is a crucial component of the Windows 11 operating system responsible for managing the graphical user interface during the login process.
When LogonUI.exe encounters errors or issues, it can lead to login problems, system instability, and various other complications.
If you are currently experiencing LogonUI.exe errors on your Windows 11, this comprehensive guide will assist you in troubleshooting LogonUI.exe and how to fix it.
Before diving into the troubleshooting steps, it is essential to take preventive measures.
Make a backup of your important data and create a system restore point.
This ensures that you can easily revert your system in case any complications arise during the troubleshooting process for LogonUI.exe.
Cause:
In fact, "LogonUI.exe: Application Error" is a serious issue in Windows that disables the login screen, preventing users from accessing their Windows accounts.
This error can occur for various reasons, including:
- Missing DLL files: The absence of necessary Dynamic Link Library (DLL) files can lead to this error.
- Graphics driver issues: Disabled or incompatible graphics drivers can interfere with the LogonUI.exe process.
- Interrupted update installation: If the installation of a Windows update is interrupted or incomplete, it may result in this error.
- Improper system shutdown: A sudden power outage or system crash during shutdown or startup processes can corrupt essential system files, including LogonUI.exe, leading to the error.
- Virus/malware infection: If your Windows system is infected with a virus or malware, these malicious programs can target and damage critical system files like LogonUI.exe, ultimately preventing users from logging in.
- Incompatible drivers and software: Installing drivers or software that are not compatible with your system can cause LogonUI.exe errors.
- Considering these factors is crucial when diagnosing and troubleshooting the "LogonUI.exe: Application Error." An effective solution often requires a multifaceted approach that takes into account various potential causes and solutions.
Now, let's explore the steps to resolve LogonUI.exe errors on Windows 11.
Solution 1: Try Safe Boot
When facing a LogonUI.exe error, accessing the Windows login screen in normal mode becomes challenging. To address this issue, you can use Safe Mode to log in and then proceed with the necessary repair steps.
Boot your computer in Safe Mode
Step 1: Boot your computer using Windows installation media. The Windows installation wizard will open. Click Next.
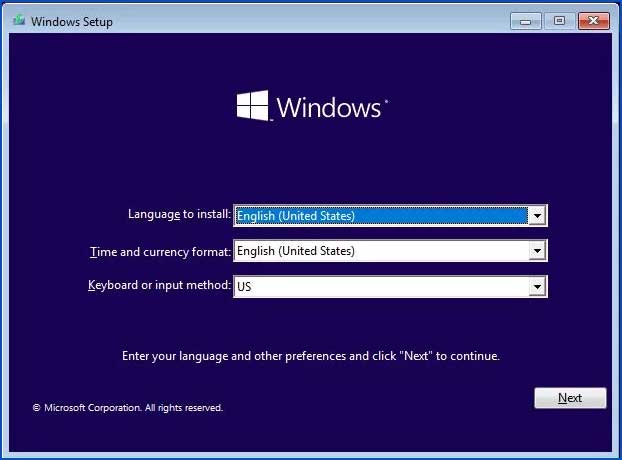
Windows Installation
Step 2: Select Repair your computer.
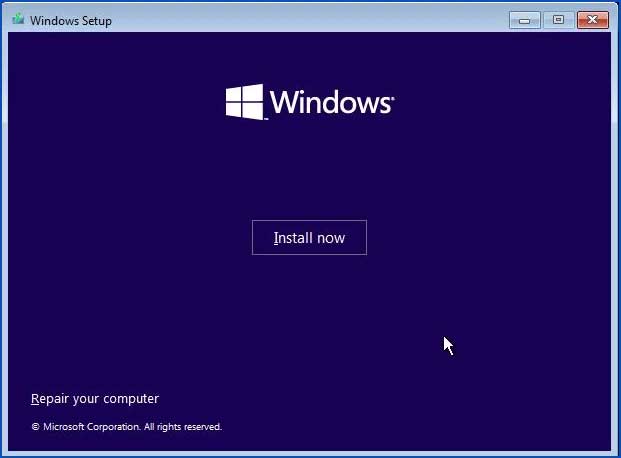
Windows Installation - Step 2
Step 3: The Advanced Startup Options or Windows Recovery Environment will open. Go to Troubleshoot.
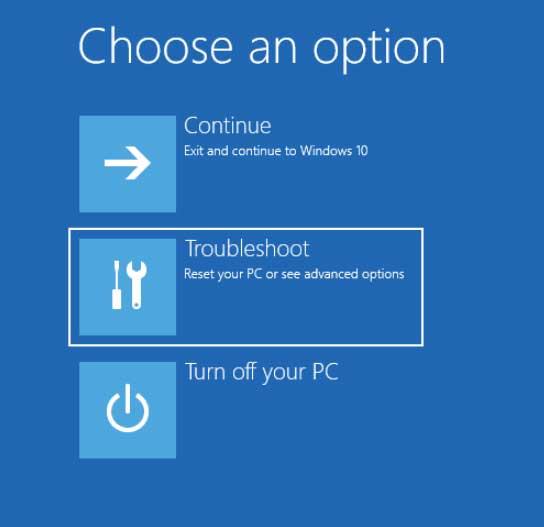
Troubleshoot in the Advanced Startup Menu for Windows 10 and 11
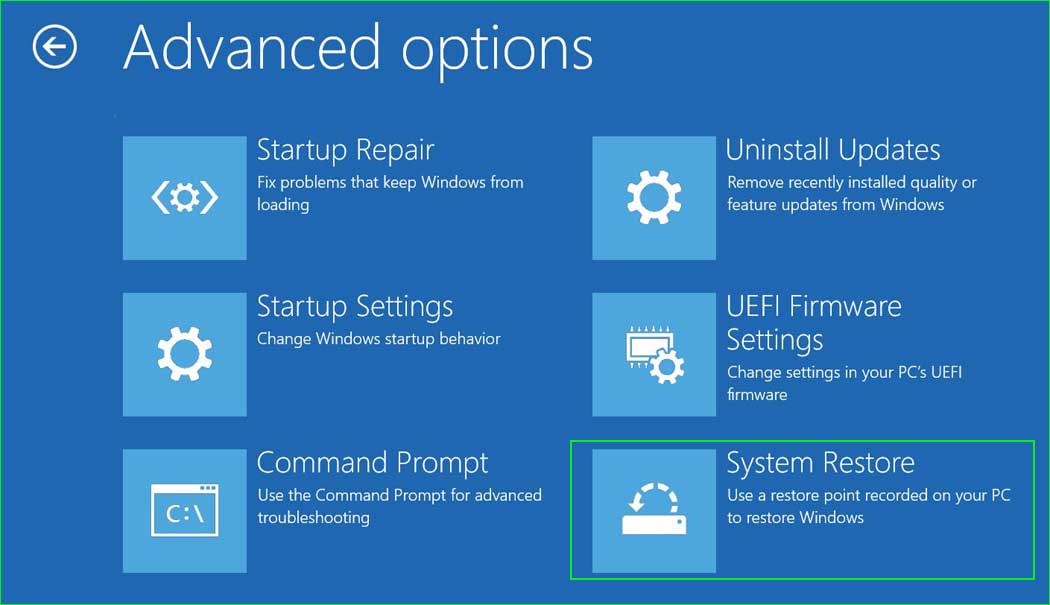
Step 4: Select Advanced options.
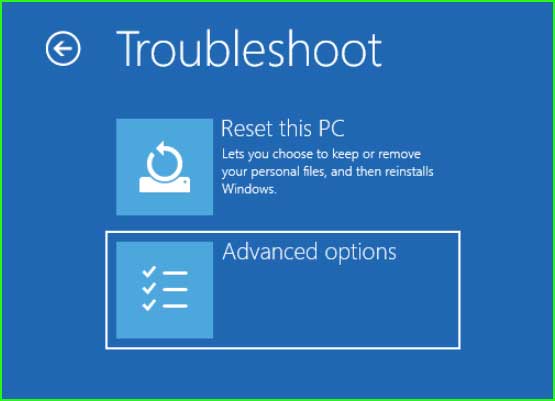
Advanced options for Windows 10 and 11
Step 5: Select Startup Settings.
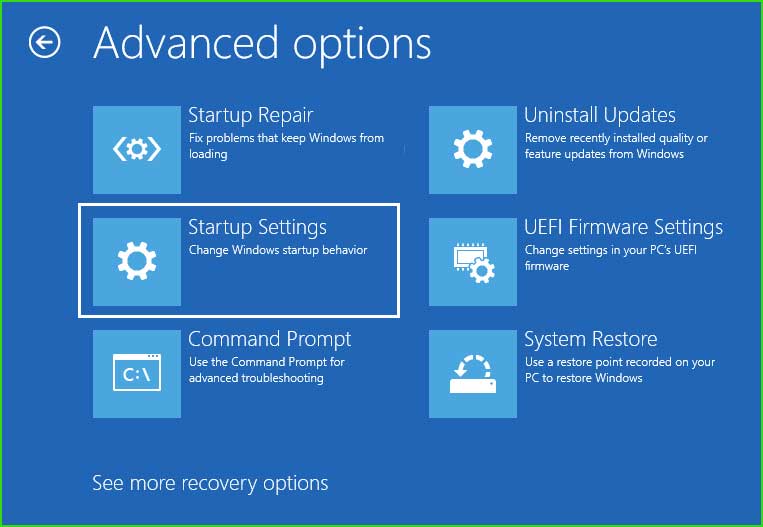
21_Startup Settings
Step 6: Click the Restart button to enable Safe Mode.
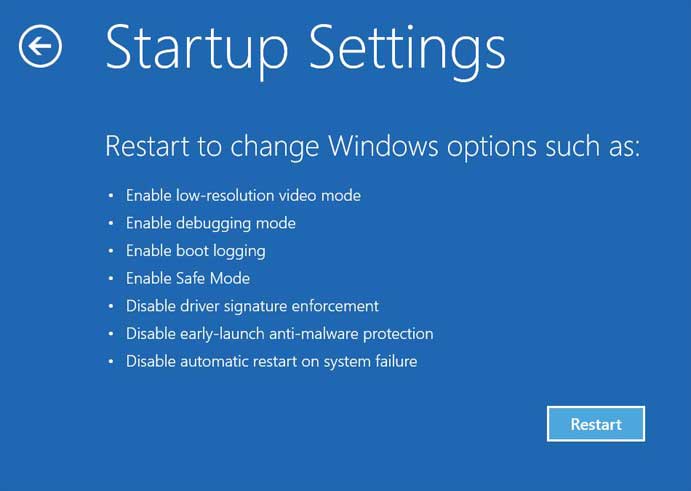
Step 7: Once your computer is running in Safe Mode, uninstall any recently added games, drivers, and software.
Perform the following troubleshooting steps in Safe Mode.
1. Run the System Repair Command
SFC/Chkdsk/Dism - Step by Step
Step 1: Open Command Prompt as Administrator.
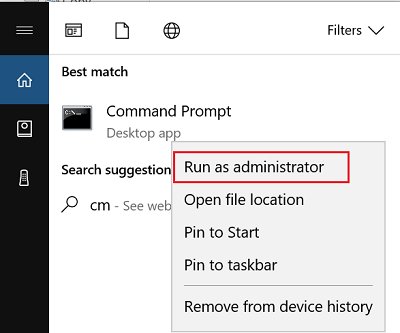
Open Command Prompt as Administrator in Windows 8, 10, and 11
Step 2: Now run the following commands one by one.
First. System File Checker tool
sfc /scannow
Second. Run the Dism command
Dism /Online /Cleanup-Image /CheckHealth
Dism /Online /Cleanup-Image /ScanHealth
Dism /Online /Cleanup-Image /RestoreHealth
Third. Run the Disk Check utility.
chkdsk /f c:
You will see the message:
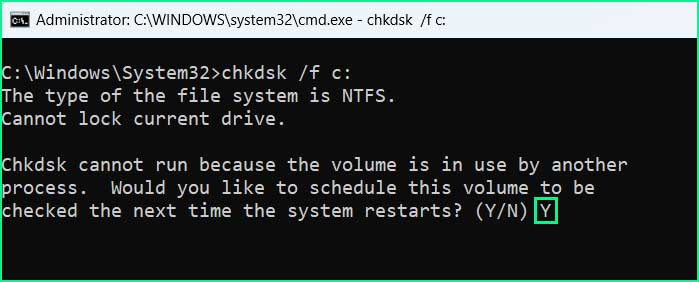
Chkdsk cannot run because the volume is in use by another process. Would you like to schedule this volume to be checked the next time the system restarts? (Yes / No)
Press Y and hit Enter. The disk check will start the next time your computer boots up.
2. Remove unused applications and drivers.
Uninstall Program
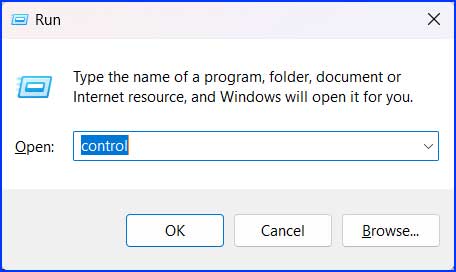
Step 1: Open Control Panel. Type "control" in the Run dialog and press Enter.
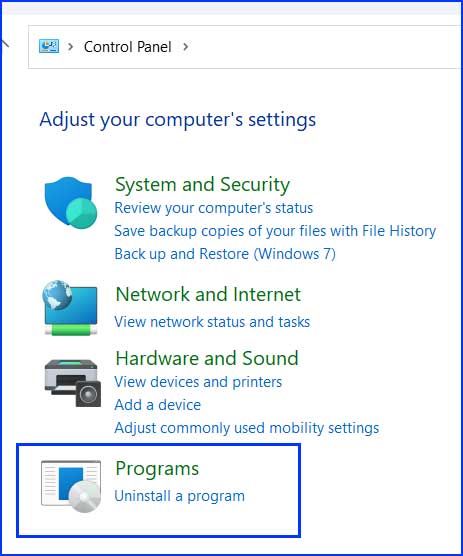
Step 2: Click on "Uninstall a program" under the Programs section.
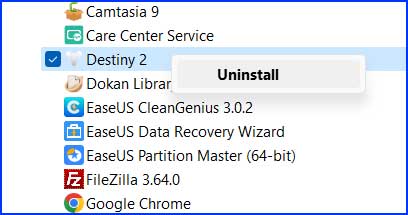
Step 3: Right-click on any unused or duplicate applications and select Uninstall.
3. Update the driver
Update Driver - Step by Step
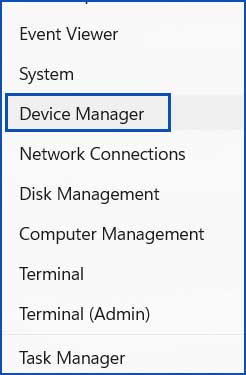
Step 1: Open Device Manager. Press Windows Key + X and click on "Device Manager."
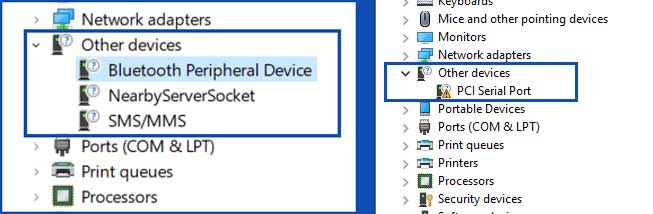
Step 2: Look for the driver that has a yellow exclamation mark or warning on it.
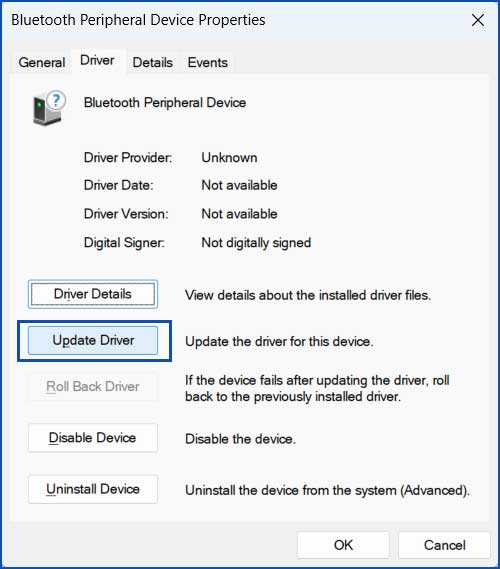
Step 3: Double-click on the driver to open Properties. Go to the Driver tab and click on the Update Driver button.
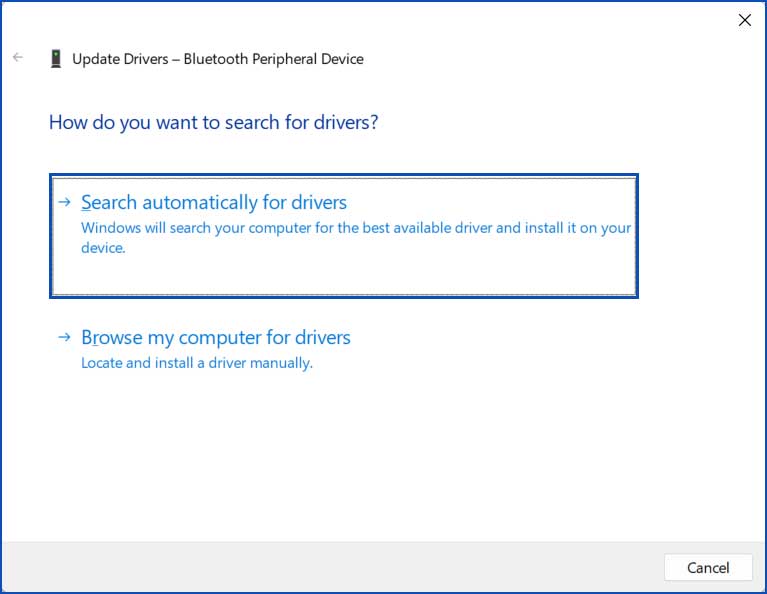
Step 4: Select "Search automatically for drivers."
Step 5: Follow the prompts and complete the process.
Step 6: If you receive the message "Windows could not install your driver," use another effective third-party tool to update/install all your drivers.
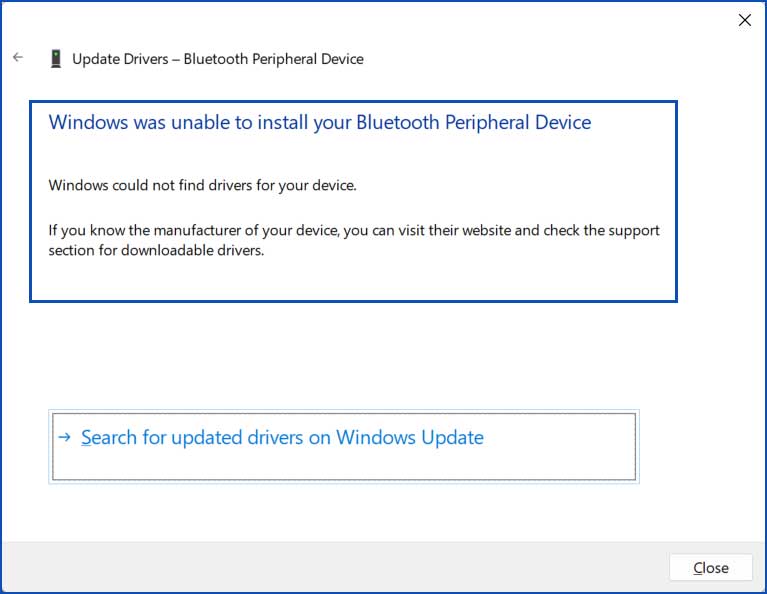
4. Complete Windows Update
Complete Windows Updates - Step by Step
1. Windows Updates
Step 1: Right-click on Start → Settings.
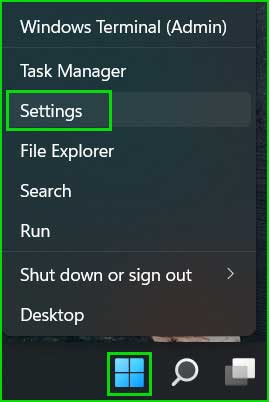
Open Windows 11 Settings
Step 2: Scroll down to find Windows Updates and then click Check for updates.
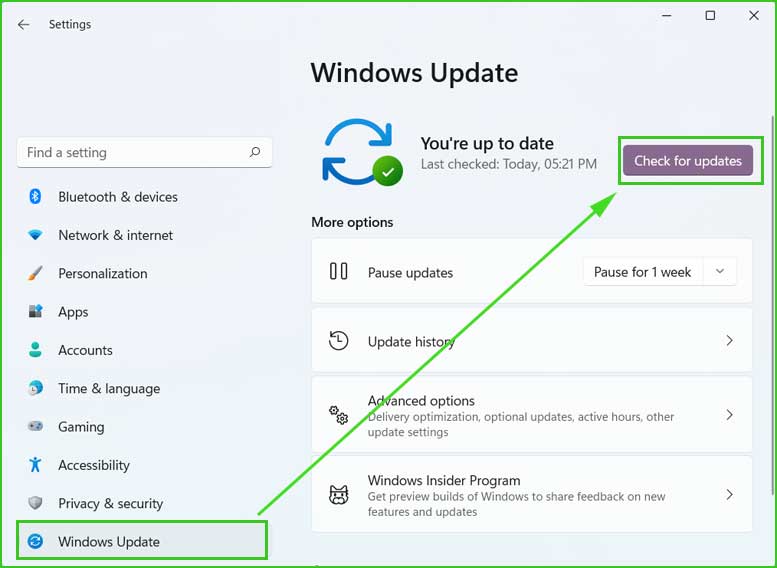
windows_updates
2. Update the application
To update the installed application on your computer, you can follow these steps.
Step 1: Open Microsoft Store. Click on your profile picture at the top of the MS Store, then select Settings.
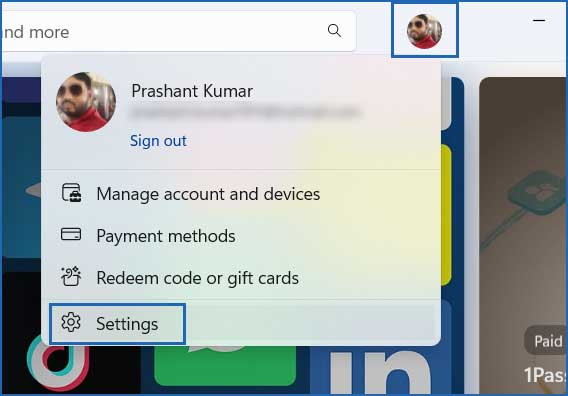
Open MS Store Settings
Step 2: Turn on app updates.
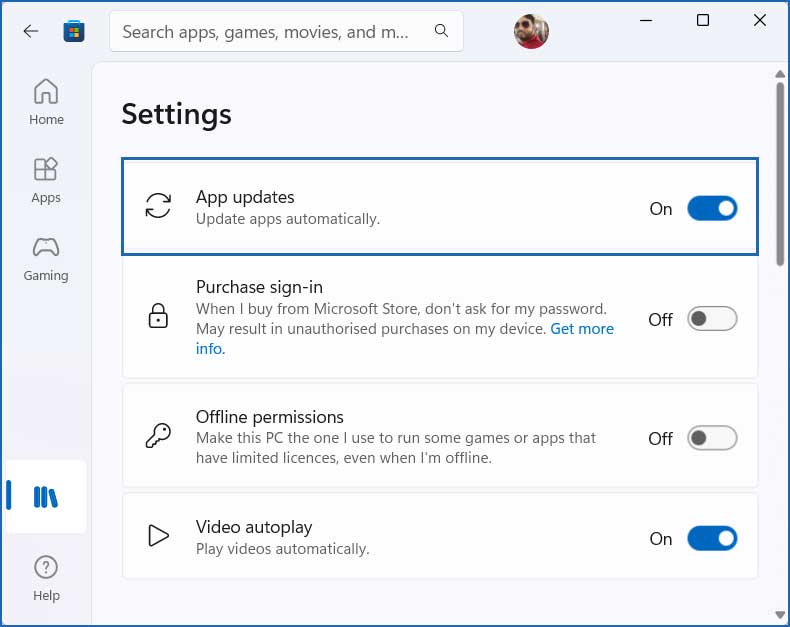
Enable automatic app updates
Step 3: Open the Microsoft Store Library. To access your Microsoft Store library, simply click on the library icon on the left sidebar. Once there, you will find a button called "Get updates." Click this to start searching for the latest updates available for the applications you have installed.
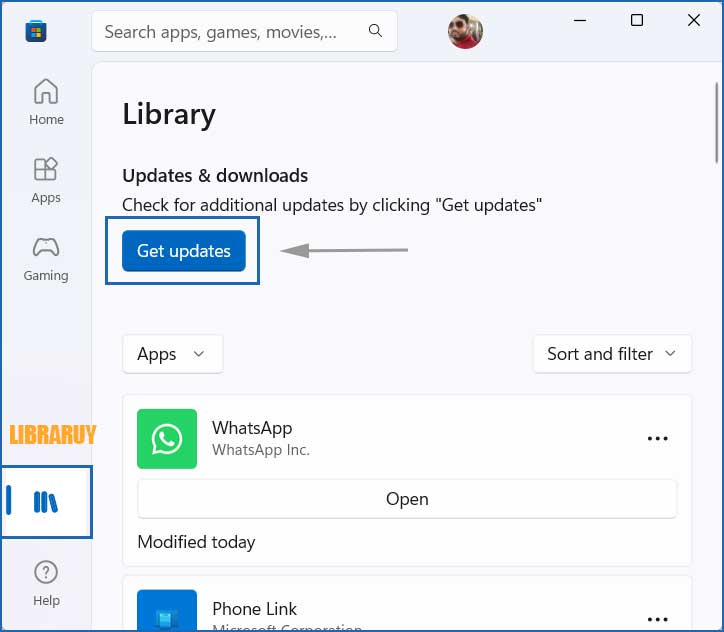
Step 4: For third-party applications, check for the updated version on its official website and install it.
3. Update the driver
Step 1: Open Device Manager. Right-click on the Start menu and select Device Manager.
Open Device Manager
Step 2: Manually expand all drivers and look for the driver with a yellow exclamation mark. Right-click on it and select Update.
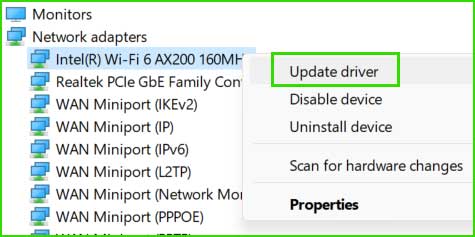
update_driver
5. Disable the graphics card
Disable/Uninstall Graphics Driver
Step 1: Open Device Manager. Right-click on the Start menu and select Device Manager.
Open Device Manager
Step 2: Expand Display Adapters. Select the graphics card, right-click on it, and then select Disable device or Uninstall device.
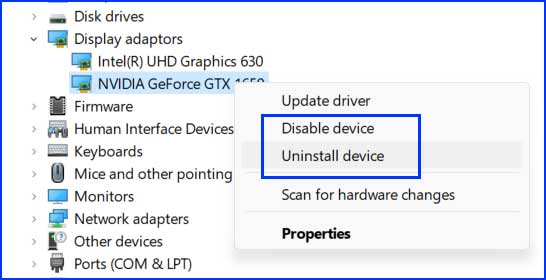
Solution 2: Perform a System Restore
Using the "System Restore" feature is often a reliable solution to reverse recent changes in Windows and eliminate critical errors like "LogonUI.exe: Application Error." To perform a system restore, follow these steps:
System Restore - Step by Step
Step 1: Open the Advanced Startup Options or Windows Recovery Environment. Go to Troubleshoot ➜ Advanced options ➜ System Restore.
system_restore
Step 2: Click Next and then select a


