

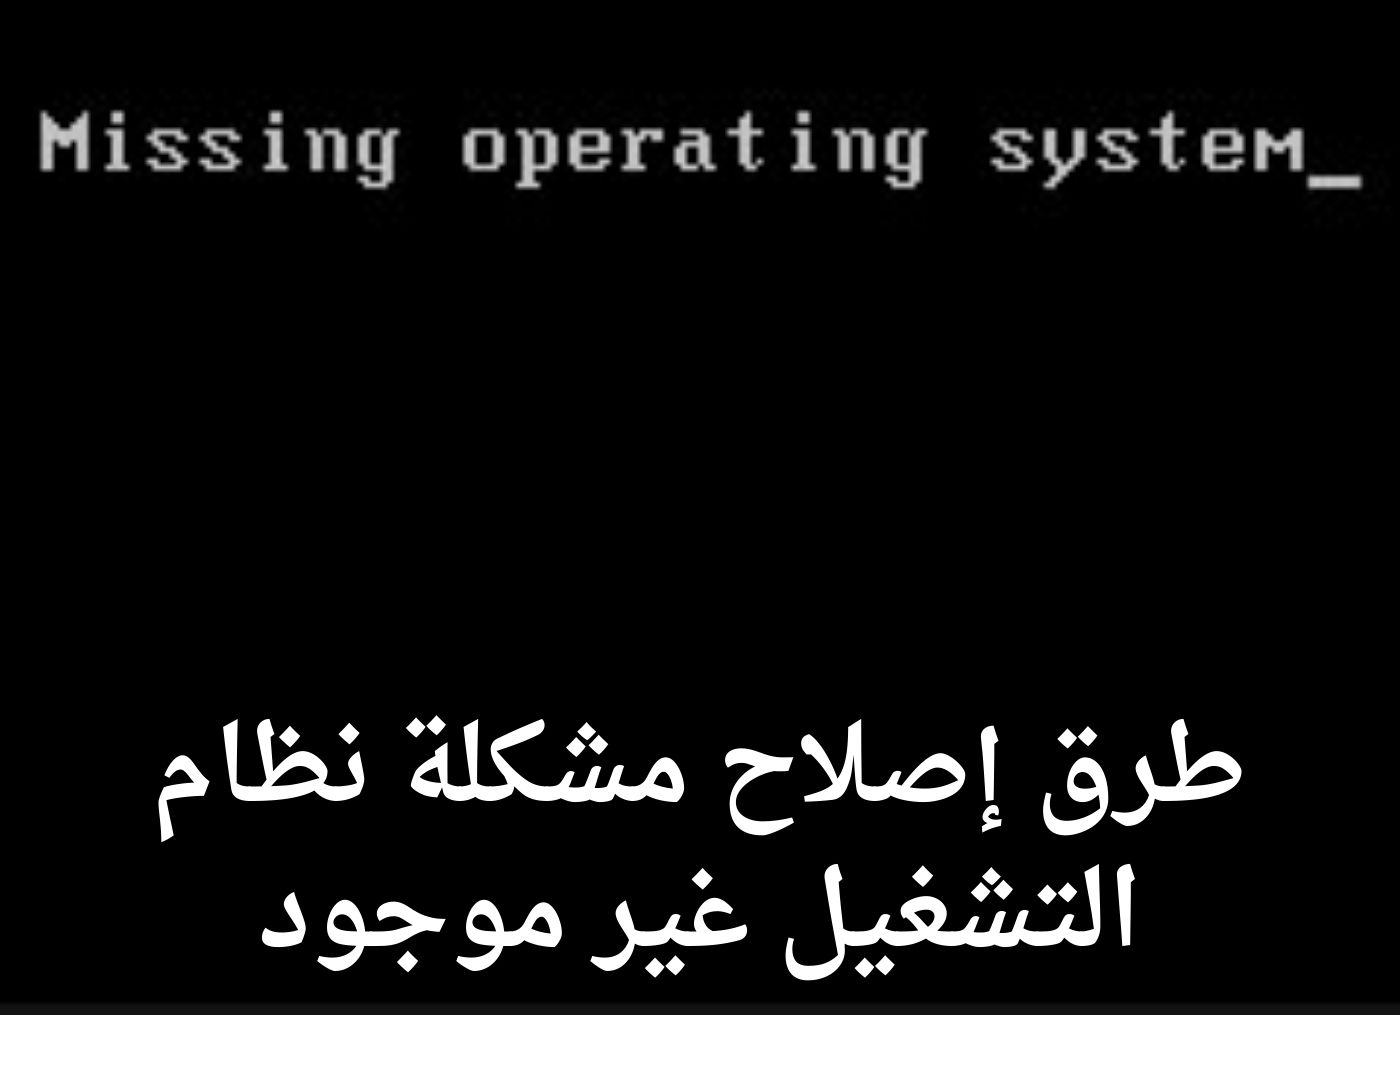
Ways to fix the problem of operating system not found: Imagine this scenario: you turn on your computer, and you are greeted by an ominous message on a black screen - "Operating System Not Found" or "Missing Operating System."
Frustration escalates, and panic begins to set in. What does it mean?
Have your data disappeared?
Is your computer beyond repair?
Don't worry, this article will take you on a journey into the depths of computer errors, exploring the causes of these alarming messages and their solutions.
The "Operating System Not Found" error messages can appear for several reasons. Although they seem devastating, they do not necessarily mean that your computer has suffered irreparable damage. Here are some common causes:
Corrupted boot data.
An incorrect boot device set in the BIOS.
A faulty or damaged cable connecting the HDD/SSD to the motherboard.
The HDD/SSD is completely or nearly damaged.
The BIOS does not detect the hard drive.
An incorrect partition is activated.
Troubleshooting: "Operating System Not Found" or "Missing Operating System."
Before you panic and rush to the nearest repair shop, try some steps from the ways to fix the problem of operating system not found to resolve the issue:
Method 1: Repair corrupted boot data or MBR using EaseUS.
The Master Boot Record (MBR), also known as the MBR file, is an essential part of any bootable drive that contains basic instructions on how to start your computer.
Its role in the boot process is vital, ensuring that your operating system loads smoothly.
However, if the boot data within the MBR becomes corrupted, your system will be unable to locate the operating system, resulting in the frustrating "Missing Operating System" error.
But don't worry; fixing this issue is easier than you think. Just follow the methods below.
Repair MBR using EaseUS
Step 1: Create a bootable USB drive using EaseUS. Launch EaseUS Partition Master, click on "Bootable Media" on the toolbar. Select "Create Bootable Media".
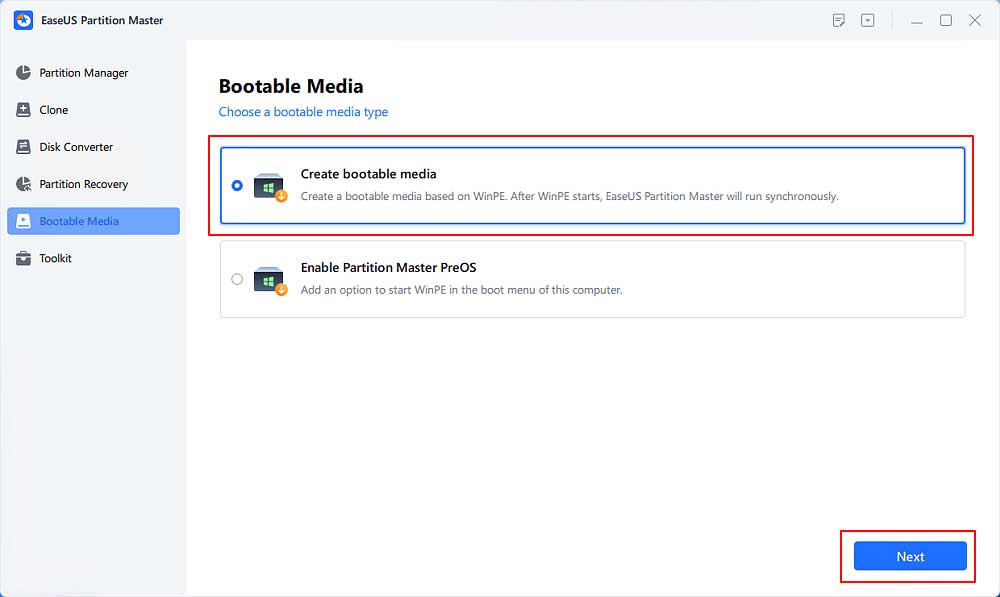
EaseUS Bootable Disk-1
Step 2: Boot your computer using the bootable USB drive.
Step 3: Click on "Toolbox" and select "Rebuild MBR".
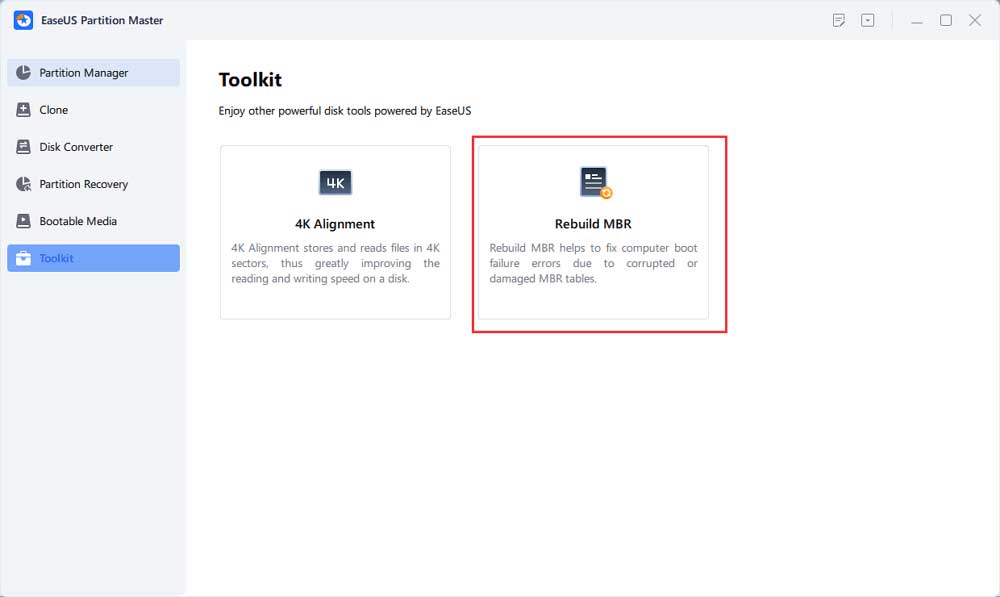
Repair EASEUS MBR
Method 2: Run the Fixboot command in Command Prompt.
To manually repair the Master Boot Record, you need a bootable WinRE device. If you don't have a bootable device, you can create one as follows:
Create a bootable device running Windows.
Manually repair the MBR - step by step
Step 1: Boot your computer using Windows installation media. The Windows installation wizard will open. Click Next.
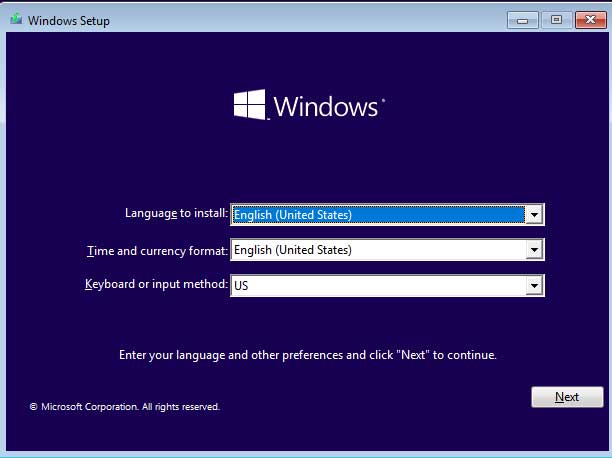
Install Windows Operating System
Step 2: Select Repair your computer.
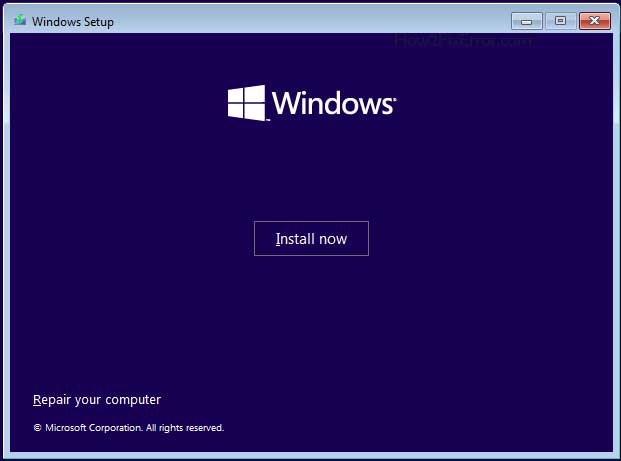
Repair your computer option for Windows 10 and 11
Step 3: The Advanced Startup Options or Windows Recovery Environment will open. Click on Troubleshoot.
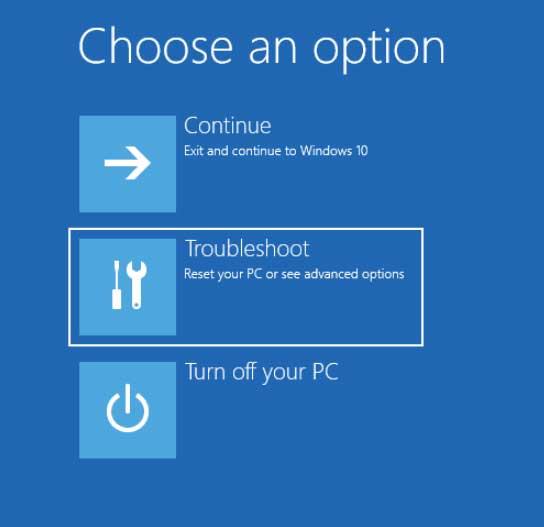
Troubleshoot in the Advanced Startup Options menu for Windows 10 and 11
Step 4: Select Command Prompt.
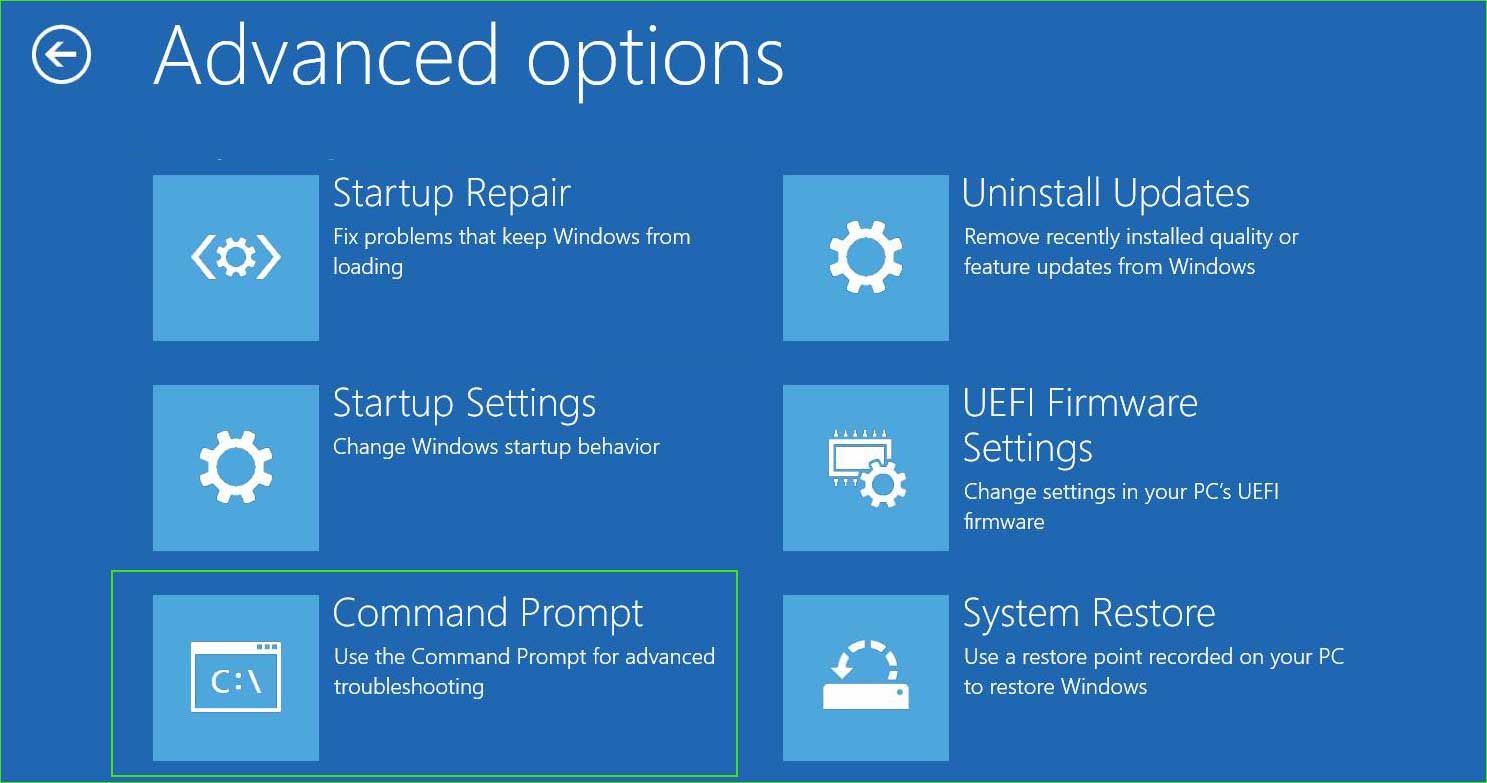
open_command_prompt in Advanced Startup Options
Step 5: Type the following commands and press Enter to execute them.
bootrec /fixmbr
bootrec /fixboot
bootrec /RebuildBcd
Step 6: Now restart your computer, and you won't see the Bootmgr is missing error message at boot time.
Method 3: Set the bootable device as primary in BIOS
Selecting an incorrect drive in the BIOS is a common reason behind the "Operating System Not Found" error on many computers and laptops, including brands like Lenovo, HP, Dell, Asus, and Acer.
This situation can also lead to other errors such as rebooting and selecting the correct boot device, or no bootable device found.
To resolve this issue, you need to check the storage drive that is set as the primary boot device in the BIOS.
If you find that a non-Windows operating system drive is selected, change it to the correct drive that contains Windows 11/10/8.
Check the boot order in BIOS - step by step
Step 1: Restart your computer and access the BIOS or UEFI settings.
The process varies by computer, but it usually involves pressing the "Delete," "F2," "F10," or "ESC" keys during startup.
Step 2: Locate the "Boot" or "Boot Order" section in the BIOS/UEFI menu.
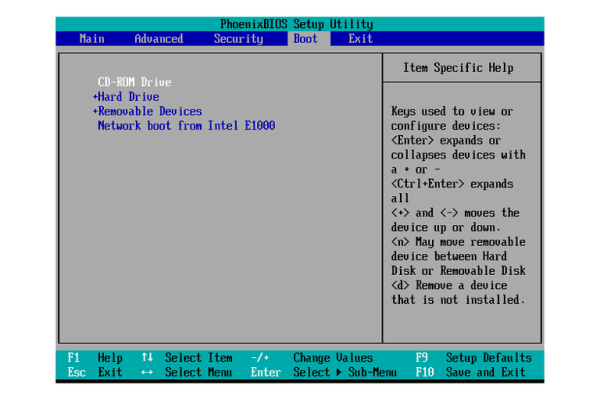
2_bios_boot_option
Step 3: Set the primary boot device to the drive where Windows 11/10 is installed. This is usually the internal hard drive or SSD.
Step 4: Save the changes and exit the BIOS/UEFI settings. Your computer will attempt to boot from the selected device.
Method 4: BIOS does not detect the hard drive
If the BIOS fails to detect the primary hard drive, you may encounter the aforementioned error. This issue can be caused by either a loose or damaged cable or a failing hard drive/SSD.
If there is a situation regarding the formatting of the hard drive, you can recover all your data from the formatted hard drive using EaseUS Data Recovery Wizard.
EaseUS Data Recovery Software
Recover data from over 2000 devices
Recover over 1000 types of files
Repair images, videos, and documents
Recover camera
Recover HDD/SSD/NAS/USB/memory card
Excellent recovery rate of up to 99.7%
Free download
Method 5: Set the primary partition as active
Set a partition as active using Diskpart
Step 1: Boot your computer using Windows installation media. The Windows installation wizard will open. Click Next.
Install Windows Operating System
Step 2: Select Repair your computer.
Repair your computer option for Windows 10 and 11
Step 3: The Advanced Startup Options or Windows Recovery Environment will open. Click on Troubleshoot.
Troubleshoot in the Advanced Startup Options menu for Windows 10 and 11
Step 4: Select Command Prompt.
open_command_prompt in Advanced Startup Options
Step 5: Now run the following commands one by one.
diskpart
list disk
select disk 0
Note: Here, select the disk wisely. Here 0 represents the disk number. Replace 0 with your primary partition number.
list partition
select partition 1
active
Method 6: Reset BIOS to factory default settings
To reset the BIOS to its default settings, follow these steps:
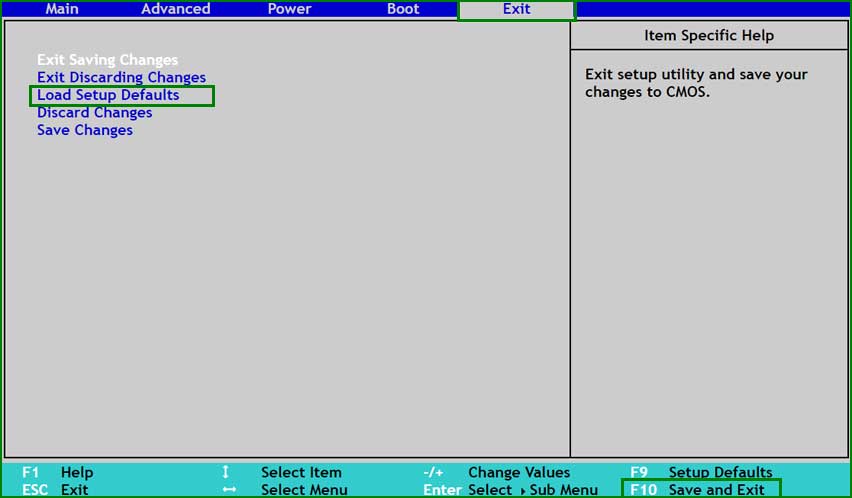
Reset BIOS/UEFI to default mode
Step 1: Open BIOS/UEFI settings.
Step 2: Go to the "Exit" tab → Select Load Setup Defaults. Press F10 to save and exit.
Pre


