


(How to Fix Critical Process Died 0x000000EF Issue in Windows 11/10) How to Fix the Critical Process Died 0x000000EF Issue in Windows 11/10:
The Critical Process Died 0x000000EF error is a type of Blue Screen of Death (BSOD) error that can occur before the system fully boots up.
When Windows encounters severe damage to its system files and services, it refuses to load and displays error messages on a blue screen during startup.
If you're facing this issue, keep reading this article. We will explain the solution in an easy-to-follow manner so you can resolve the problem on your own.
How to Fix the Critical Process Died 0x000000EF Issue in Windows 11/10
Fixing the Critical Process Died 0x000000EF error can be challenging, as it often indicates a serious problem with the Windows operating system. However, you can try the following steps to resolve it:
Solution 1: Try Safe Mode
If you can't start your computer due to this error, try booting into Safe Mode.
By entering Safe Mode, you can easily undo changes you made before the blue screen error appeared, such as uninstalling recent programs, drivers, updates, games, etc.
Boot your computer in Safe Mode
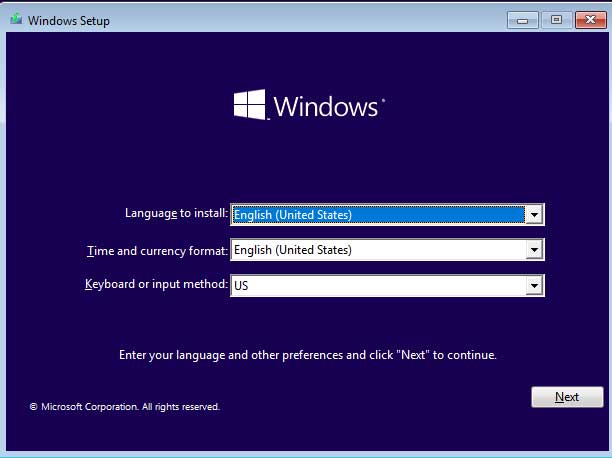
Step 1: You can use Windows installation media to boot your computer.
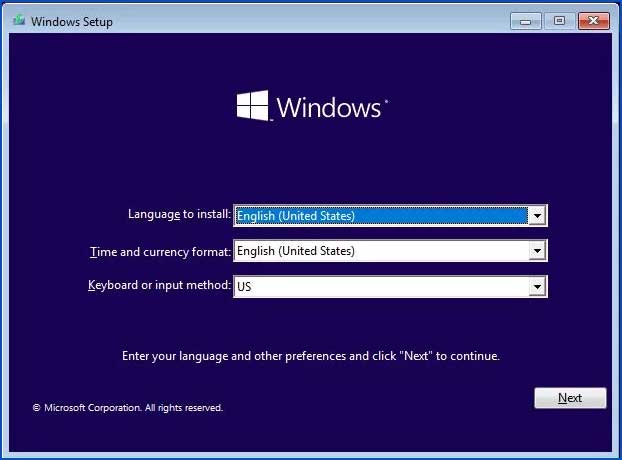
The Windows installation wizard will open. Click Next.
Install Windows
Step 2: Select Repair your computer.
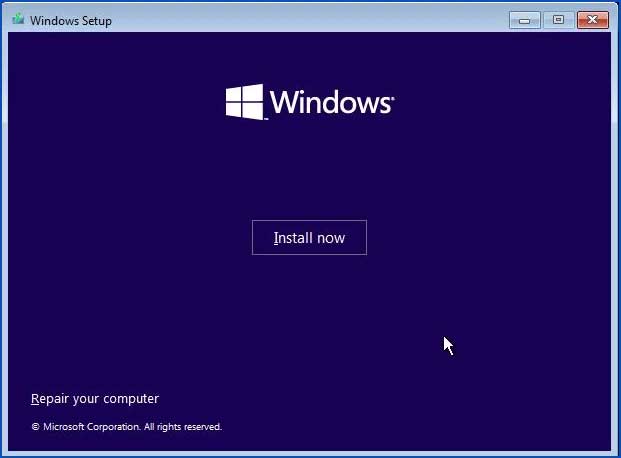
Step 3: You will see the option for Advanced Startup or Windows Recovery Environment.
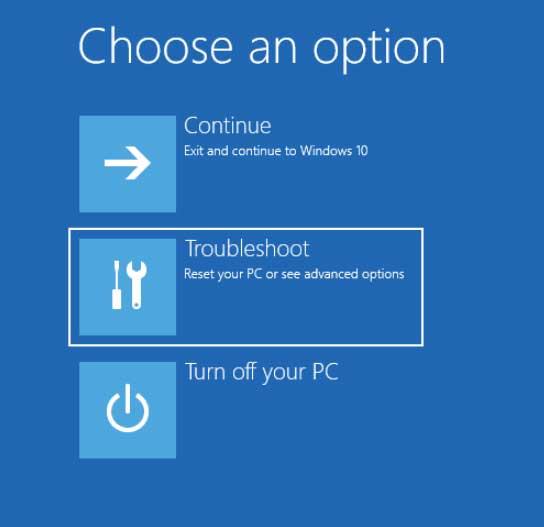
Go to Troubleshoot
Step 4: Select Advanced options
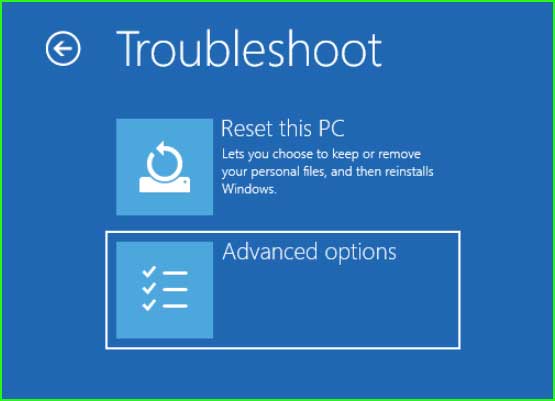
Step 5: Select Startup Settings
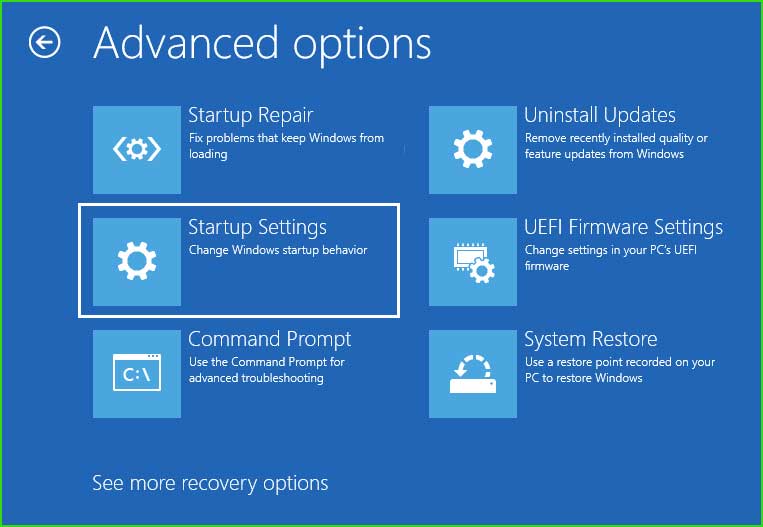
Step 6: Click the Restart button to enable Safe Mode.
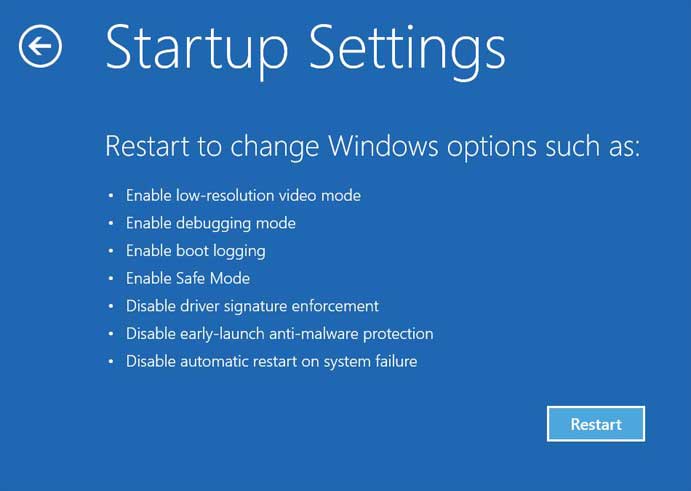
Step 7: Once your computer boots into Safe Mode, uninstall any recently added games, drivers, and programs.
Solution 2: Remove the Faulty Driver.
Driver failures, including incompatibility or outdated, incorrect, or corrupted driver files, are common causes of the Critical Process Died 0x000000EF error. To resolve this error, you need to manually remove the recently installed driver. You can perform this step as follows:
Remove the driver using commands
Step 1: You can use Windows installation media to boot your computer. The Windows installation wizard will open. Click Next.
Step 2: Select Repair your computer.
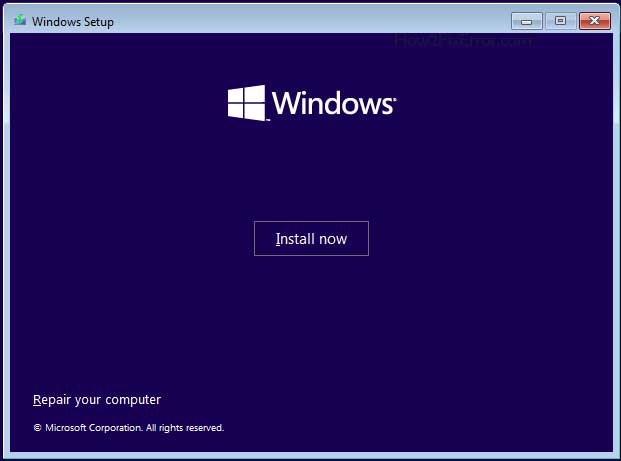
Step 3: You will see the option for Advanced Startup or Windows Recovery Environment. Click on Troubleshoot.
Step 4: Select Command Prompt.
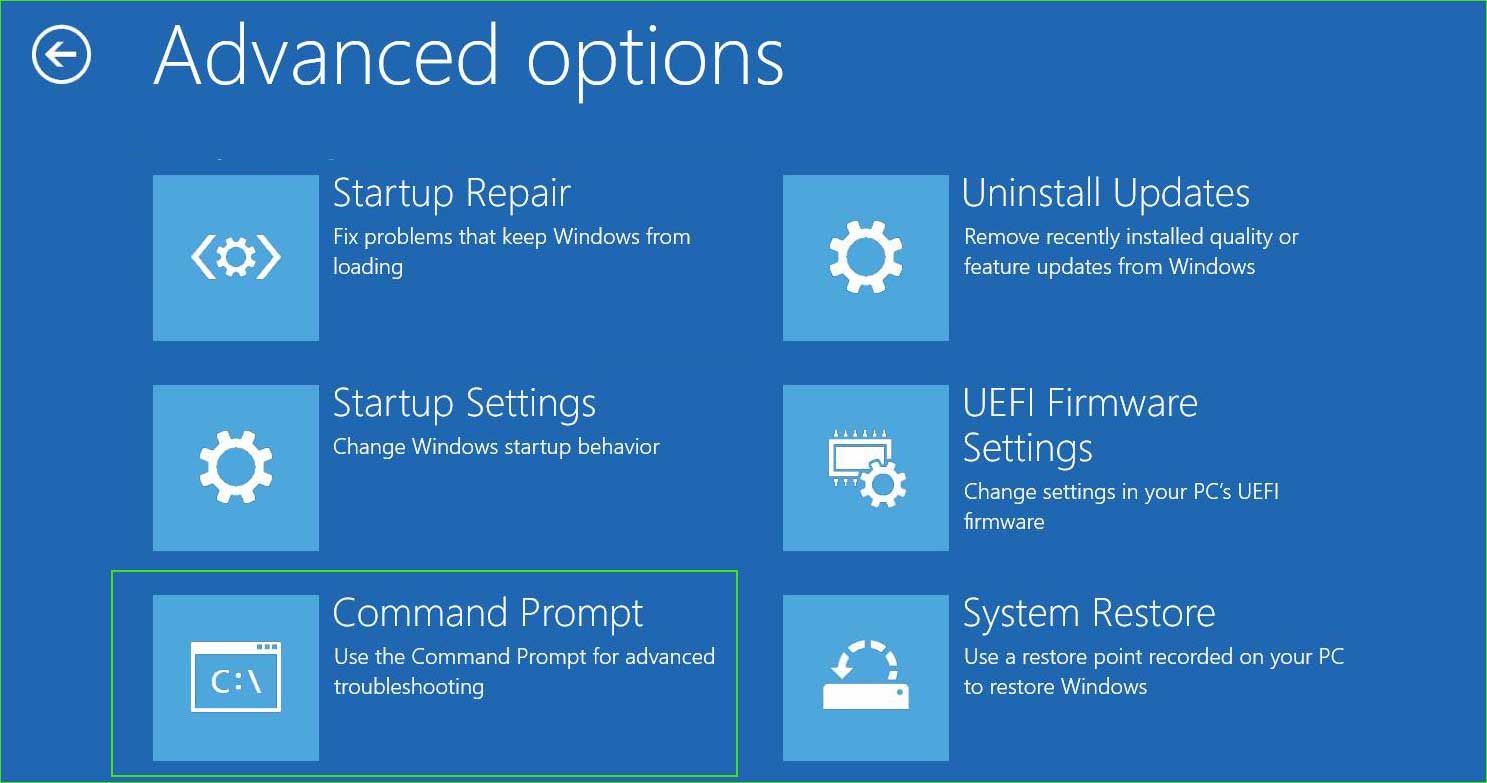
open_command_prompt in Advanced Startup Options
Step 5: Locate the drive where Windows is installed.
In the Windows recovery environment, the drive letter may change, so you can't be sure which drive is Windows.
You can find the correct Windows drive as follows:
Type "c:" and press Enter.
Type "dir" to list the directory.
If you see the "Windows" directory in the list, it's the correct drive.
If you don't find the "Windows" directory, try looking for it on "D:", "E:", or "F:" drives as well.
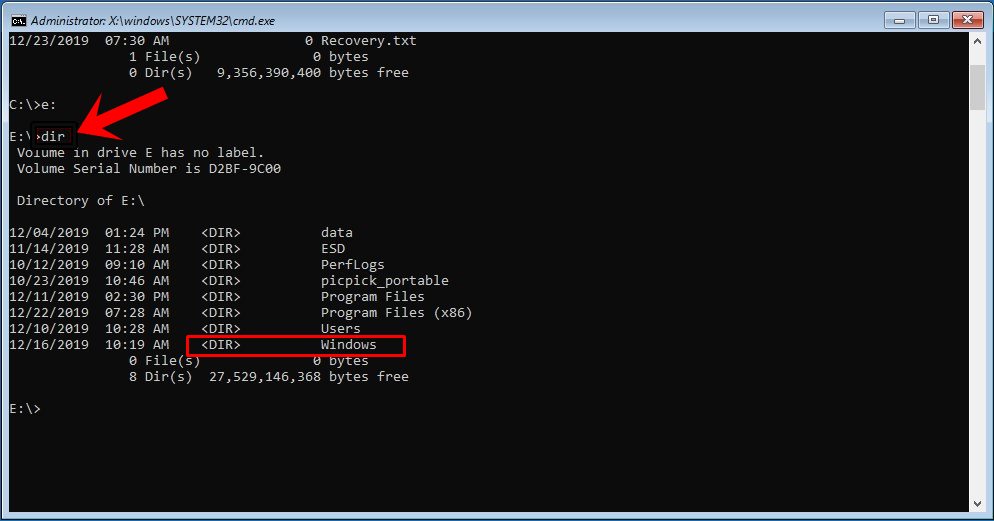
Command Prompt
Step 6: Once you identify and enter the Windows drive, run the following command. Here, I assume that my "Windows" directory is on the "e:" drive.
dism /image:e:\ /get-drivers
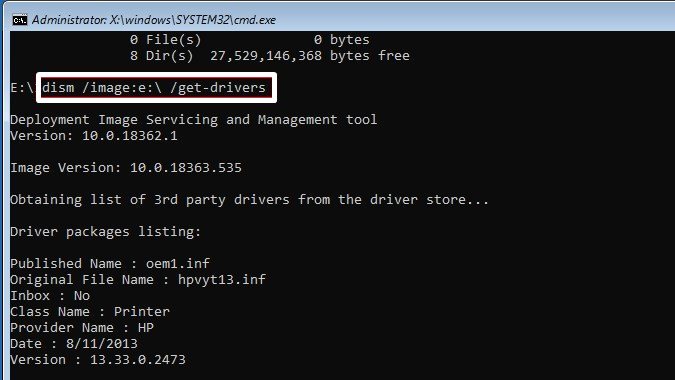
The above command will list the third-party drivers installed on your computer.
Step 7: You can use the following command to get more information about the driver.
dism /image:e:\ /get-driverinfo /driver:driver_name.inf
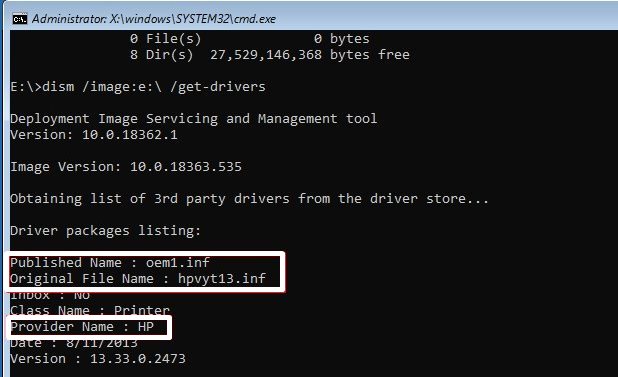
Replace driver_name with the name of your driver.
Step 8: Remove the problematic or suspected driver using the following command.
dism /image:e:\ /remove-driver /driver:driver_name.inf
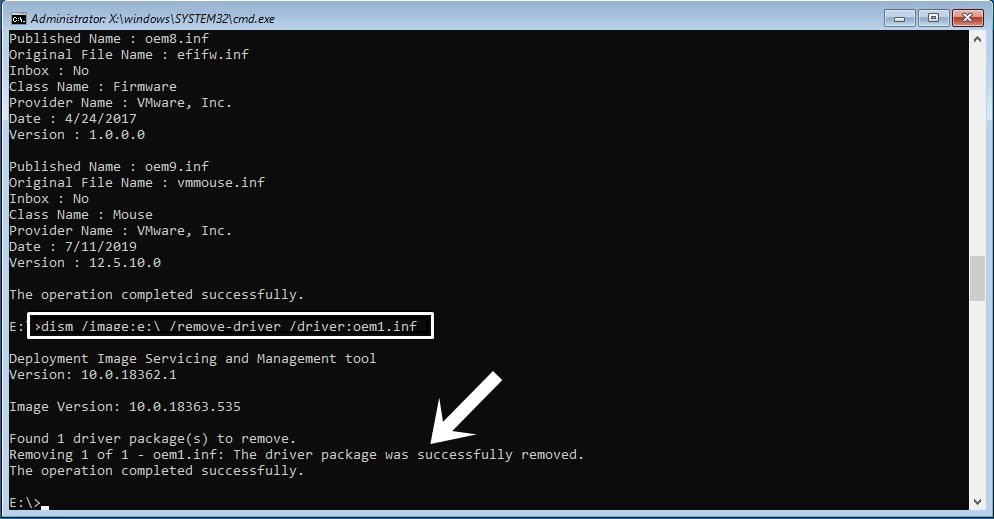
Replace driver_name with the name of your driver.
Solution 3: Run System Repair Commands.
There are some useful commands included in Windows 11 and 10 that may help with fixing Windows issues. These commands are SFC, CHKDSK, DISM, and Bootrec. You can use all these commands as follows:
Repair Windows using commands
Step 1: Open the Advanced Startup or Windows Recovery Environment. Click on Troubleshoot.
Step 2: Select Command Prompt.
open_command_prompt in Advanced Startup Options
Step 3: Run the following commands.
SFC Command
SFC stands for System File Checker, and it is used to scan and repair corrupted Windows files. The primary function of the System File Checker is to maintain the integrity of the core system files that Windows relies on to function properly.
sfc /scannow
CHKDSK Command
CHKDSK is short for "Check Disk" and is used to check and repair HDD/SSD errors such as integrity violations, file system failures, and bad sectors on the disk, etc.
chkdsk C: /f /r
DISM Command
The DISM command, which stands for "Deployment Imaging Service and Management Tool," is a command-line tool in Windows used to service and manage Windows operating system images.
It is indeed a powerful tool used for tasks related to system repair, updates, and maintenance.
To check the health of the Windows image:
DISM /Online /Cleanup-Image /ScanHealth
To attempt to fix any issues found in the image:
DISM /Online /Cleanup-Image /RestoreHealth
Bootrec Command
This is a powerful command-line tool in Windows used to fix issues related to the boot process as well as to detect and repair errors.
bootrec /scanos
bootrec /fixmbr
bootrec /fixboot
bootrec /rebuildbcd
Solution 4: Perform Startup Repair
You can also perform a Startup Repair to fix the Critical Process Died 0x000000EF error. To do this, you will need a bootable Windows installation drive, which you can create using the following methods.
Startup Repair - Step by Step
Step 1: Use Windows installation media to boot your computer.
The Windows installation wizard will open. Click Next.
Install Windows
Step 2: Select Repair your computer.
Step 3: You will see the option for Advanced Startup or Windows Recovery Environment. Click on Troubleshoot.
Step 4: You will see the Advanced Startup Options menu.
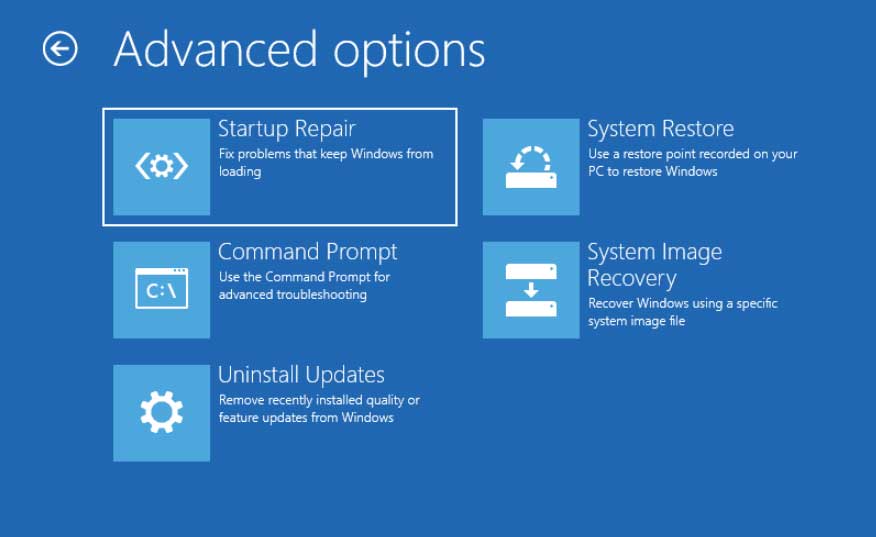
Go to Troubleshoot, then Advanced options, then Startup Repair.
Windows 10 and 11 Startup Repair
Step 5: Select the operating system.
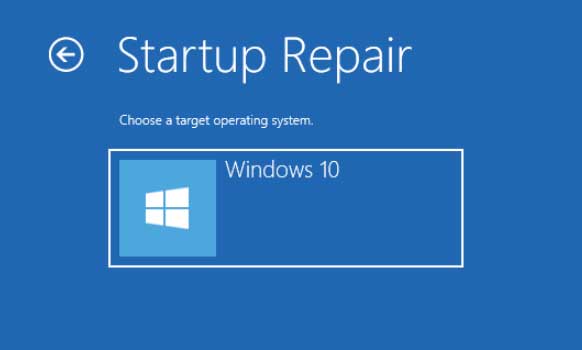
Startup Repair - Select Operating System
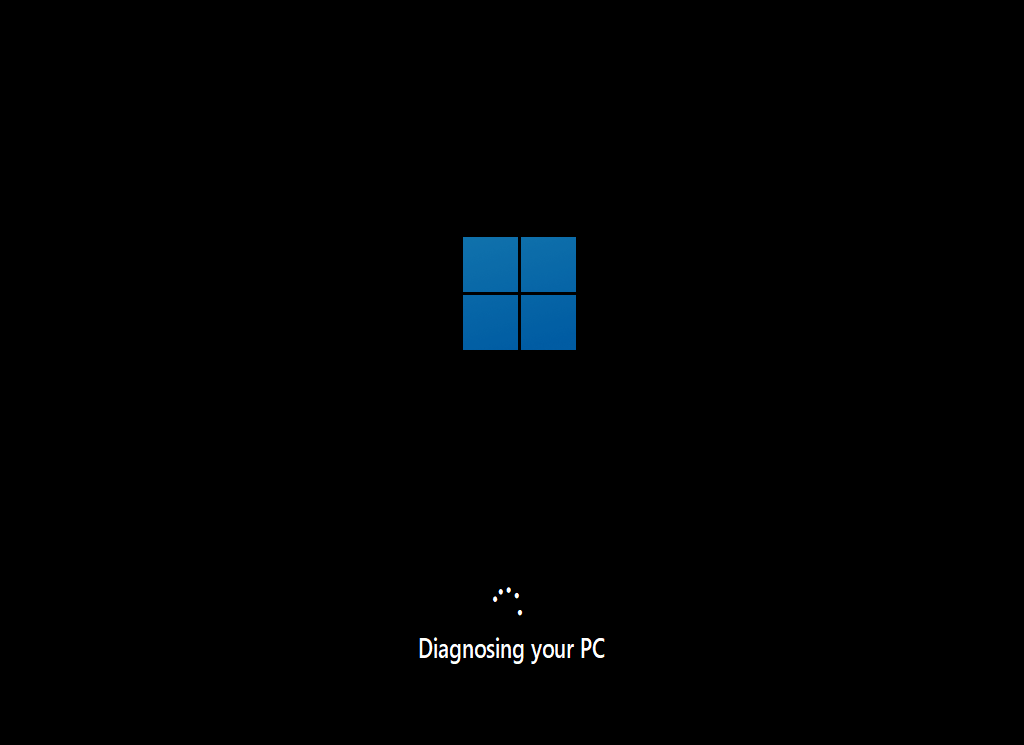
Step 6: You will need to wait for it to diagnose and repair your computer.
Solution 5: Uninstall Recent Updates
If you suspect that this error started occurring after installing a specific Windows update, you may consider removing it to resolve the blue screen error 0x000000EF.
Uninstall Updates - Step by Step
Step 1: Open the Advanced Startup or Windows Recovery Environment.
Then click on Troubleshoot.
Step 2: Go to Troubleshoot, then Advanced options, then Uninstall Updates.
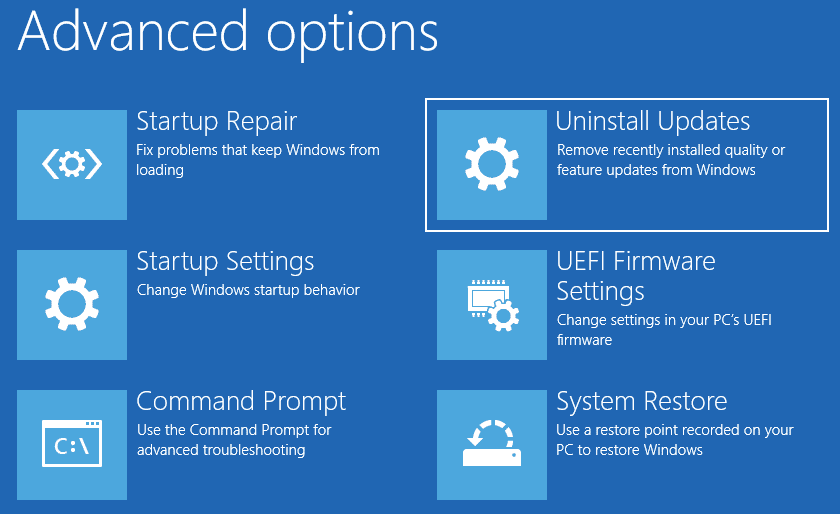
Win Uninstall Advanced Options
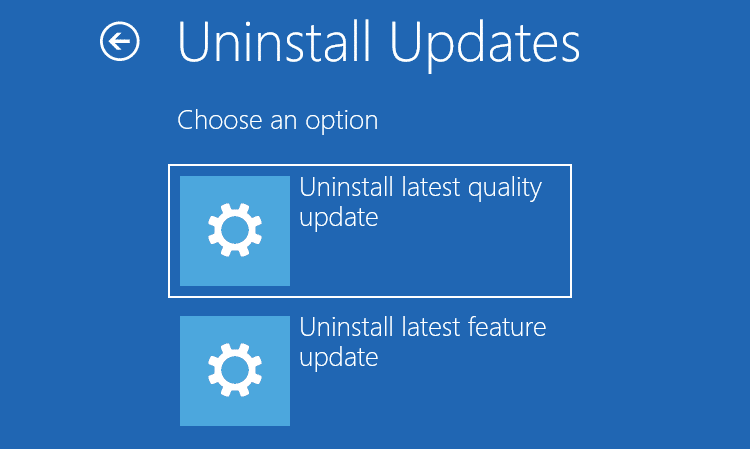
Step 3: You need to select Uninstall the last quality update.
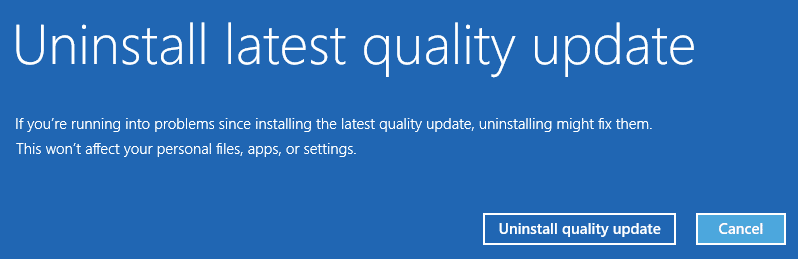
Step 4: Click the button to uninstall the quality update and also remove updates.
How to Prevent Critical Process Died 0x000000EF
Encountering a blue screen error can be a frustrating experience and often requires significant time and effort to resolve, so you should regularly check your device.
Conclusion
In this article, we discussed how to fix the Critical Process Died 0x000000EF issue in Windows 11/10.
The Critical Process Died 0x000000EF is also a critical error in Windows that can lead


